User Guide: Create a Custom Tool
This guide will walk through the step-by-step process of creating a custom tool from scratch on IDEAS.
Prerequisites
Creating a custom tool requires configuration and testing of your local code before moving to the cloud to publish in IDEAS. For this reason, you are required to install a few software pre-requisities on your local computer.
Git Bash
If you're on Windows, you'll need to first install git bash, which is a terminal application you will use to test your tool locally.
What's a terminal?
A terminal is an application that allows you to run commands on your computer.
Docker
Docker is an open-source platform for container technology. It’s required to be installed in order to run containers during local tool testing, as well as building custom containers if necessary. To install docker, follow this getting started guide.
Windows Users
You may need to update the windows subsystem for linux (WSL) used in docker after installation.
wsl --update
Linux Users
Follow these instructions to run docker on linux as a non-privileged user.
Python
Python is required to be installed, in order to use IDEAS CLI locally. You can install python from the official website. If you’re on Windows, you can also install python easily from the Microsoft store.
IDEAS CLI (ideas-python)
ideas-python is a pip package which includes the IDEAS CLI that is required for testing tools locally.
To install this package, create a virtual environment using your preferred tool, and install the package in the environment using pip.
For example, this code snippet creates a virtual environment using the venv module included in the Python standard library:
python -m venv <venv_name>
source <venv_name>/bin/activate # on Linux and macOS
source <venv_name>/Scripts/activate # on Windows
python -m pip install ideas-python
Python Virtual Environment
You can use tools like hatch, anaconda, or poetry as well to manage your virtual environment, instead of the built-in venv module.
Installing in System Environment
You can also install the IDEAS CLI in your system environment, without creating a virtual environment, but it’s strongly recommended to always use virtual environments when managing python dependencies.
Step 1: Create Tool in IDEAS
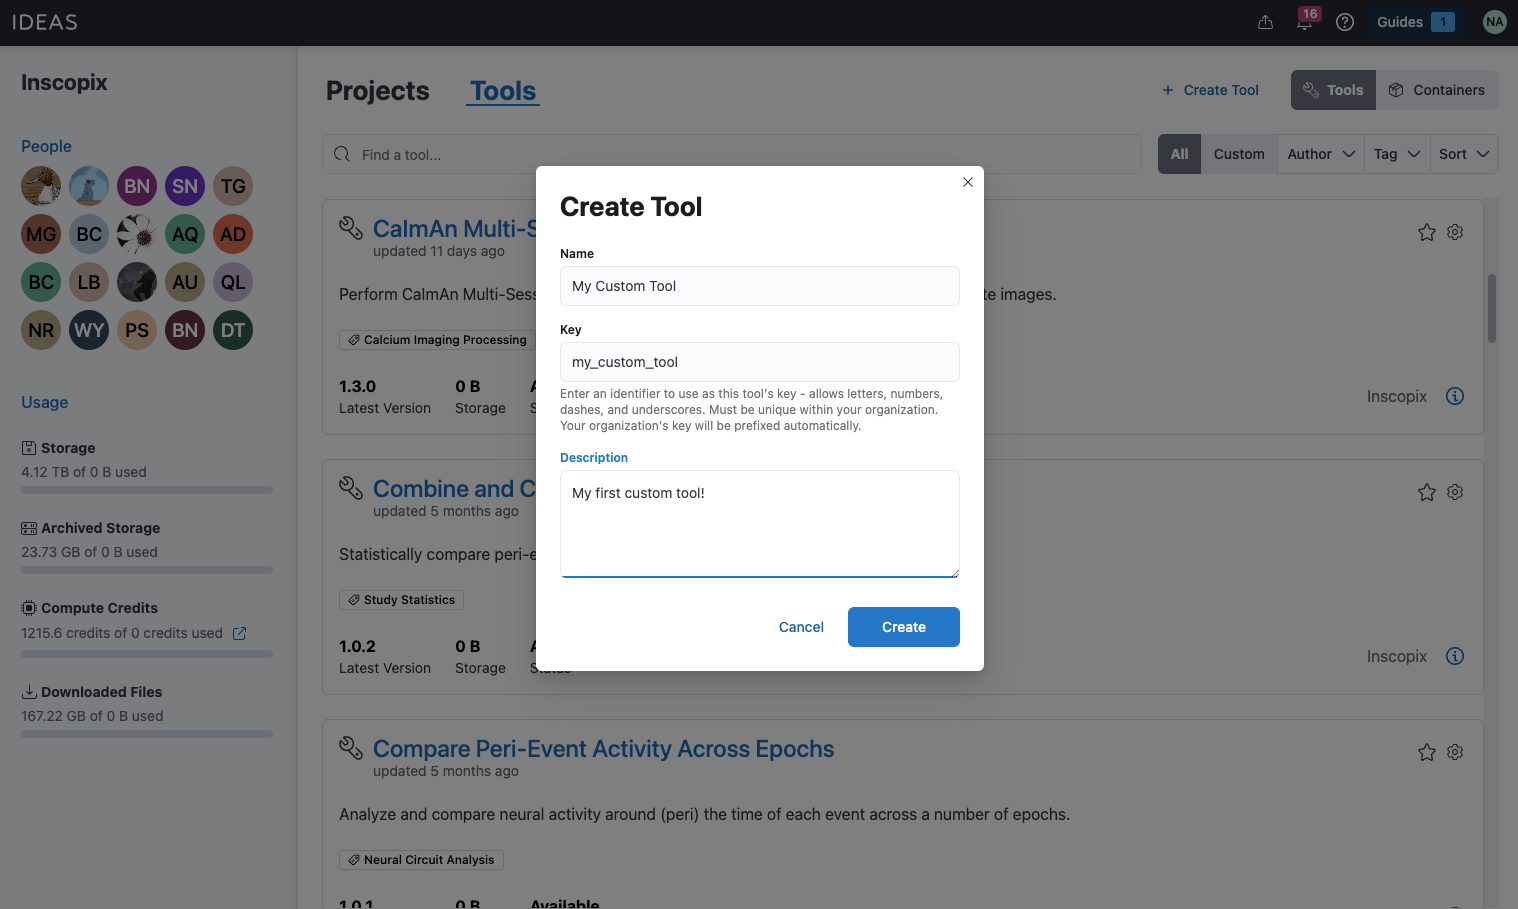
First, start off by creating the new custom tool in the cloud, by selecting Create Tool in the tools library.
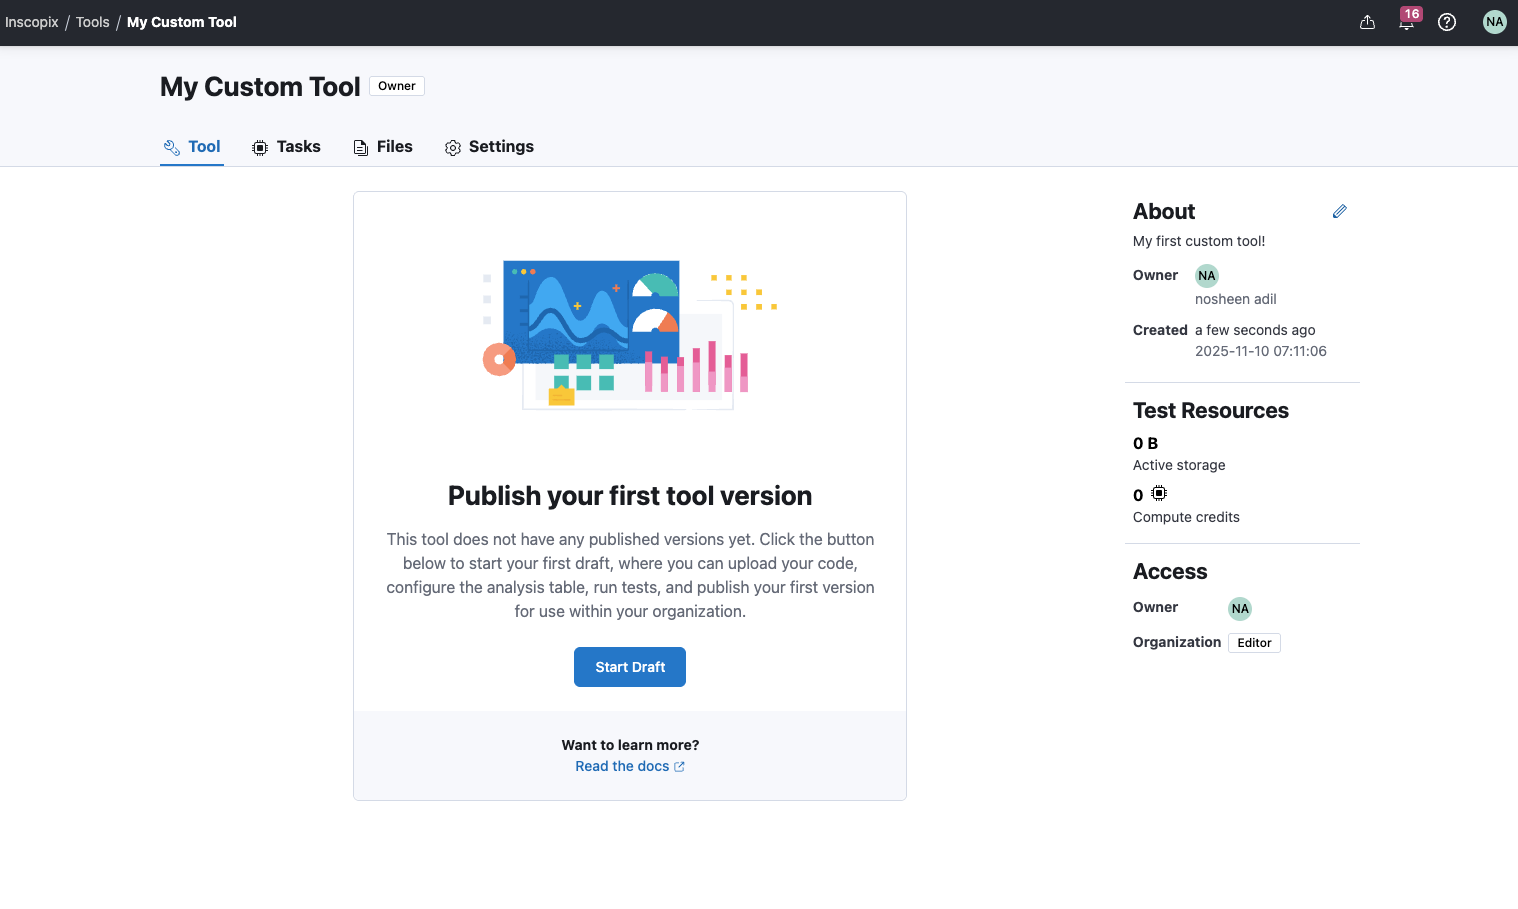
Within the newly created tool project page, start your first draft tool.
Step 2: Define the Tool Function
Once you've created your tool in IDEAS, the next step is to define the tool function. A tool is essentially a wrapper around a python function. The arguments of the function map directly to input parameters in the IDEAS tool (i.e., columns in the tool’s analysis table).
When you select a function for your tool, IDEAS detects if there’s any type annotations for the function arguments that can be used as hints for the type of parameter to use for the tool in IDEAS (i.e., the type of column in the tool’s analysis table). If there's no type annotations, then IDEAS will try to infer the argument type from the default value for the function argument (if there is one). Refer to this table for a list of supported python types, and the corresponding IDEAS parameter types.
Use type annotations in your python functions
For the best experience, ensure your tool function arguments have a supported type annotations.
Use IdeasFile type annotation for file inputs
To pass a file input to your tool, add an argument to the function representing the file input path.
For these arguments, use IdeasFile as the type annotation, which is available in the ideas.types API.
This type annotation tells IDEAS that these function arguments are file inputs that need to be provided to the tool.
Step 3: Configure and Test Tool Locally with IDEAS CLI
Before publishing your custom analysis code as a tool in the cloud, you need to validate your custom analysis code runs as expected within a chosen container environment. This validation is done locally using the IDEAS CLI. Testing locally with the CLI effectively mimics how your tool will be executed in the cloud on IDEAS, which is why it’s crucial that local tool execution works before publishing the tool in cloud.
What's a CLI?
CLI stands for "Command Line Interface", is a text-based user interface that allows you to run programs on your computer by typing commands in a terminal application. A terminal application is a type of application on computers that allows you to run programs by typing out commands. CLI commands are executed in terminal applications.
Why do I need to test locally?
Using a local environment to test your tool before publishing in the cloud is necessary for the following reasons. First, it allows you to test your custom code, inside a particular container, locally before testing in the cloud. Testing locally mimicks the cloud environment and allows you to save compute credits by testing on your own computer before validating in the cloud. Testing locally will also allow you to quickly iterate on development. You can make changes to your local code and immediately testing inside a particular container before having to upload anything to the cloud. This creates a tight loop for tool development in a local environment, that saves a lot of debugging time once you move to the tool publisher.
Use an IDE!
An IDE stands for "Integrated Development Environment", which is a user interface that makes coding easier. IDEs allow you to open and edit code files in local folders, and also open terminal applications to execute programs simultaneously. It's strongly recommended to use an IDE when developing your tool code locally and working with the IDEAS CLI, since an IDE allows you to open and edit code files for your tool and simultaneously test changes to your tool code using the IDEAS CLI. There are many options for IDEs, such as Visual Studio Code.
Step 3a: Configure Tool
For this step, go back to the browser and open up the tool project that you created in Step 1. Open up the draft tool version, copy the command that looks like the following command, and paste in a local terminal application:
ideas tools configure <key>
What is <key>?
A tool key is a unique identifier for your tool on IDEAS.
The tool key links your local code configuration to a tool on IDEAS.
The tool key is fixed when you first create the tool in IDEAS; it cannot be changed.
The tool publisher will show the full command to run with the correct value for <key> according to your tool.
Which folder do I run these commands in?
Any CLI commands starting with ideas tools should be run in the top-level of your local folder that contains all the analysis code required for your custom tool.
When you run this command you’ll be prompted for the following three pieces of information: python module path, function for tool execution, and container for tool execution environment.
Enter the path of the python module you want to execute for this tool:
First you will be asked to enter the path to the python module in your local code folder to use for the tool. As you start typing, you will be shown suggestions for files/directories in your local code folder. You can also hit tab to see a list of all files/directories in your local code folder. Once you’ve selected a file, hit enter to move to the next prompt. If your python module is in a nested directory, hit enter, and then hit tab to see options for sub-directories. Repeat this process until you reach the desired file.
Select the function in this module you want to execute for this tool:
After selecting the python module, you need to select the function in the python module to execute for the tool. You will be presented a list of options for functions detected in the selected python module. Use the arrow keys to navigate between options and hit enter to select a function.
Do you need to download a container from IDEAS?
Finally, select the container you want to use for tool execution. First, you will be asked to choose whether to download an existing container from IDEAS, or select a local container. Enter yes if you want to download a container that has been published to IDEAS. Enter no if you want to use a custom container that you have built locally, refer to this guide for more details on creating custom containers.
Select the container to download from IDEAS:
If you select to download a container from IDEAS, you will be presented a list of container image names that are available on IDEAS. This list of options should contain both Inscopix containers or custom containers published by members of your organization in IDEAS.
Select the container you want to use as the tool execution environment:
If you selected no, you will be presented a list of container image names that are available locally on your computer from docker. Use the arrow keys to navigate between options and hit enter to select a function.
The following gif demonstrates this whole configuration process:
Once this command completes, all of this information is saved to a local configuration file, added to an .ideas folder within the local codebase.
This config is used by the CLI to know how to run your function in the desired container.
It will also be used to automatically detect the configuration of the tool when code is uploaded to the browser.
Step 3b: Run Tool
Once the tool is configured, it can be run locally with the following command.
ideas tools run <key>
In order to run a tool, you are expected to provide a json file which specifies the inputs for execution.
By default, when you configure your tool, the CLI creates a file located in .ideas/<key>/inputs.json.
This file contains key value pairs, where each key is the name of an argument defined in the tool function, and the value is the default value for that argument in the tool function (or null if there is no default).
You can modify this file to specify inputs to test your tool with locally, or alternatively, you can specify a different json file to read inputs from:
ideas tools run <key> --inputs /path/to/inputs
The following gif demonstrates how to run a tool locally:
When you run this command the CLI will launch a container, copy the local code files into the container, and then call the desired tool function.
Once the tool completes, the CLI displays a summary of output files generated by the tool.
The outputs will be available in a folder named outputs in the top-level of your local code folder.
Step 3c: Bundle Code
Finally, generate a code bundle, which is an archive of your local code files + configuration files generated by IDEAS CLI.
ideas tools bundle
Note
By default, ideas will respect your .gitignore patterns when building the bundle contents, as well as the following default exclusion patterns:
/outputs/
.ideas/
*.cbundle
.ideasignore
__pycache__/
*.py[cod]
*.egg-info/
.DS_Store
venv/
.venv/
.git/
.github/
.gitignore
To opt out of these exclusions and include files/folders matching these patterns in your bundle, use the --no-default-excludes argument:
ideas tools bundle --no-default-excludes
You can also specify a custom file of patterns to ignore, for example:
ideas tools bundle --excludes-file .ideasignore
Each line in this file should specify a pattern according to the gitignore pattern format.
Once you’ve generated the code bundle, you can transition back to IDEAS to finish the publish process.
Step 4: Publish Tool in IDEAS
After configuring and testing your tool locally with the CLI, you are ready to publish the tool in IDEAS. The tool publisher consists of four steps: upload, configure, test, and publish. The following sections describe each of these steps in detail.
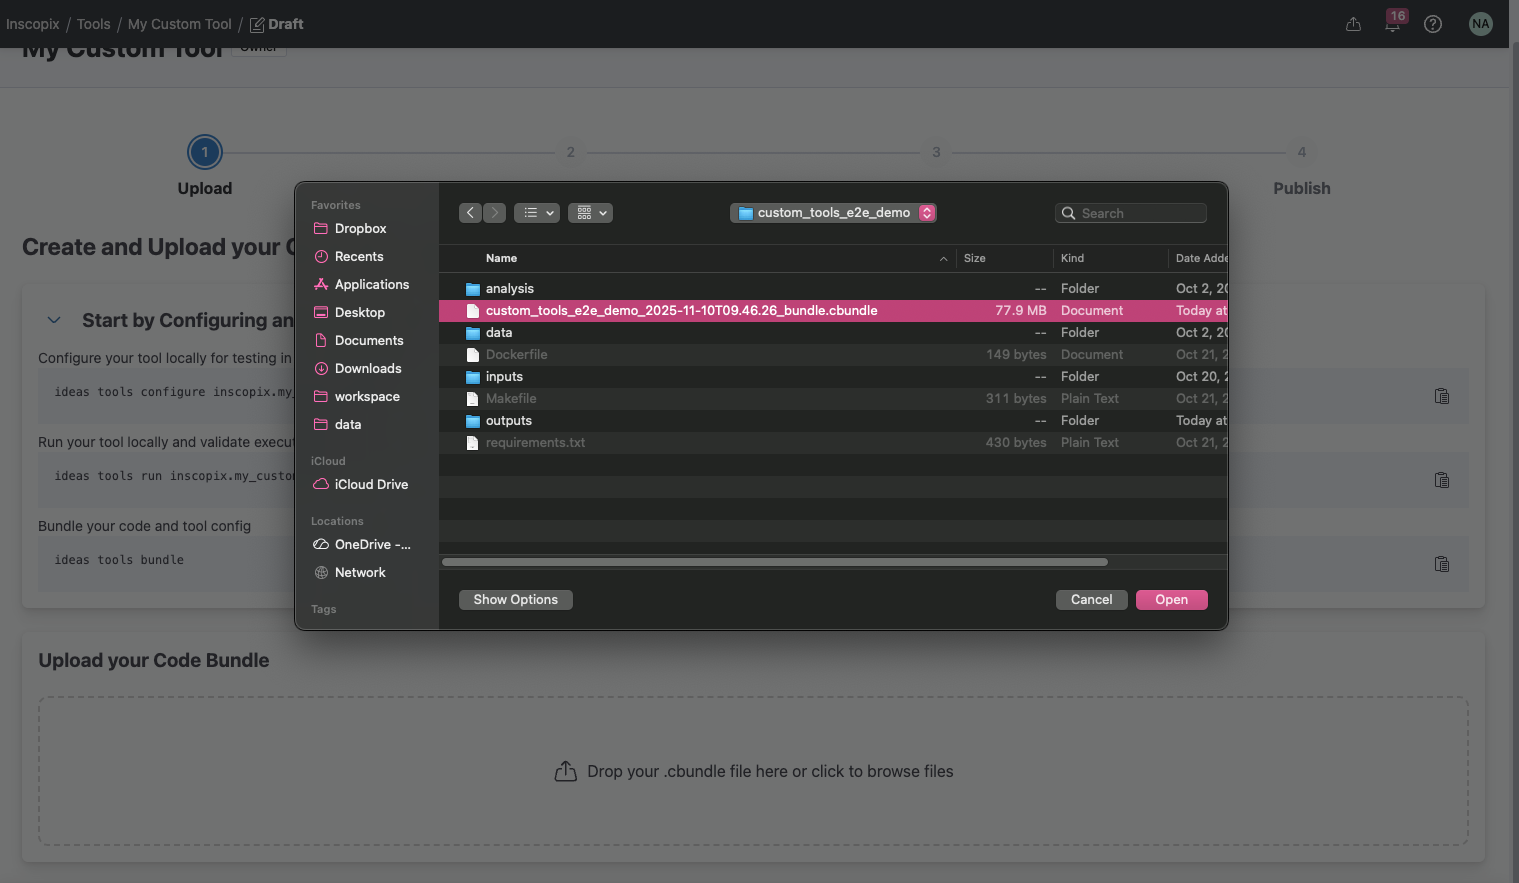
Step 4a: Upload
The first step of the tool publisher is to create and upload your custom code. Custom code should have been configured (Step 3a), tested locally (Step 3b), and then compressed into a bundle file that can be uploaded to IDEAS (Step 3c). After generating a bundle, select the file in the publisher and upload to IDEAS. Once the bundle is uploaded, the publisher will automatically move to the next step.
For more details on uploading code to the tool publisher, refer to this section.
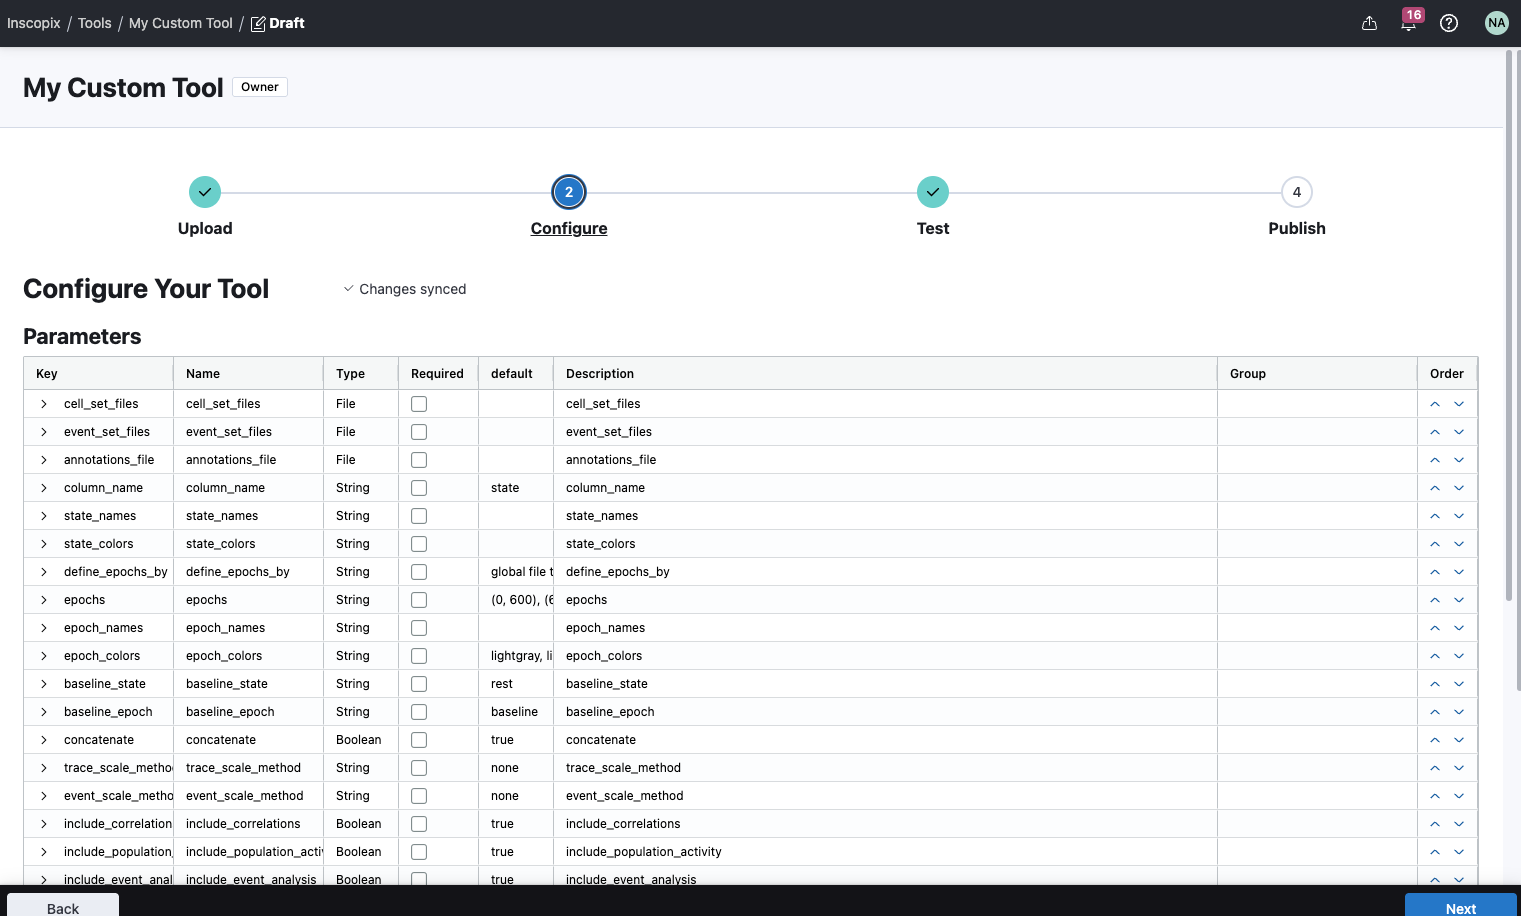
Step 4b: Configure
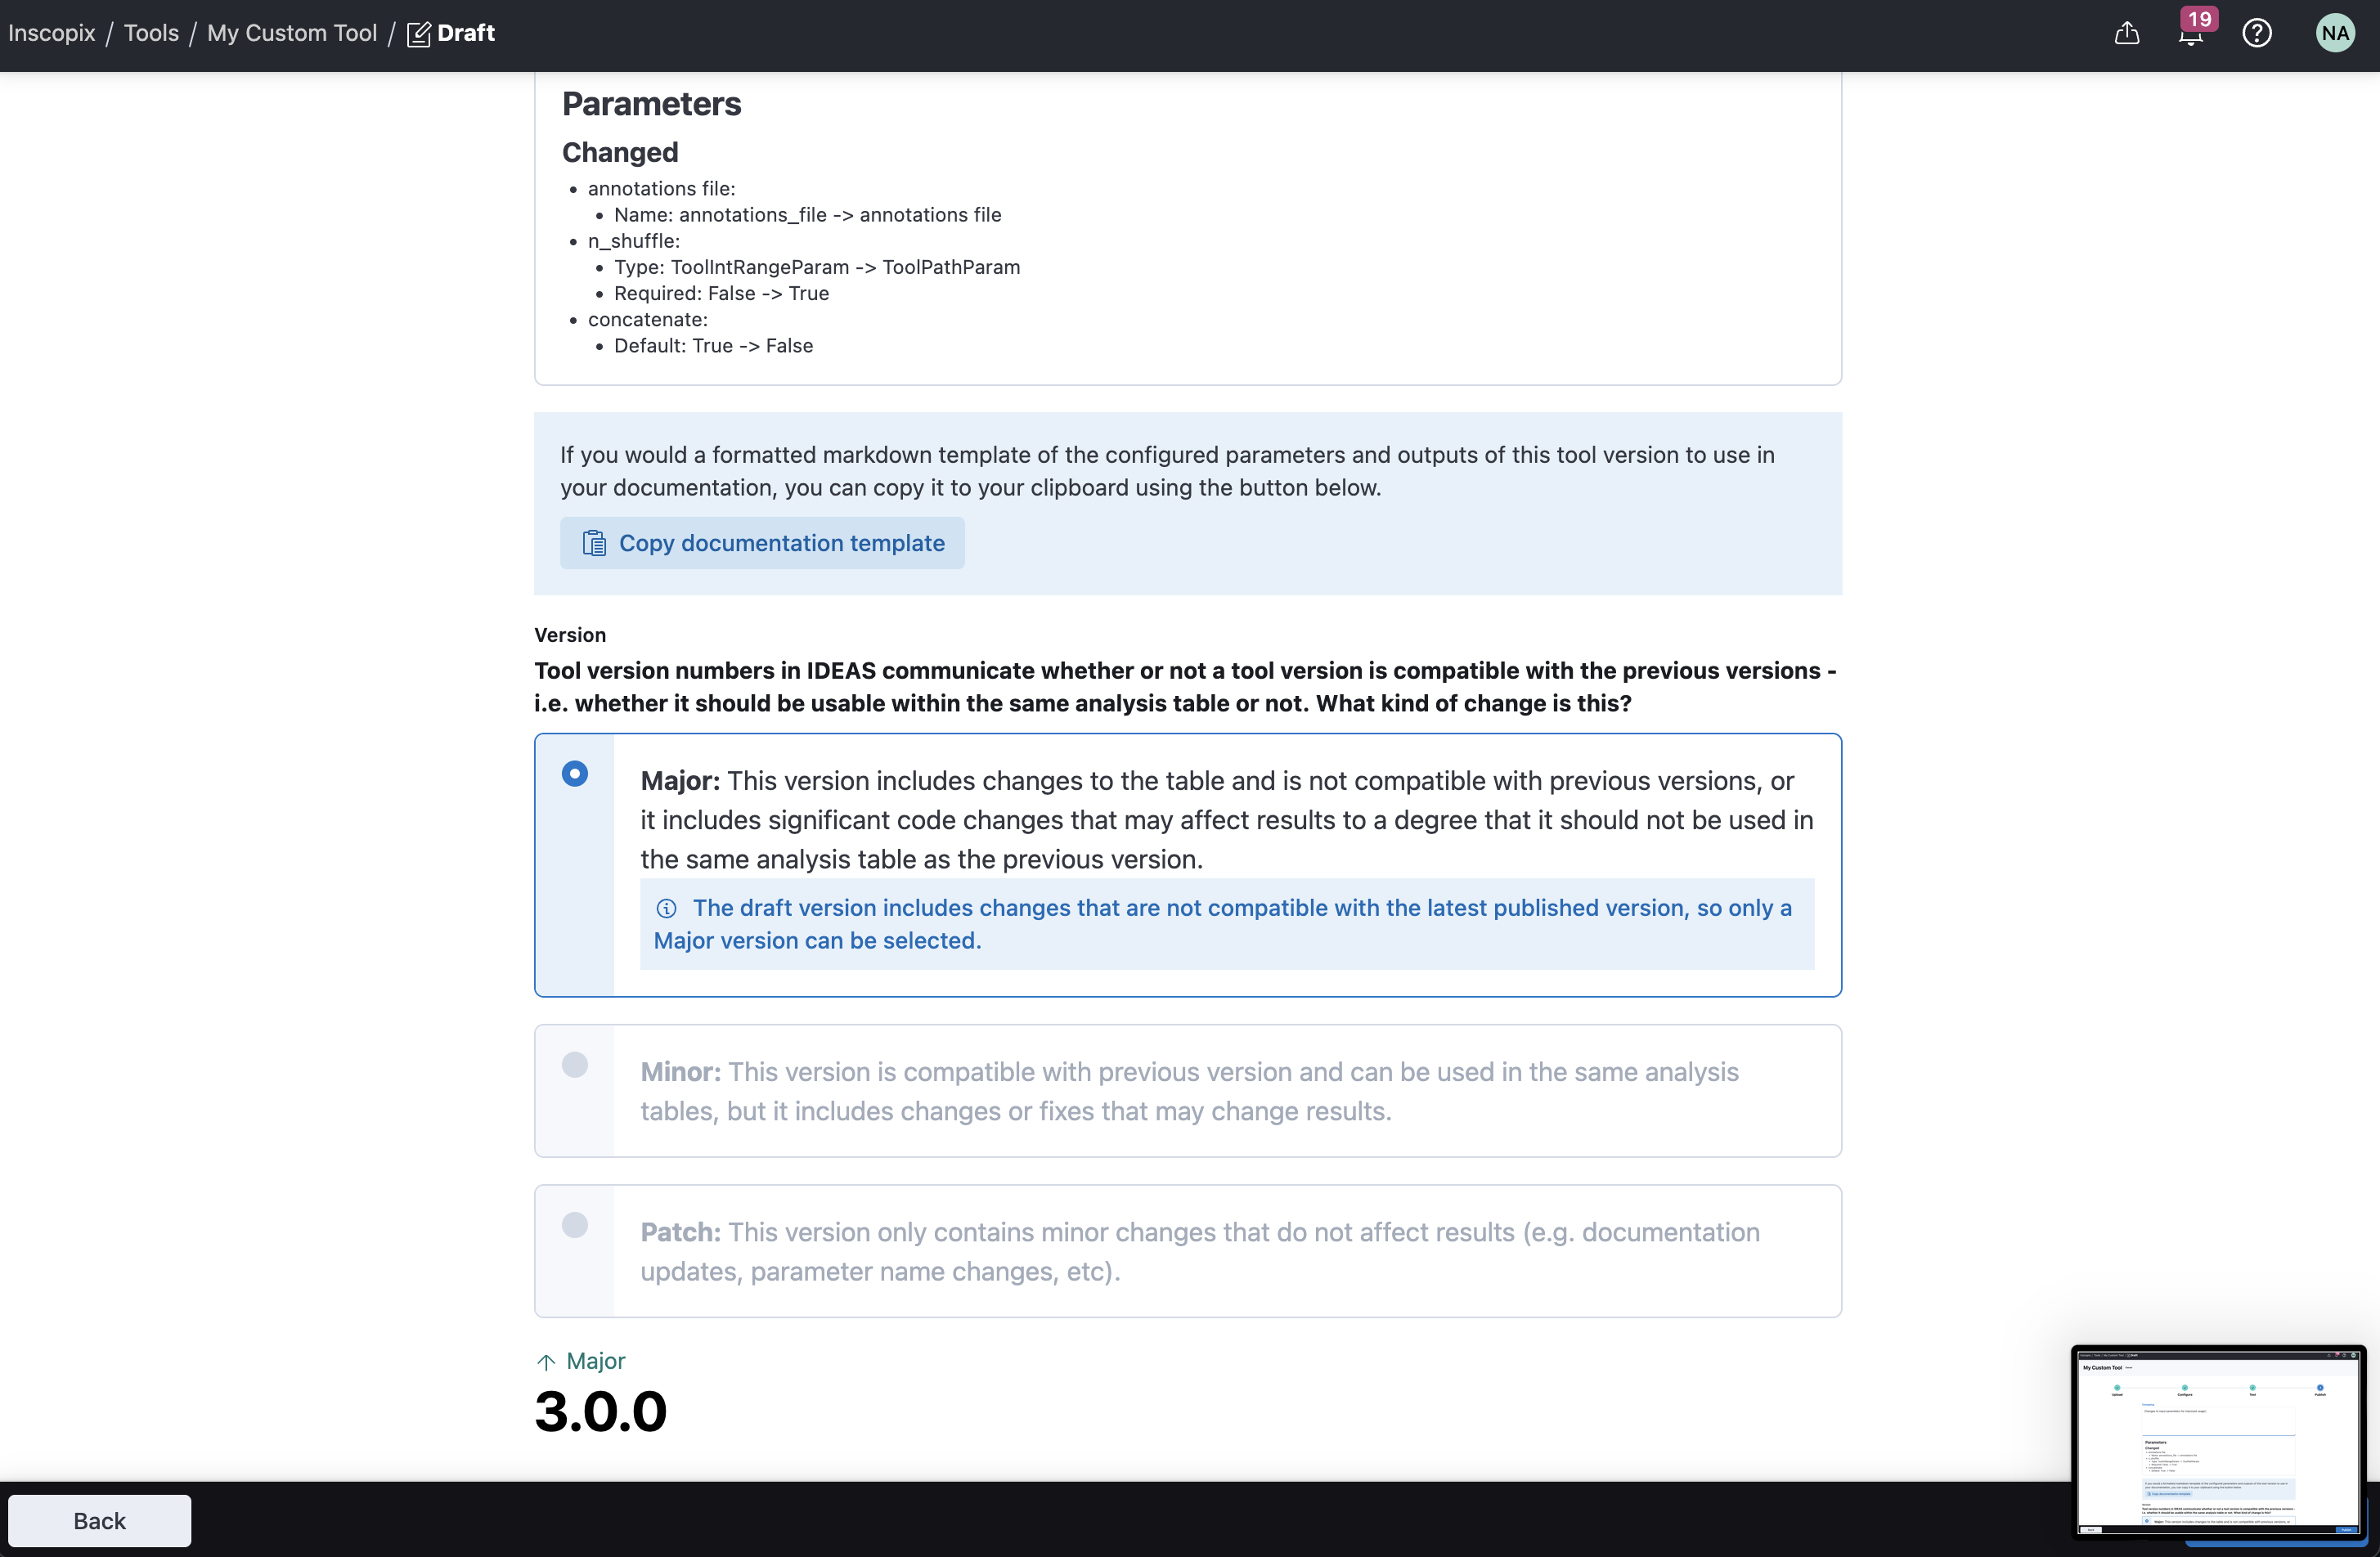
The second step of the tool publisher is to configure your tool parameters and outputs. Parameters are automatically identified from your tool function. No further configuration is necessary, but you can optionally customize details about the parameters.
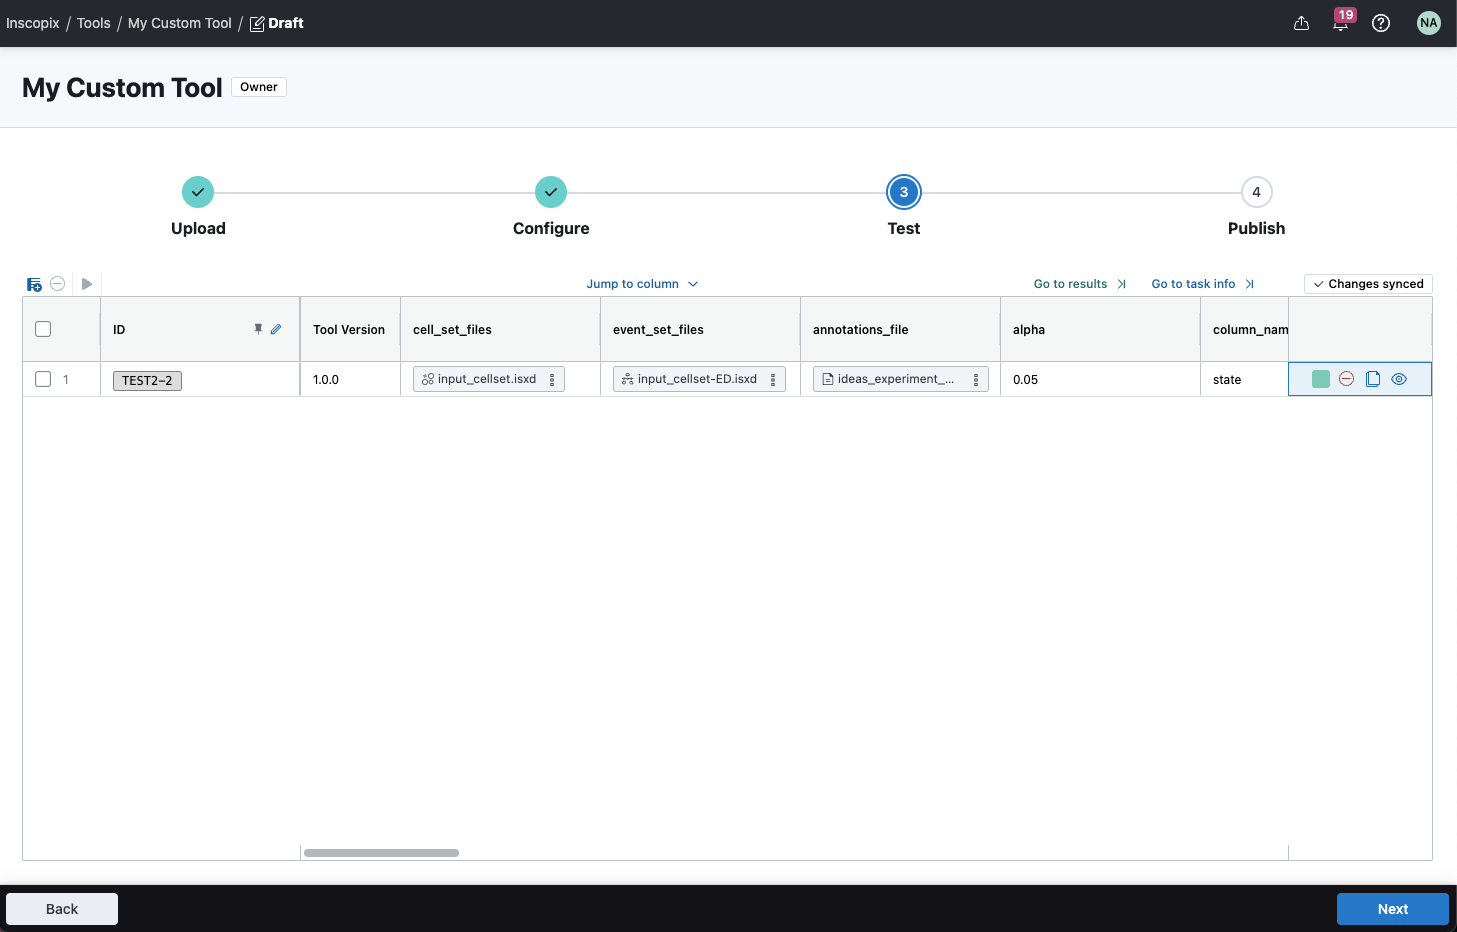
Step 4c: Test
The third step of the publisher is to test your tool. Previously, you tested your tool locally with the CLI, but now you must test your tool as an analysis table. The parameter and output rows from the configure step will map to columns in the tool analysis table. You can upload data to this table and test different use cases to validate how your tool runs in the cloud, before publishing to IDEAS.
Step 4d: Publish
The final step is to publish the tool. For your first tool version, the version is fixed to 1.0.0. You can provide a short description of the first tool version for users of the tool to reference.