Linking and Joining Tables
Linking and joining data tables are methods for associating and grouping data between different tables without needing to copy files across multiple tables. For example, you may run a double blind study where you have one table representing the miniscope recordings collected, but you are unaware of the IDs of the animal IDs you tested. You have a second table that lists all animal IDs and descriptive information about each animal. You now need to link the miniscope recordings with the appropriate subject information for analysis.
The following sections will walk through an example to help illustrate how linking and joining features work.
Linking tables
Linking tables adds columns from another table by manually linking rows in the present table with rows in the other table. This allows you to associate data in both tables by selecting shared data between the two.
In the example below, we're starting with the following two data tables:
-
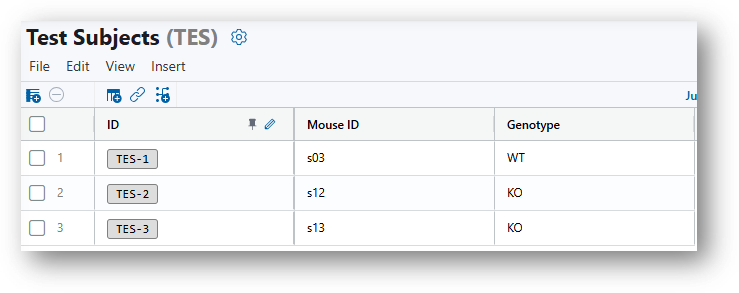
Subjects table: mouse ID and genotype
-
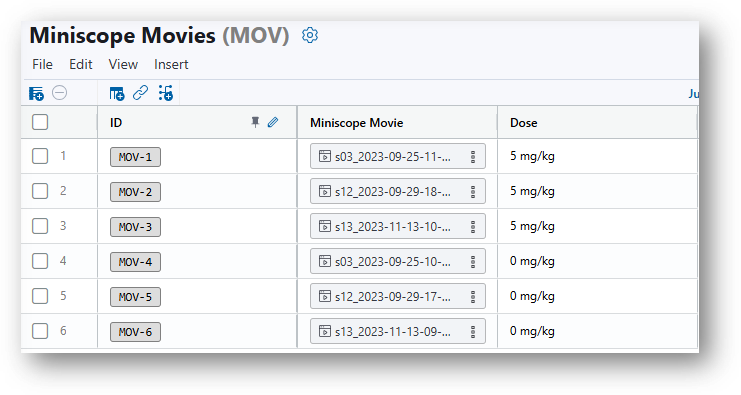
Miniscope movie table: miniscope recordings and drug doses (test condition)
We want to be able to look at our miniscope recordings and know which animal goes with each. Therefore, we want to link the subjects table to the miniscope data table. To accomplish this, we will do the following:
-
Navigate to the miniscope data table and click to insert columns from another table. This can be done using either the respective icon
 or selecting From Table as the column type.
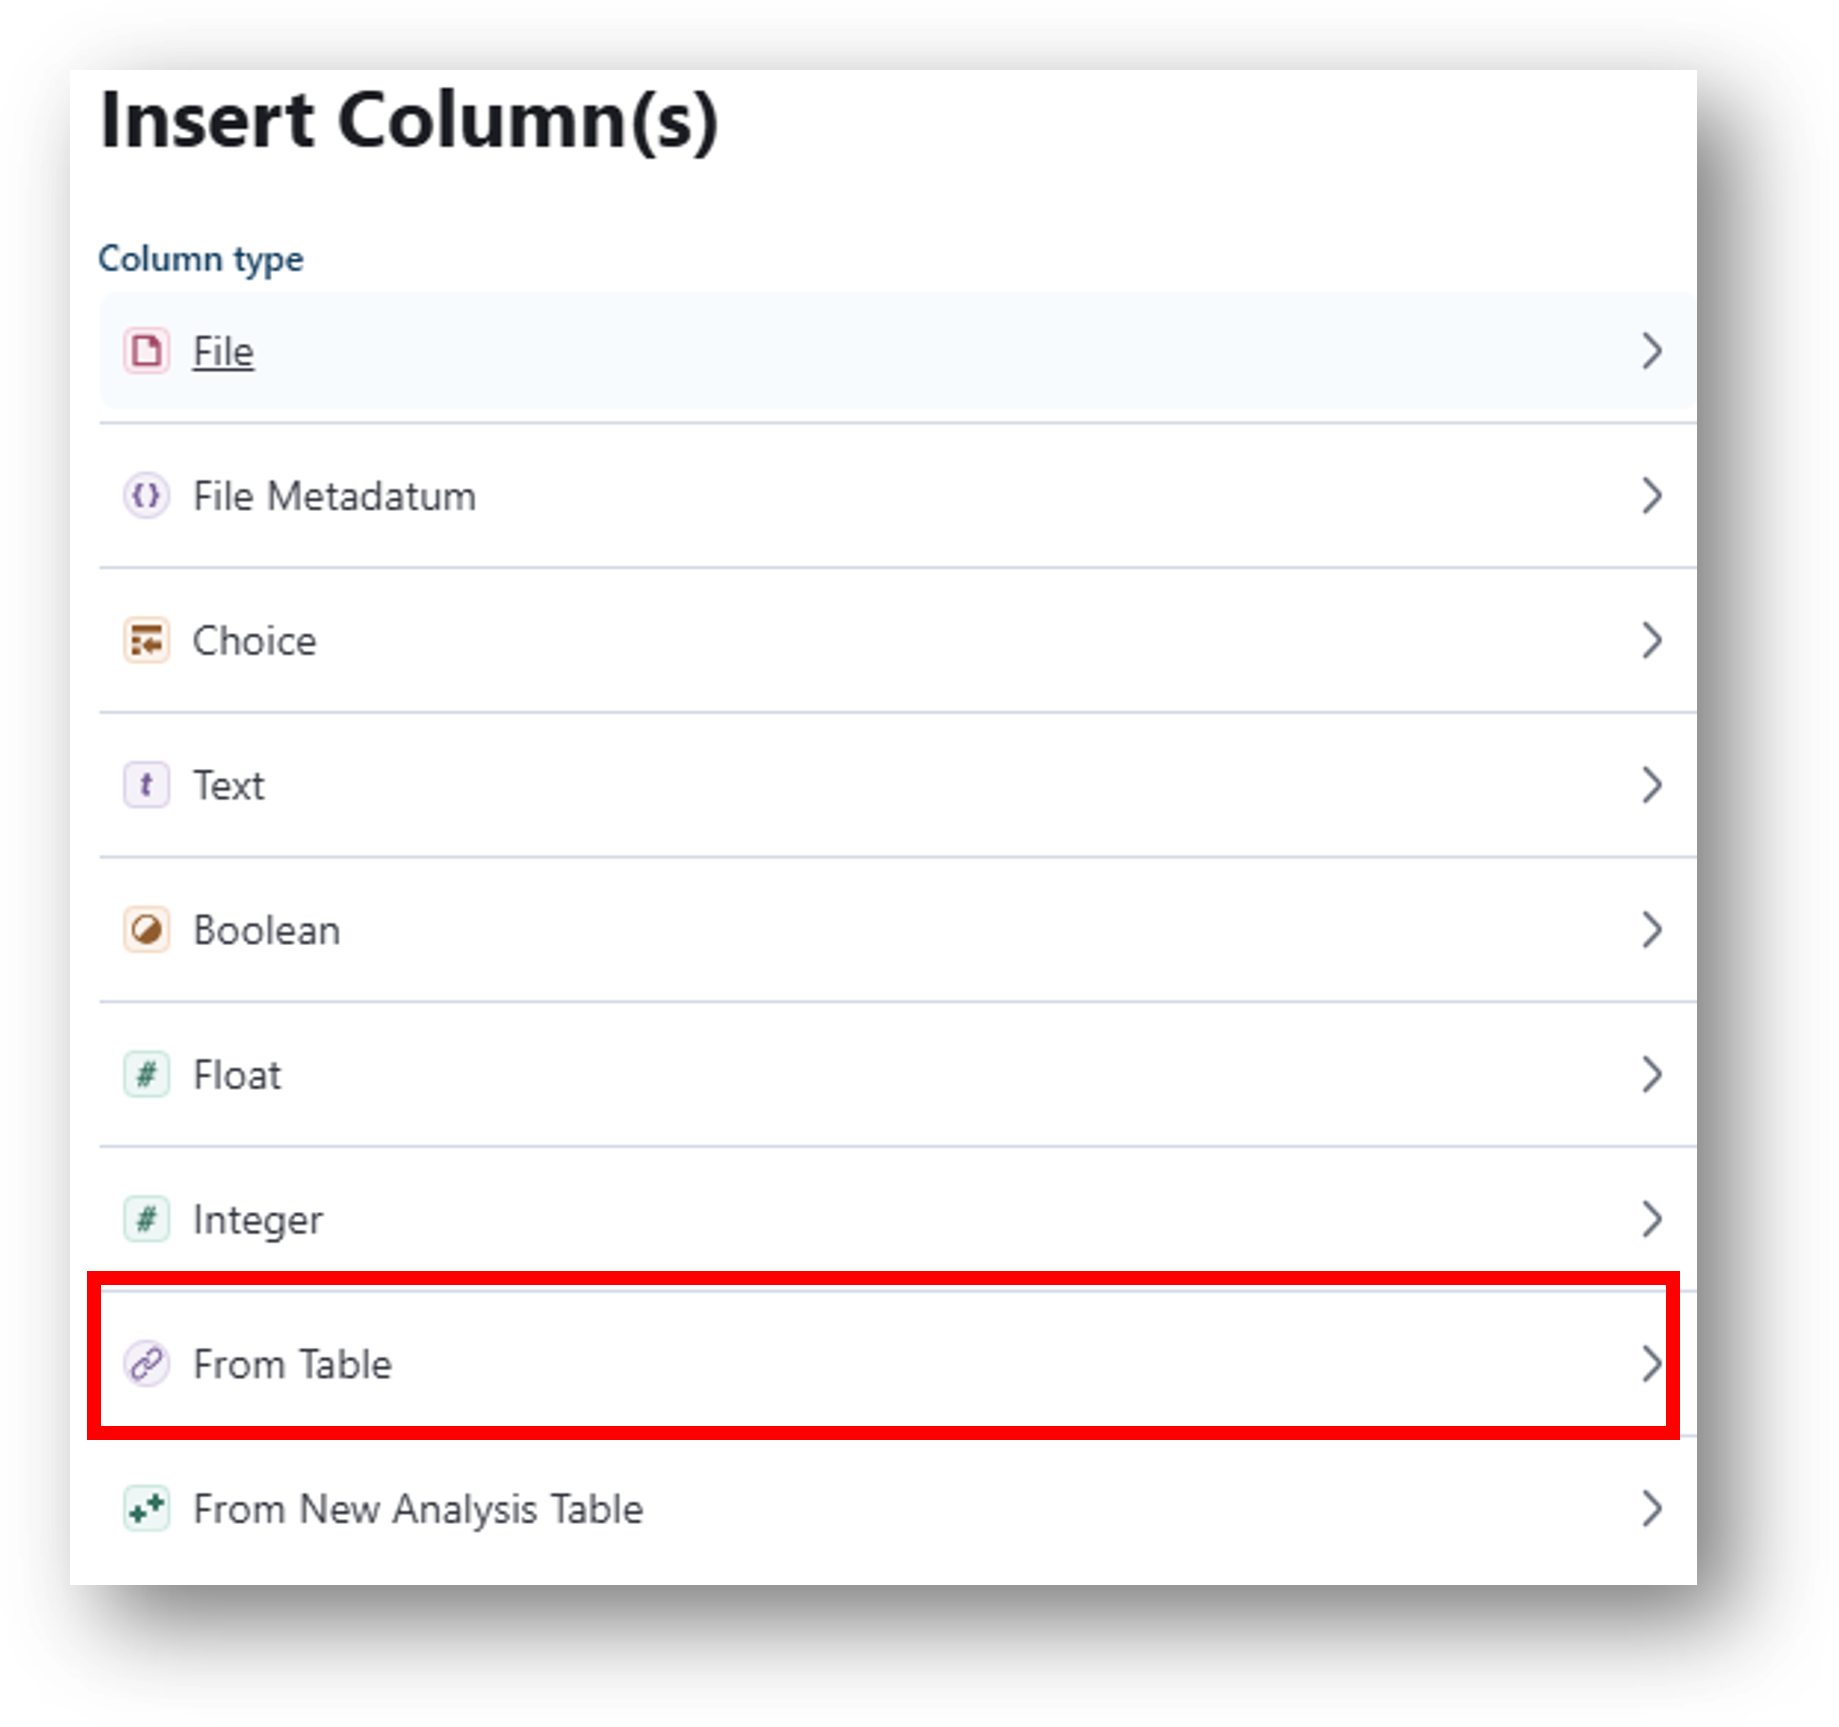
-
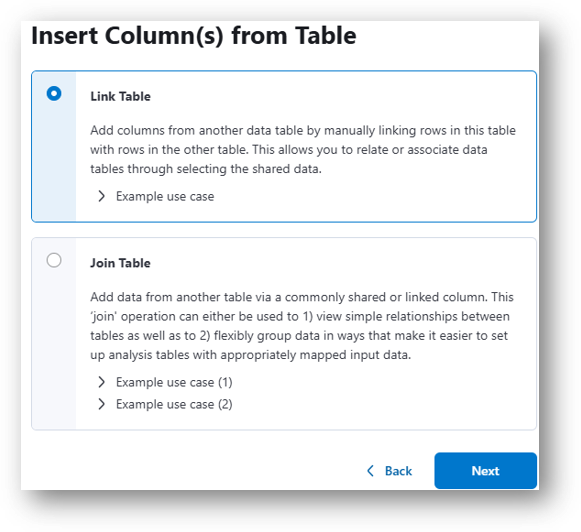
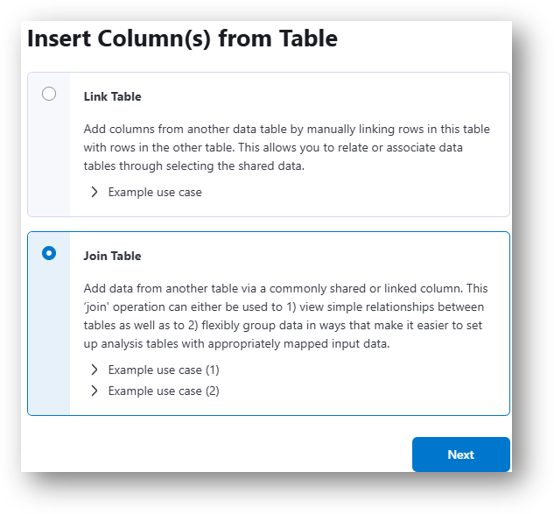
Select Link Table and click Next.
-
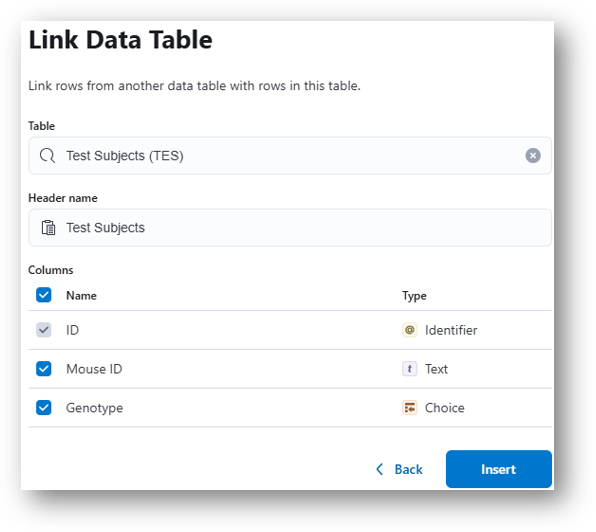
Select the subjects table as we want to link the data from the subjects table to the miniscope table. Optionally, modify the header name for the column. Select which columns in the subjects table you want to associate with the miniscope table. The row identifier is required.
-
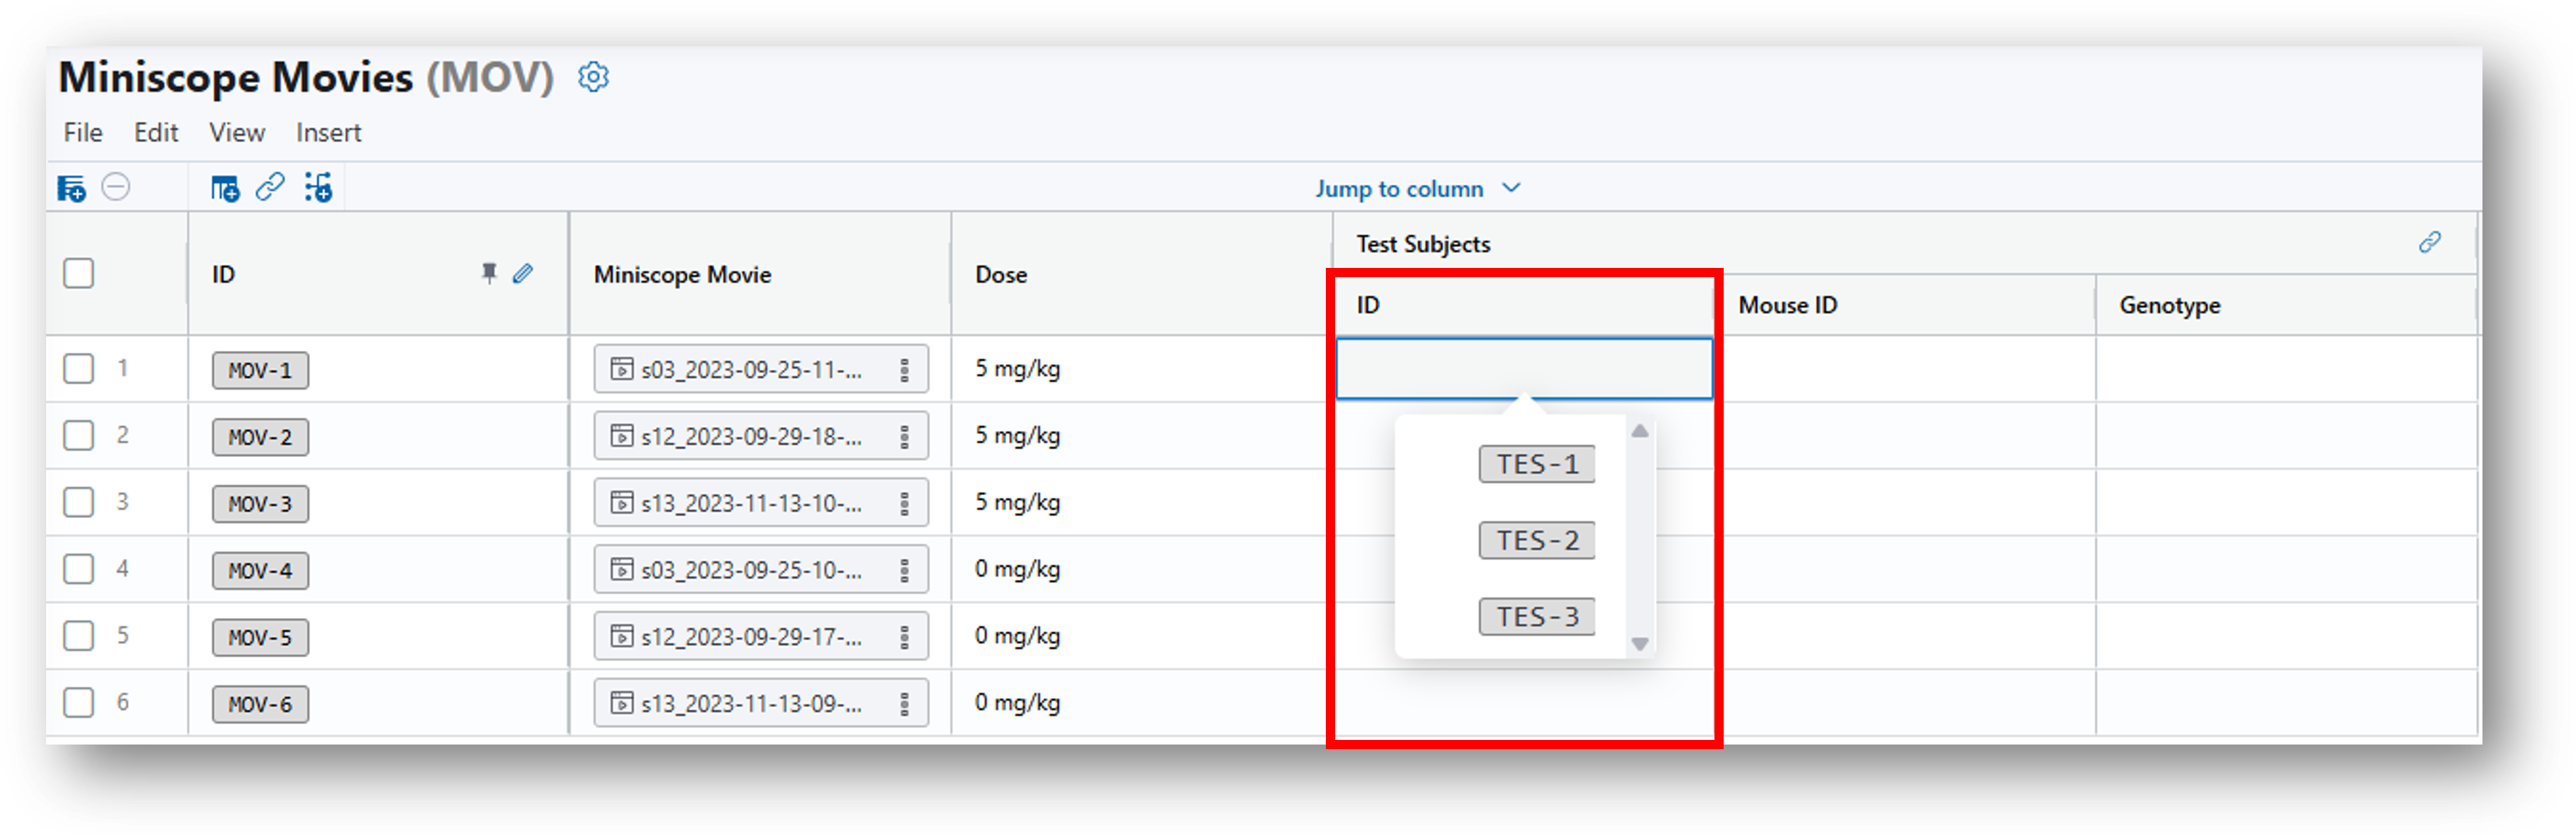
You will return to the miniscope movie data table where you will see the 3 columns selected during the configuration. Note that they are currently blank! This is because we need to manually select which Subject ID goes with what miniscope recording. Double click in the identifier column to assign the correct subject with the correct recording.
-
As you complete filling in the identifier column, you will notice that the other subject data automatically filled into the table and is now associated with the miniscope recordings.

As a result of linking, the miniscope movie table now has the mouse ID and genotype information from the subjects table which may be important for data analyses.
Note
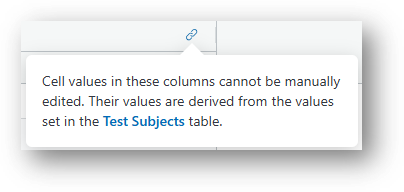
Linked data is NOT editable (linked data on the miniscope table). To edit data, you need to navigate to the table containing the source data. Use the link icon to see from which table linked data comes. Clicking the link in the message will take you to the linked table.
Also note that if the any of the linked data from the subject data table changes, it will also be reflected on the miniscope data table because the data is linked.
Joining tables
Joining tables will similarly associate data between tables, but requires that a link between two tables already exists (e.g., a shared column).
In the example used above for linking subject data to miniscope recordings, we will now take this linked data and join the miniscope data with the subject table.
-
Navigate to the subject table and click to insert a column from a table. This time we will select Join Table.
-
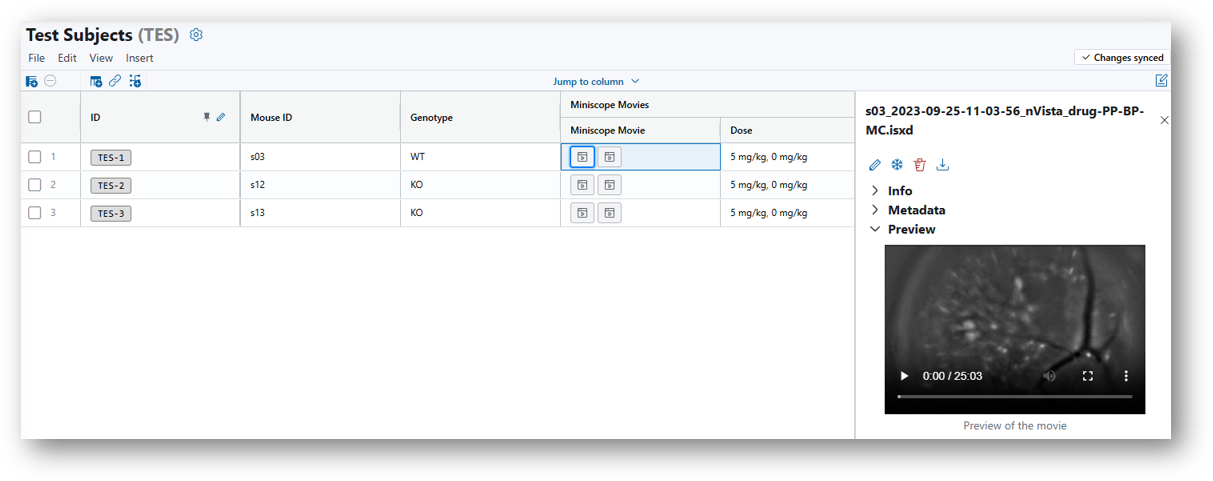
Select the miniscope table as we want to join the miniscope movies with the subjects table. Optionally, modify the header name for the column. Important, now we need to select the shared/linked column between the two tables (IDEAS will automatically attempt to identify this). Finally, select the columns to join and then click Insert.
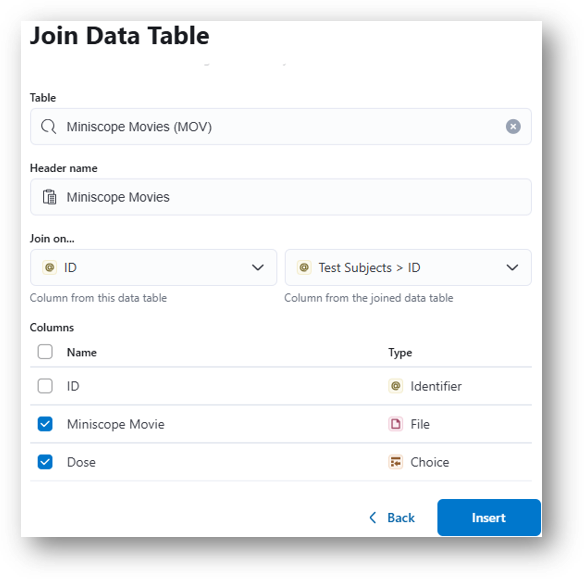
As a result of joining, the miniscope movies and dose information has been added to the subjects table.
Tip
Joining tables is a great way to group data so that it can be easily mapped to analysis tables!
For example, if you want to run Multi-Session Registration (MSR) on all cellsets derived from a particular subject, you can use the join example above to create a column that contains all the data grouped by subject. This column can then be mapped to an MSR analysis table to automatically fill out the inputs! See Analyze Data for more details.
Note
Similar to linked data, data that is joined is NOT editable (e.g., dosing data from the miniscope table cannot be edited on the subjects table. You would need to edit directly on the miniscope table.