Organize data
Overview
Organizing uploaded files into tables helps link related data together, and enables adding specific metadata and experimental notes to keep track of important details across datasets.
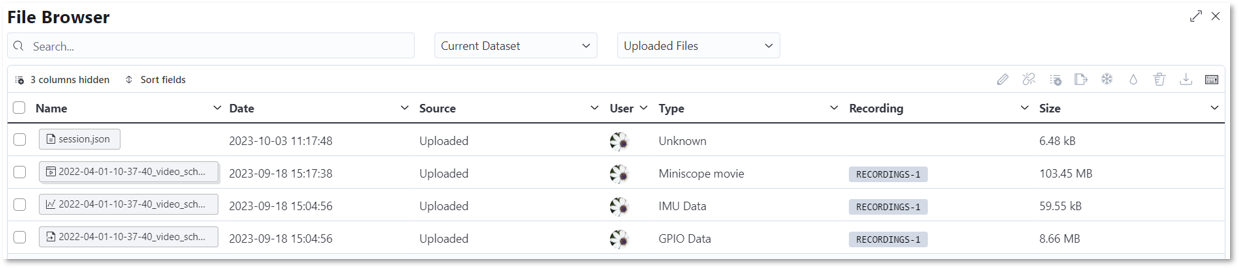
File browser
The file browser is a key feature in organizing data within IDEAS where you can view and manage all files either uploaded to or generated within IDEAS.
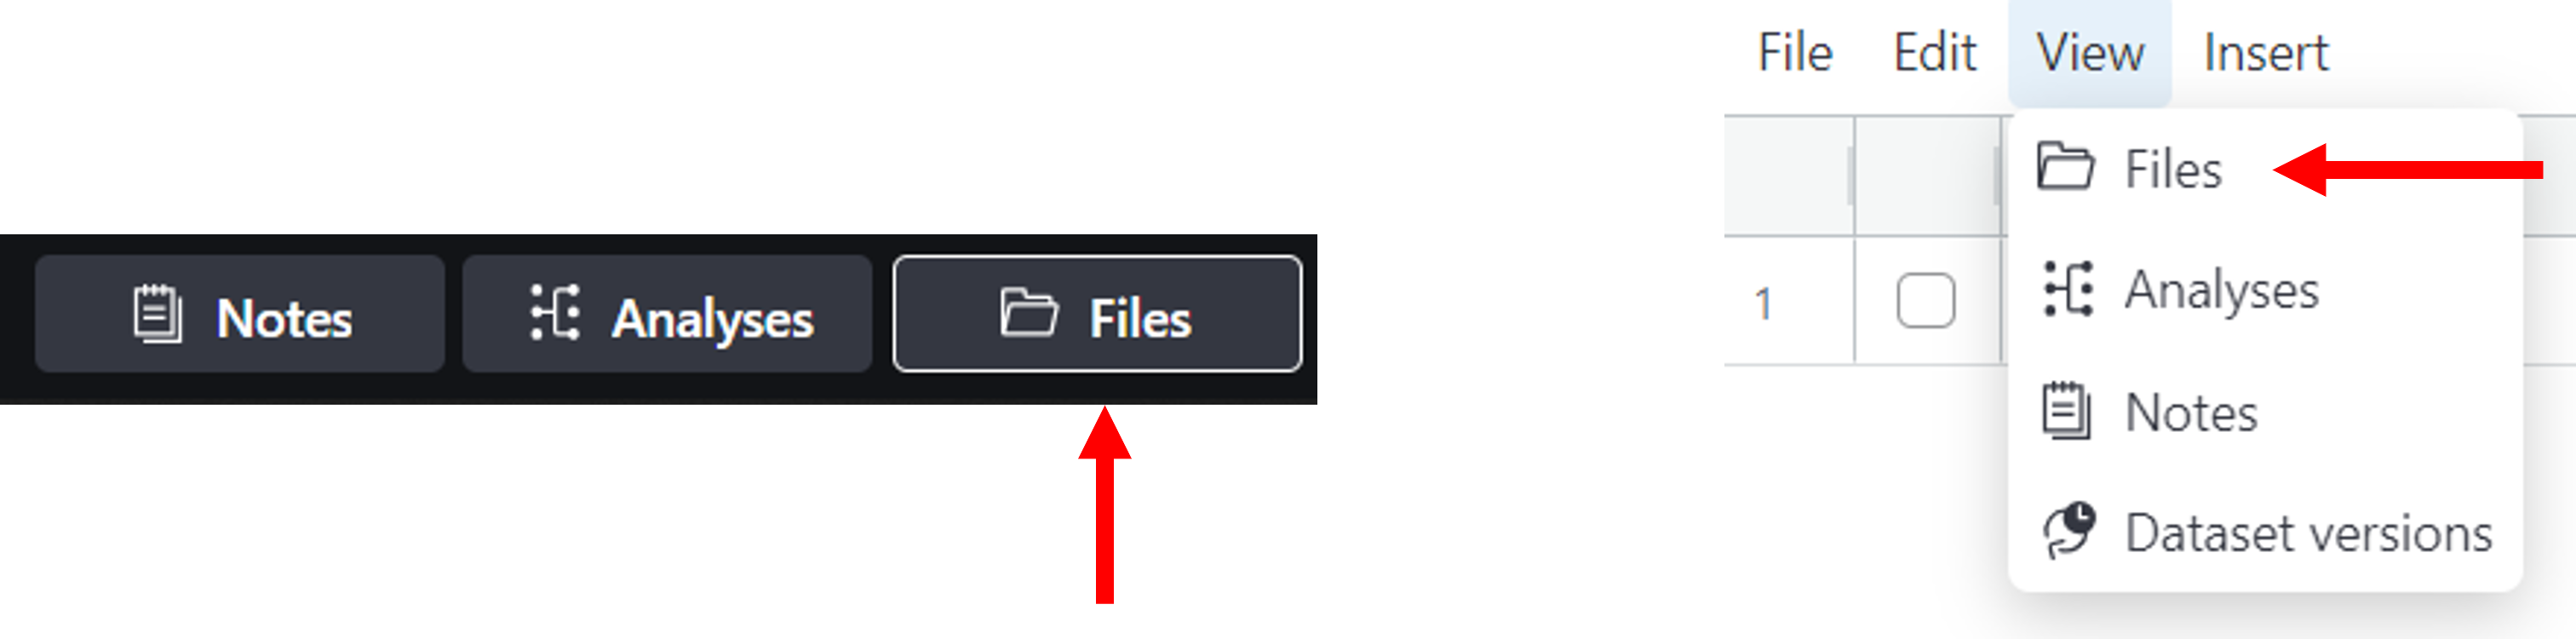
The file browser may be accessed using one of the following methods:
-
Clicking the Files button in the bottom toolbar
-
Select Files from the View menu of a data table
-
Select the Files tab from the Project home page
Searching for files
Use the search bar in the file browser to more easily find files. For example, you may use terms from your filename, file date, data type, and recording ID.
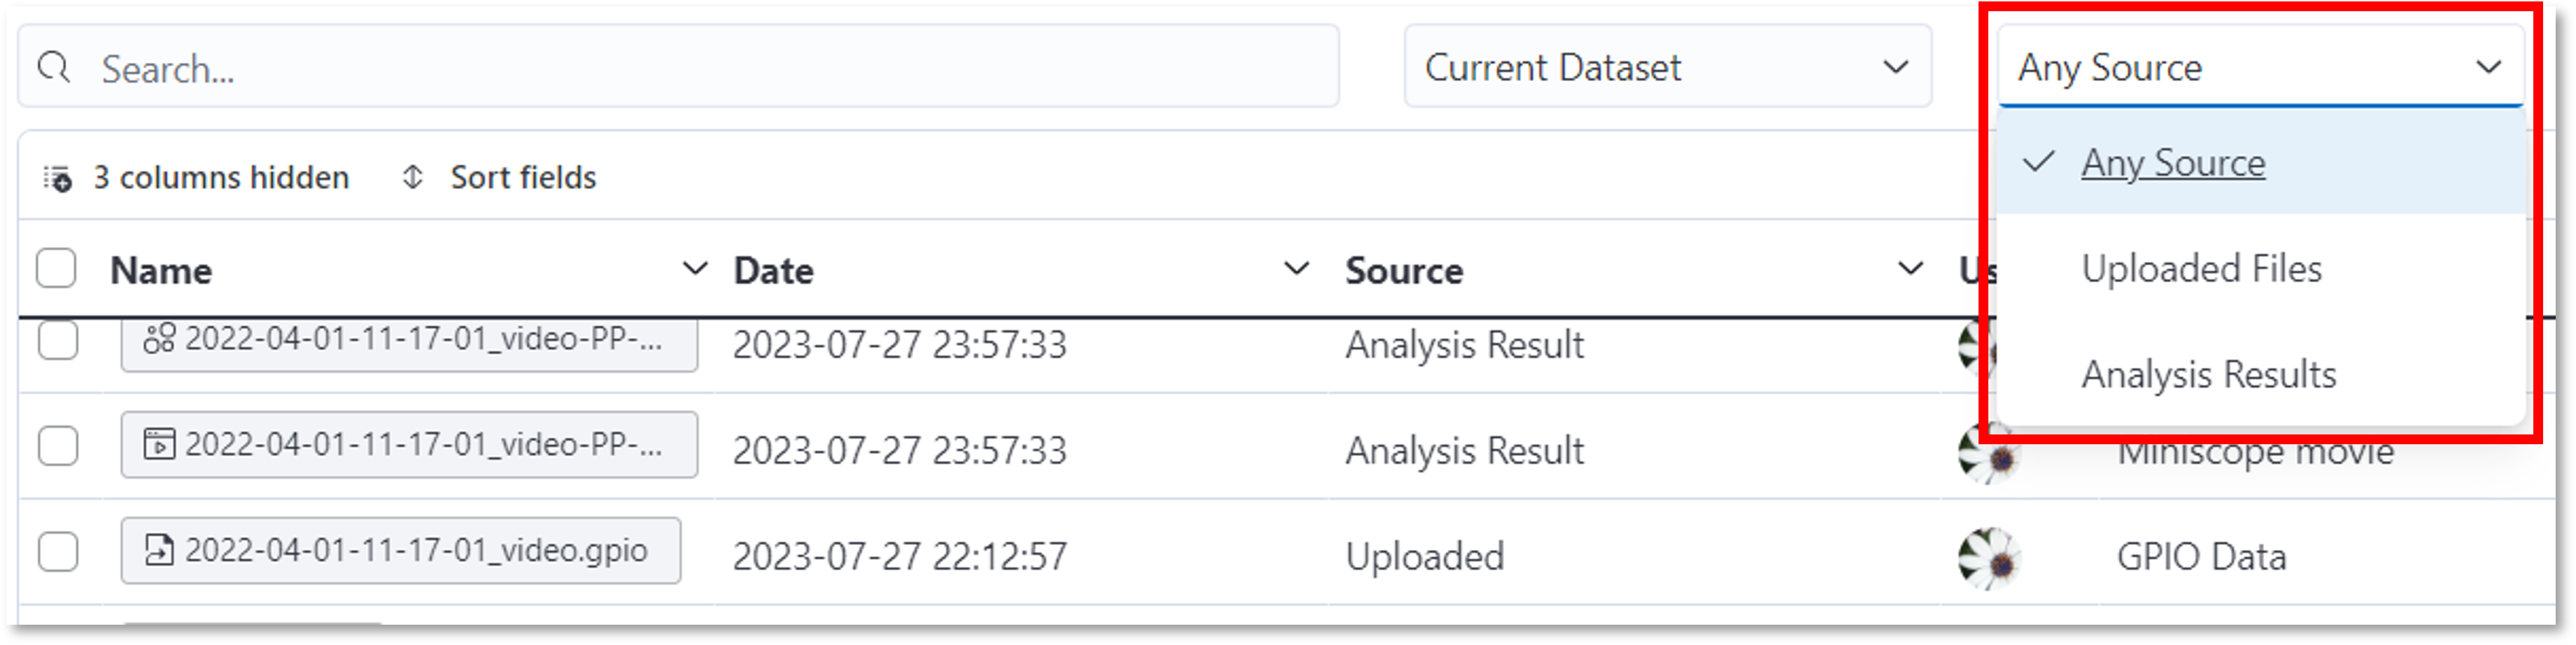
Filter files by source
You may filter your view based on the file source by selecting one of the 3 options in the drop-down menu:
- All files: all files including uploaded files and files from analysis results
- Uploaded files: files specifically uploaded to IDEAS
- Analysis results: files generated within IDEAS using the analytical tools
Sorting and organizing files
You may select what fields the file browser displays by choosing to show or hide columns.
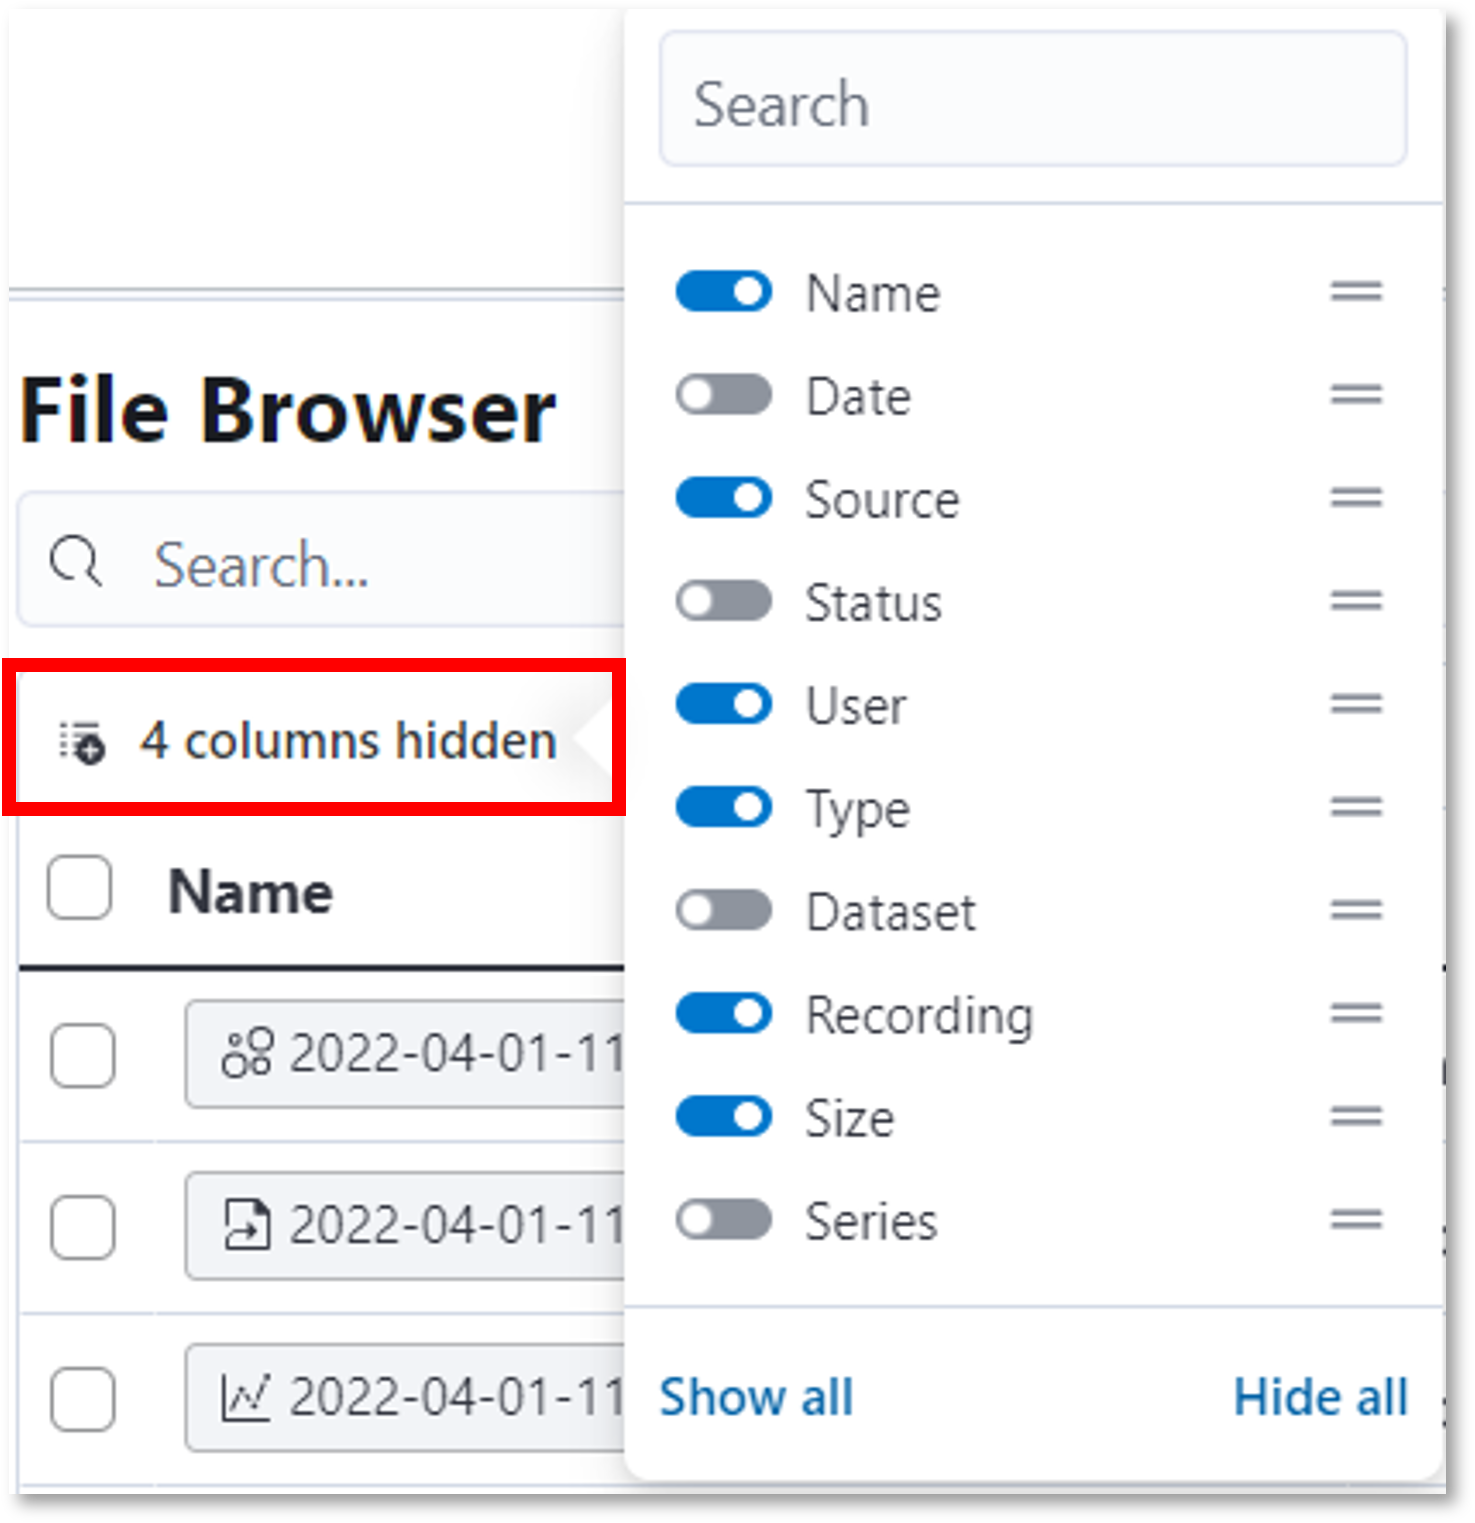
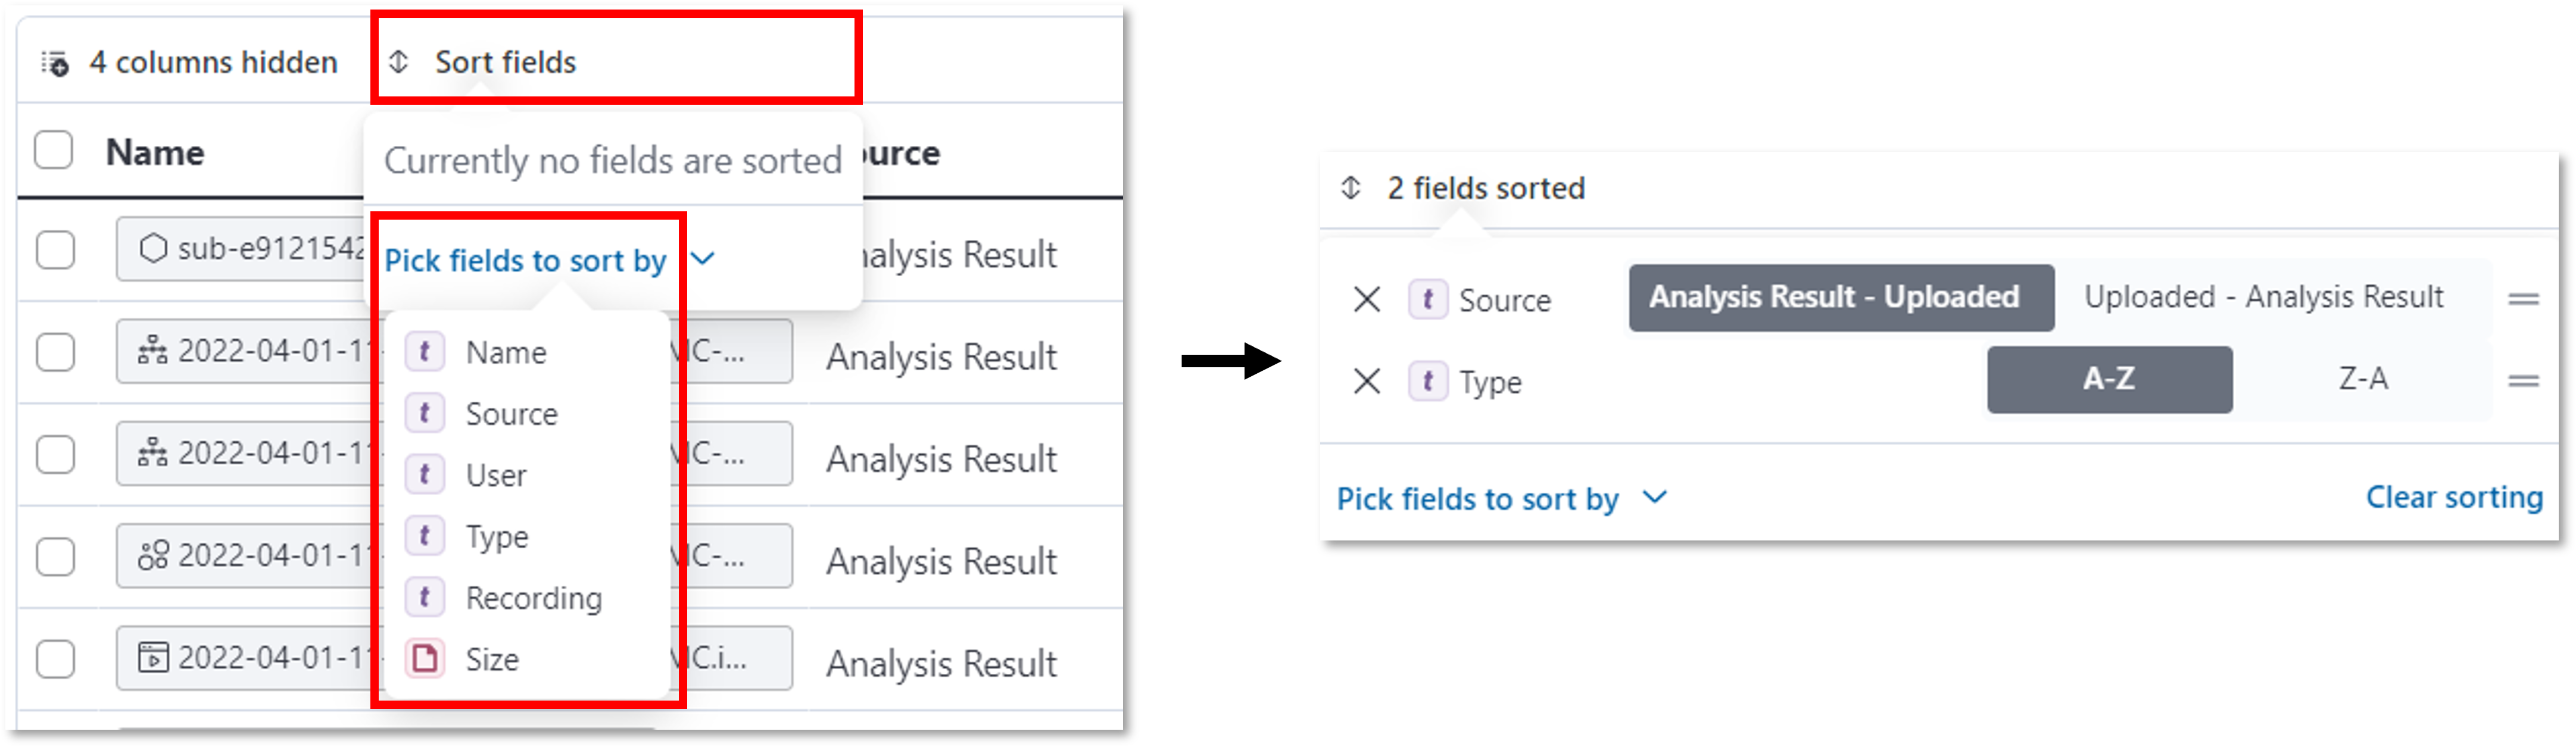
Based on the columns visible, files may then be sorted based on selected column fields. Click either the column name or the sort fields option from the file browser menu to create a sorting preference. If you select more than one field to sort, you can adjust the sorting order by dragging the field up or down in the list.
File browser tools
The file browser includes the following additional tools to help you manage your files.
 Rename file
 Unassign file from their respective recording
 Create a time series
 Break a time series
 Archive file
 Unarchive file
 Delete data and history for a file
 Cancel file upload
 Download file
 Keyboard shortcuts
Create data series
If you want to group data into a series (e.g., you performed multiple miniscope recordings where the miniscope was not removed), use the following steps:
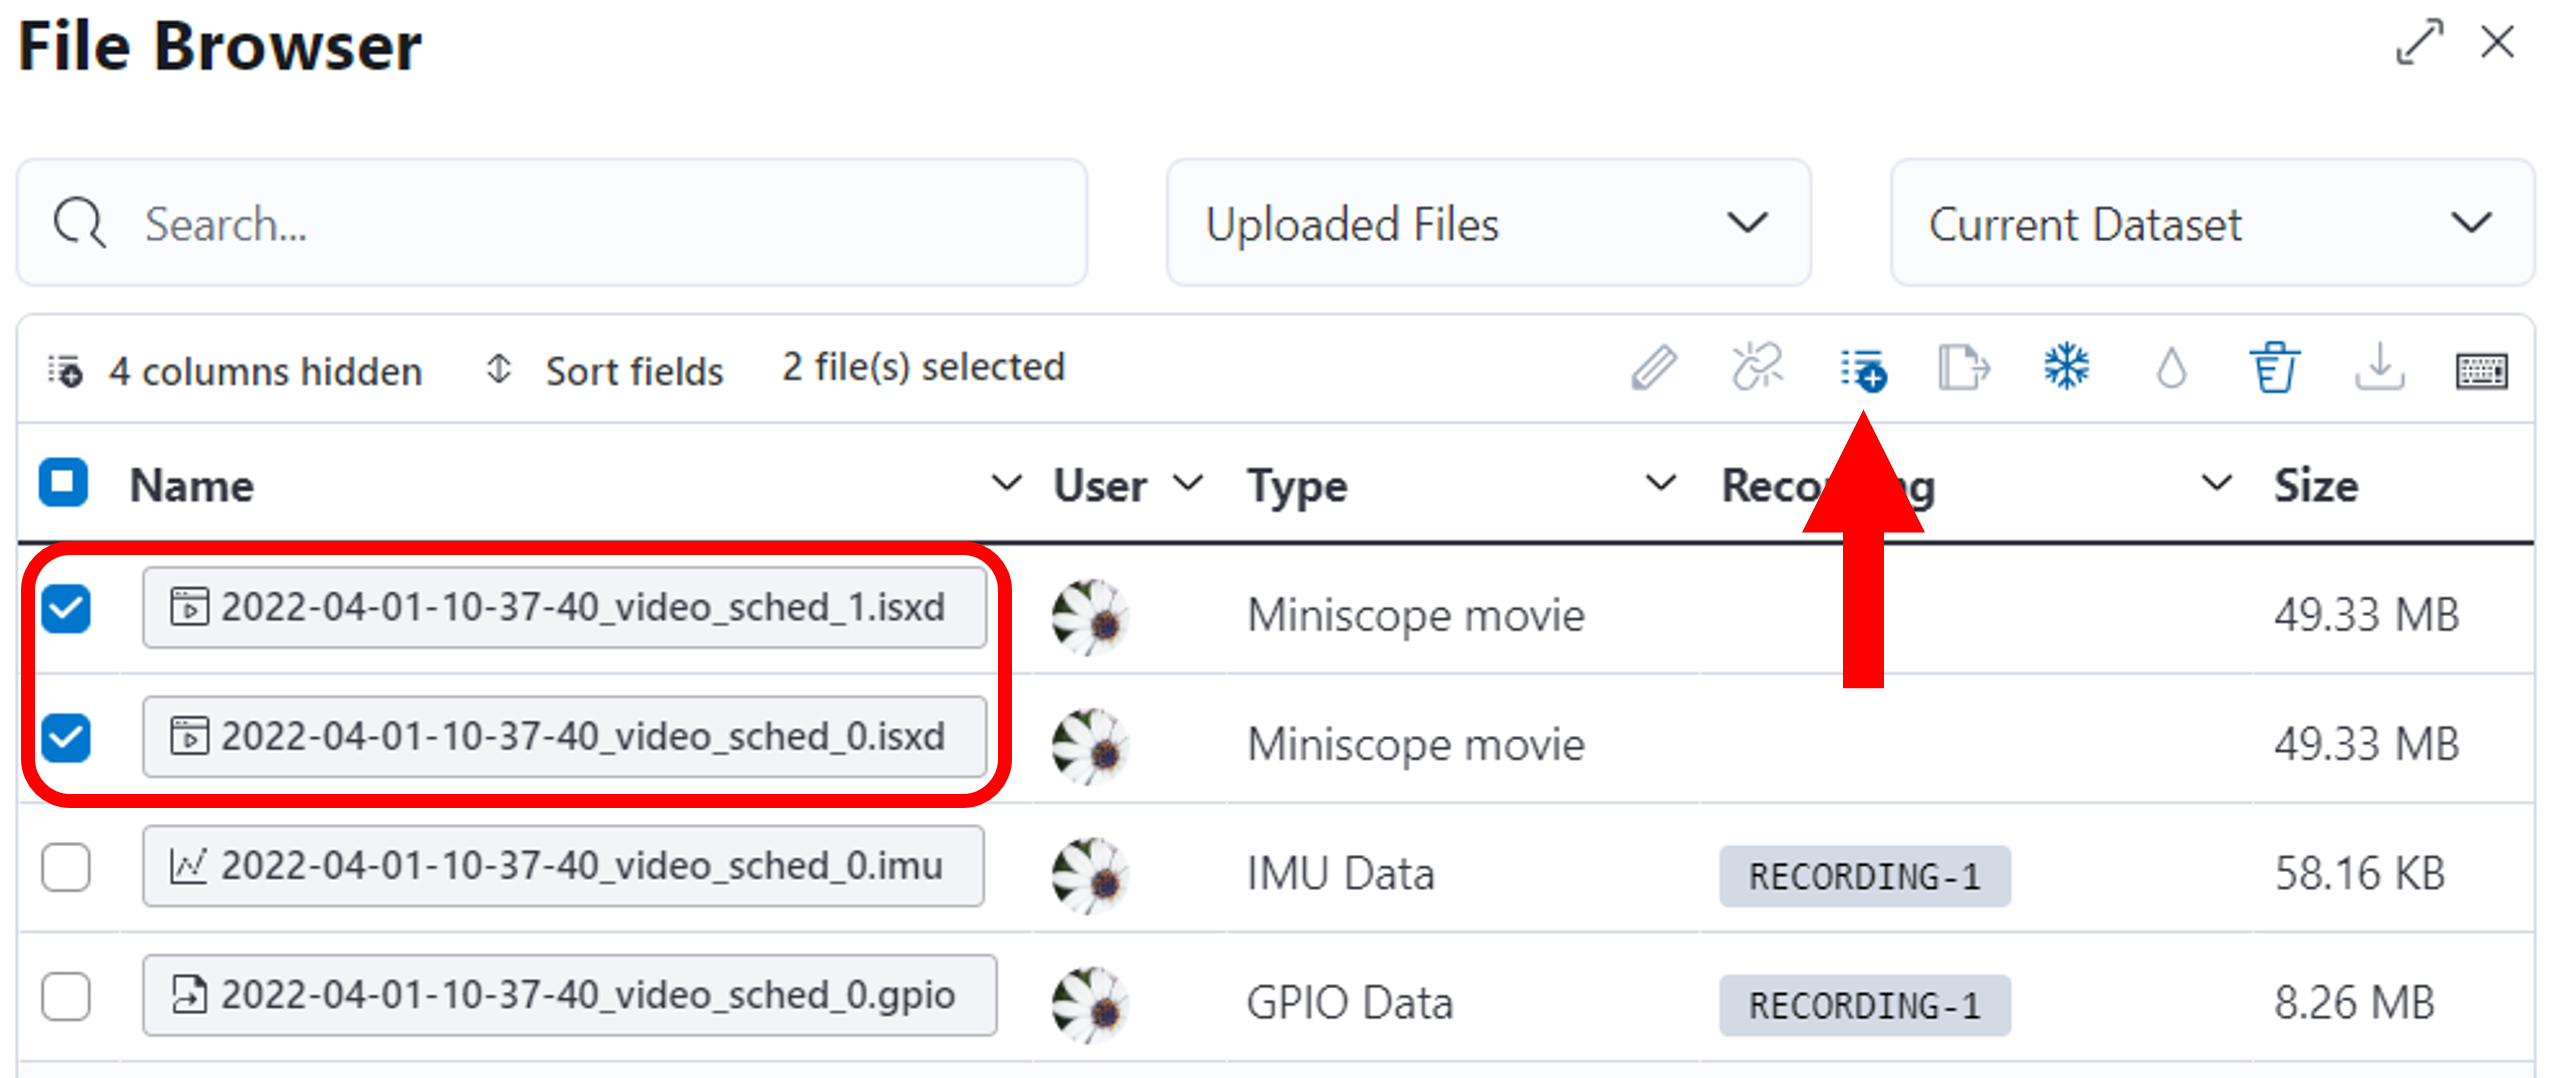
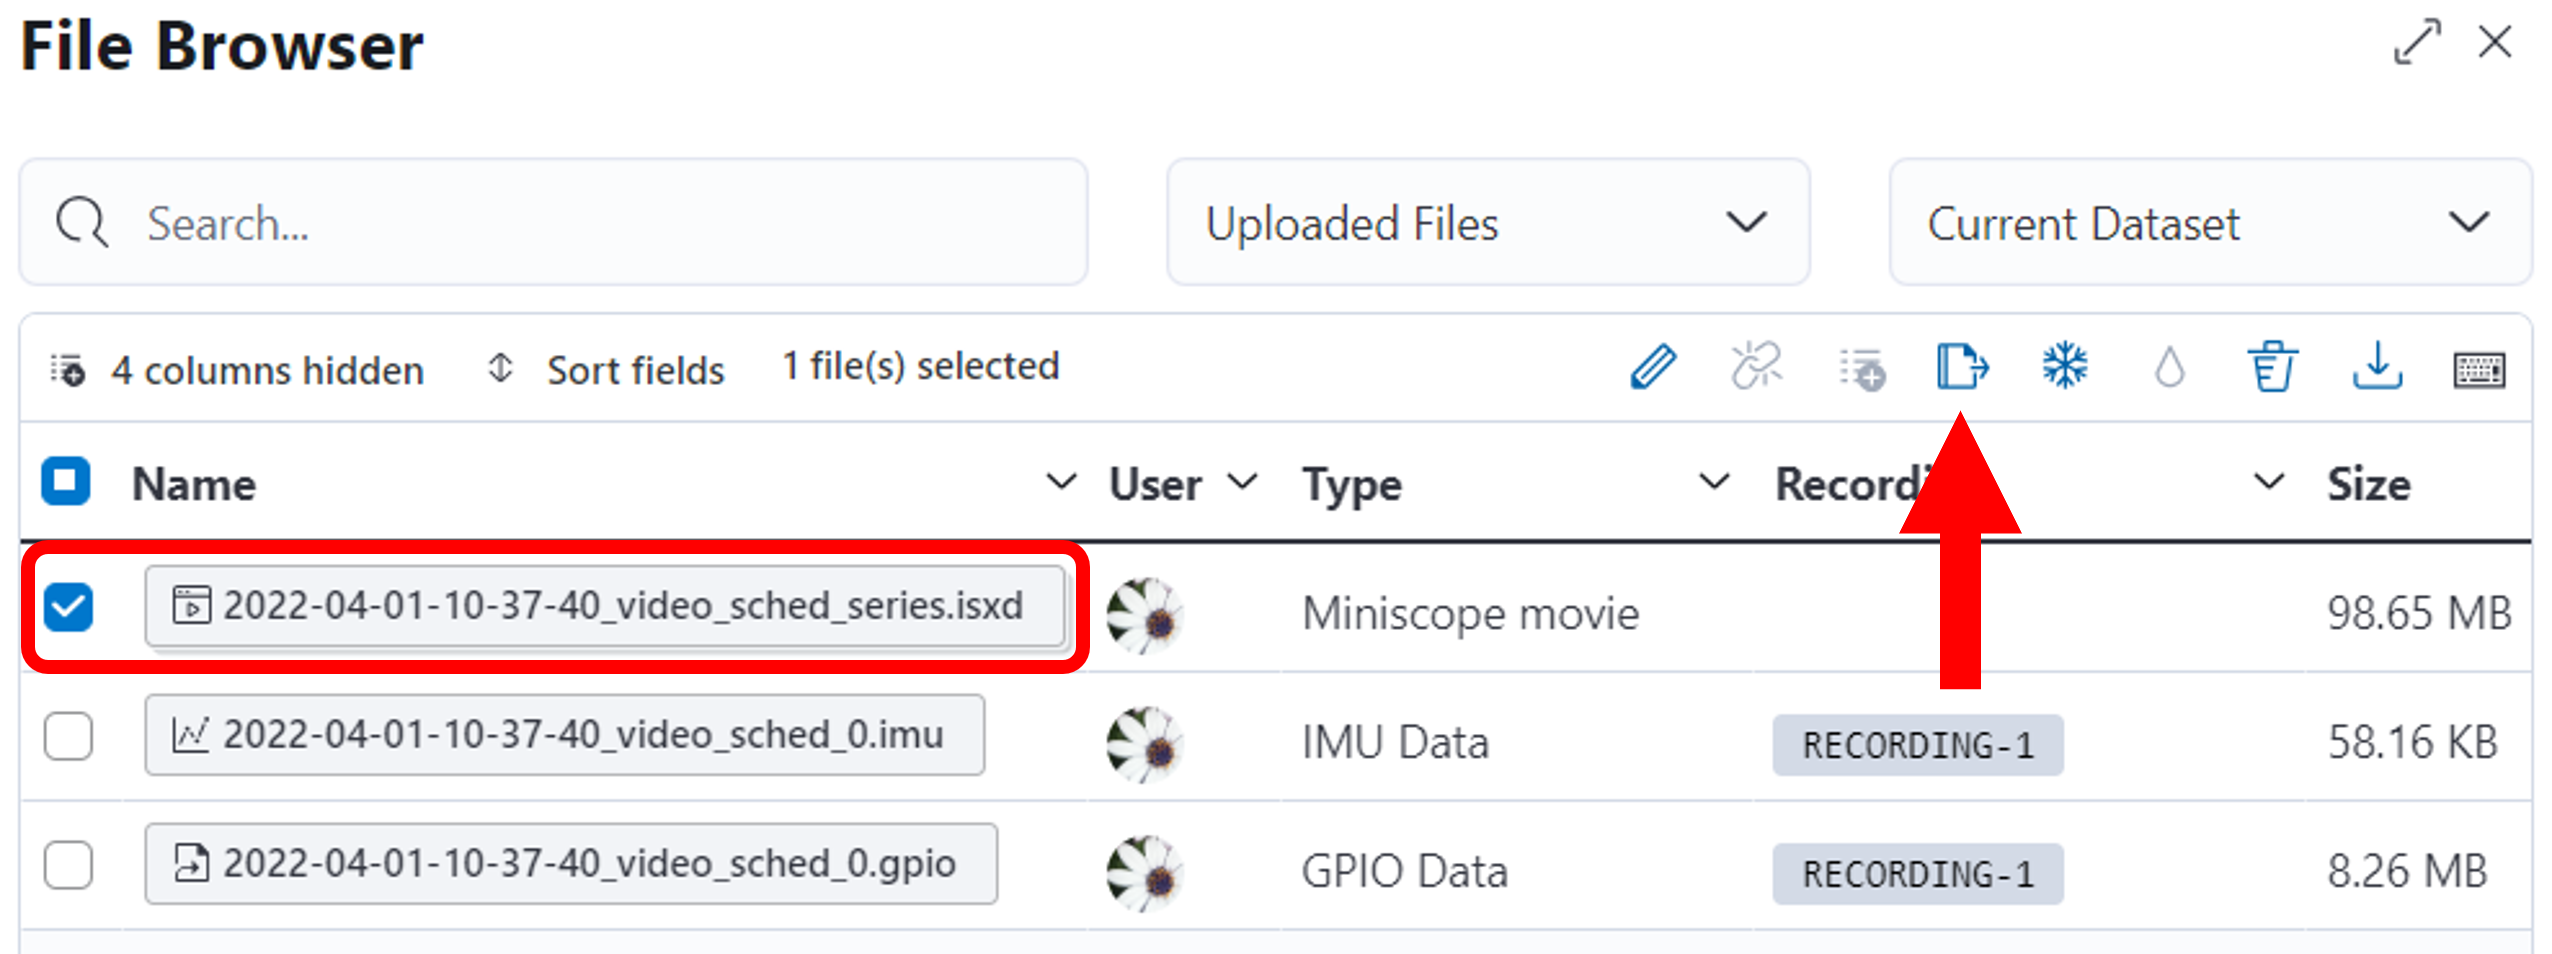
- From within a dataset, open the File Browser.
- Select the files to group into a series and click the Create Series icon in the menu bar.
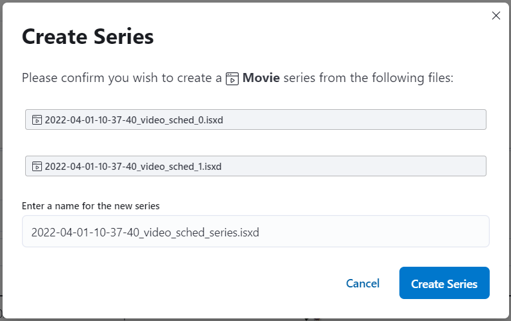
- Modify the default name for the series if desired and then click Create Series. The series is now available for use in the dataset table. Note that files in a series will automatically be arranged in order by start time found in the metadata. If timing metadata is not present, you will be able to manually order your movies. The order defined here will set the order of movies in the given series across the platform.
Note that you can break the series using the respective icon in the menu bar.
Organize uploaded files into data tables
Build out a data table by first deciding what rows and columns of information you want the data table(s) to contain and then fill in each cell with the corresponding data file.
Insert rows
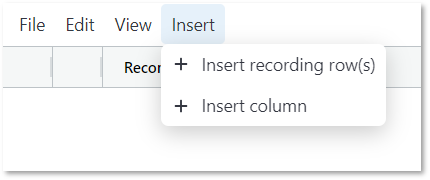
Insert rows using either the  icon or the Insert menu and
clicking Insert row(s). Note that the icon will only insert one row at a time while the menu will allow you to configure the number of rows to insert.
icon or the Insert menu and
clicking Insert row(s). Note that the icon will only insert one row at a time while the menu will allow you to configure the number of rows to insert.
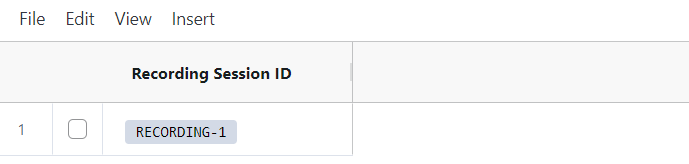
You should now see row(s) inserted in your data table. Note that the recording ID is defined by the pre-fix you provided when
creating the data table. The ID is hard-coded so if you have 3 rows (REC-1, REC-2, REC-3) and delete REC-3, the next row you insert
will be given the ID: REC-4.
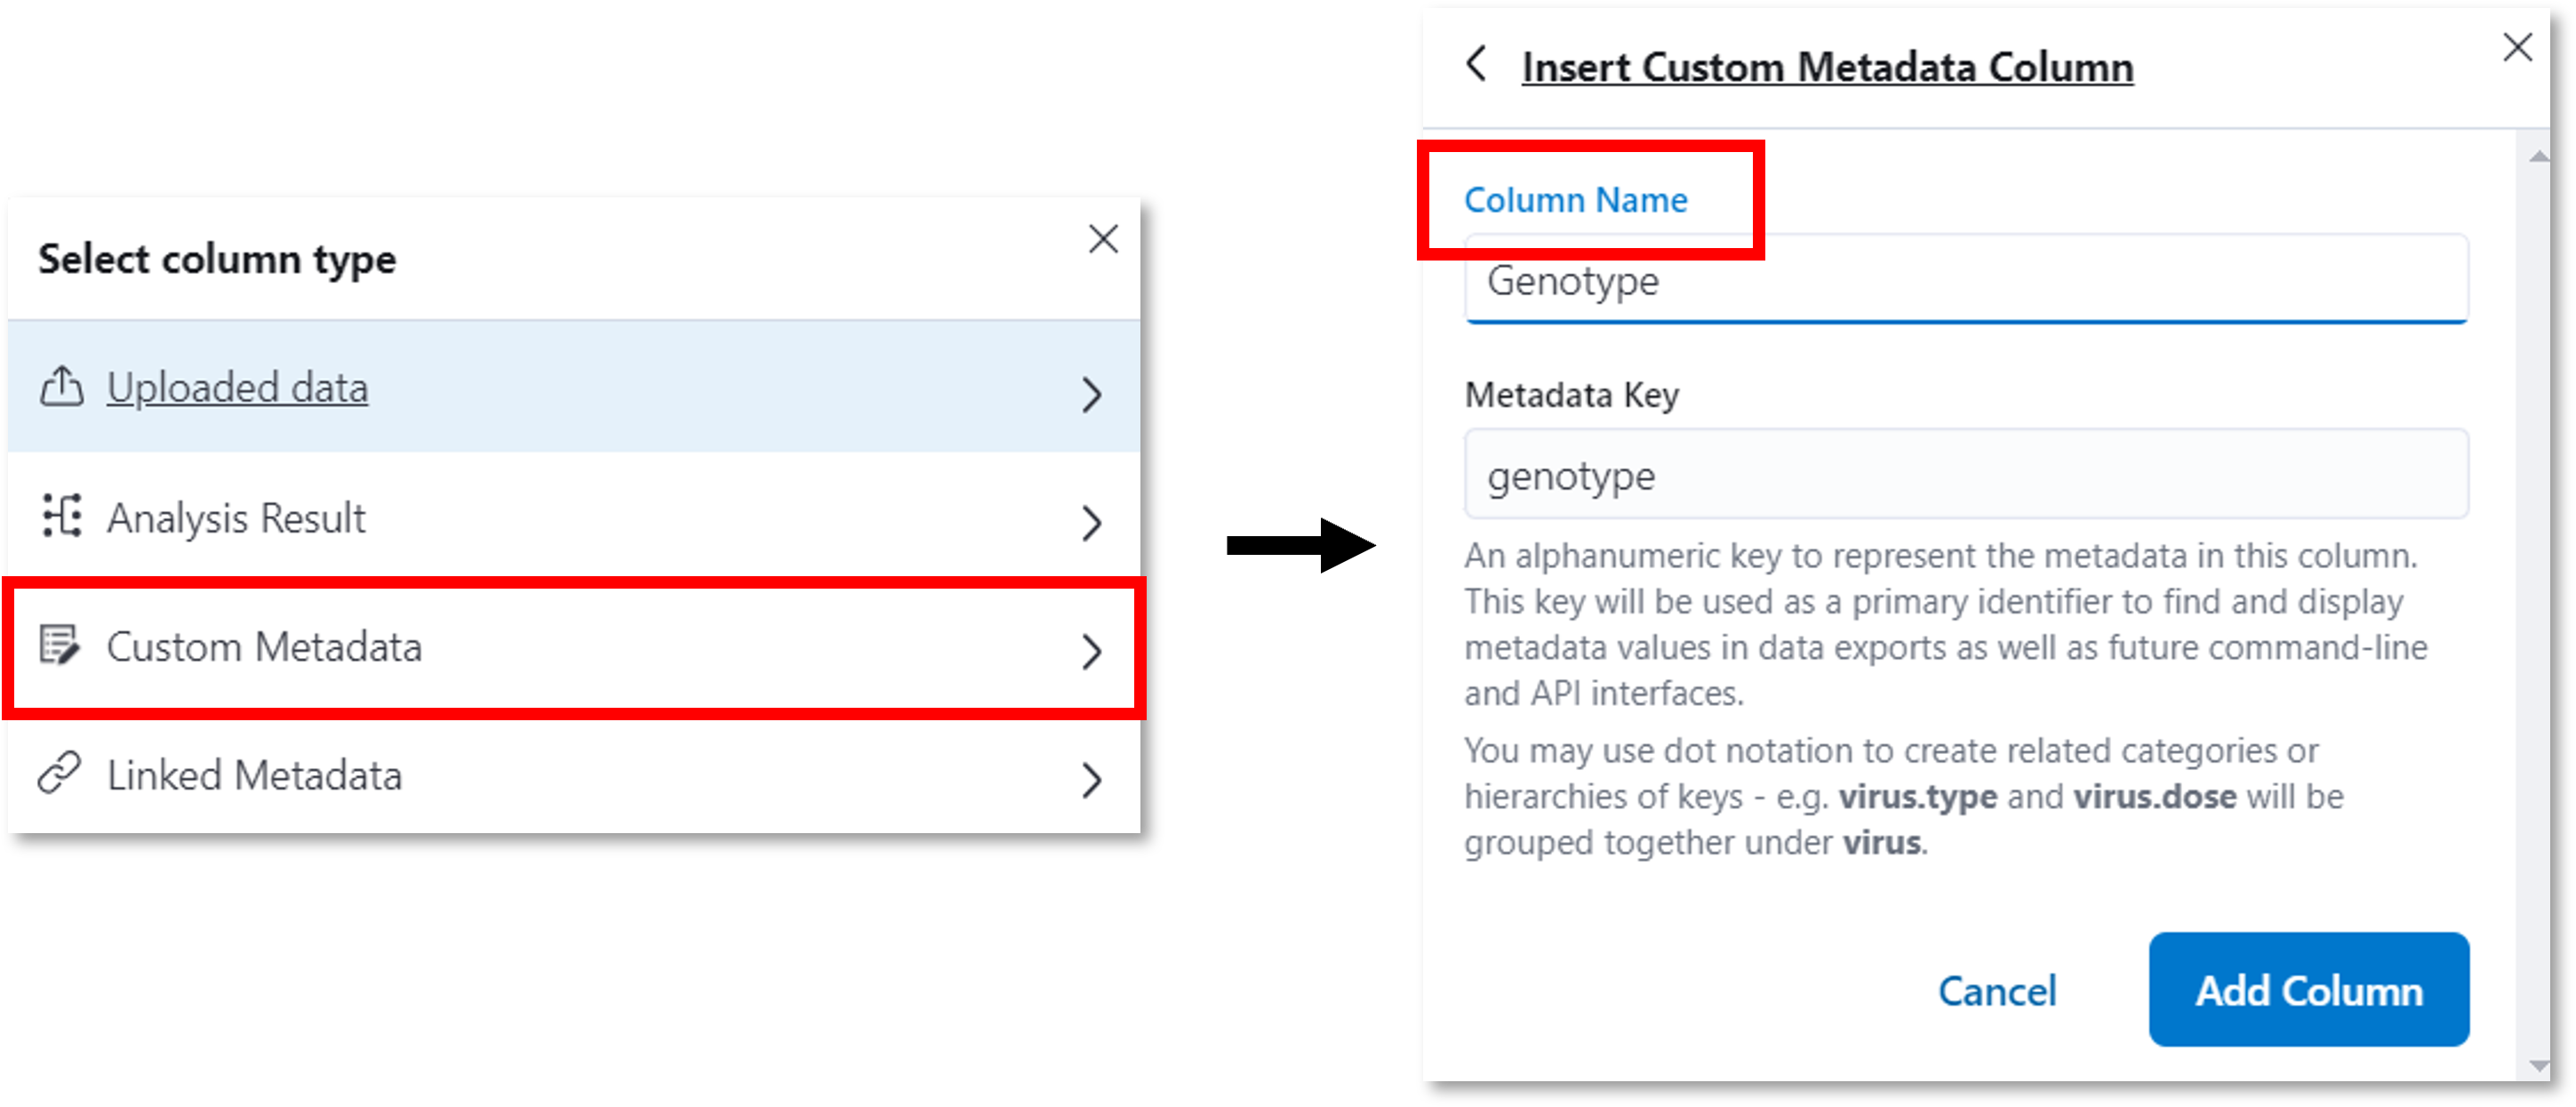
Insert data column
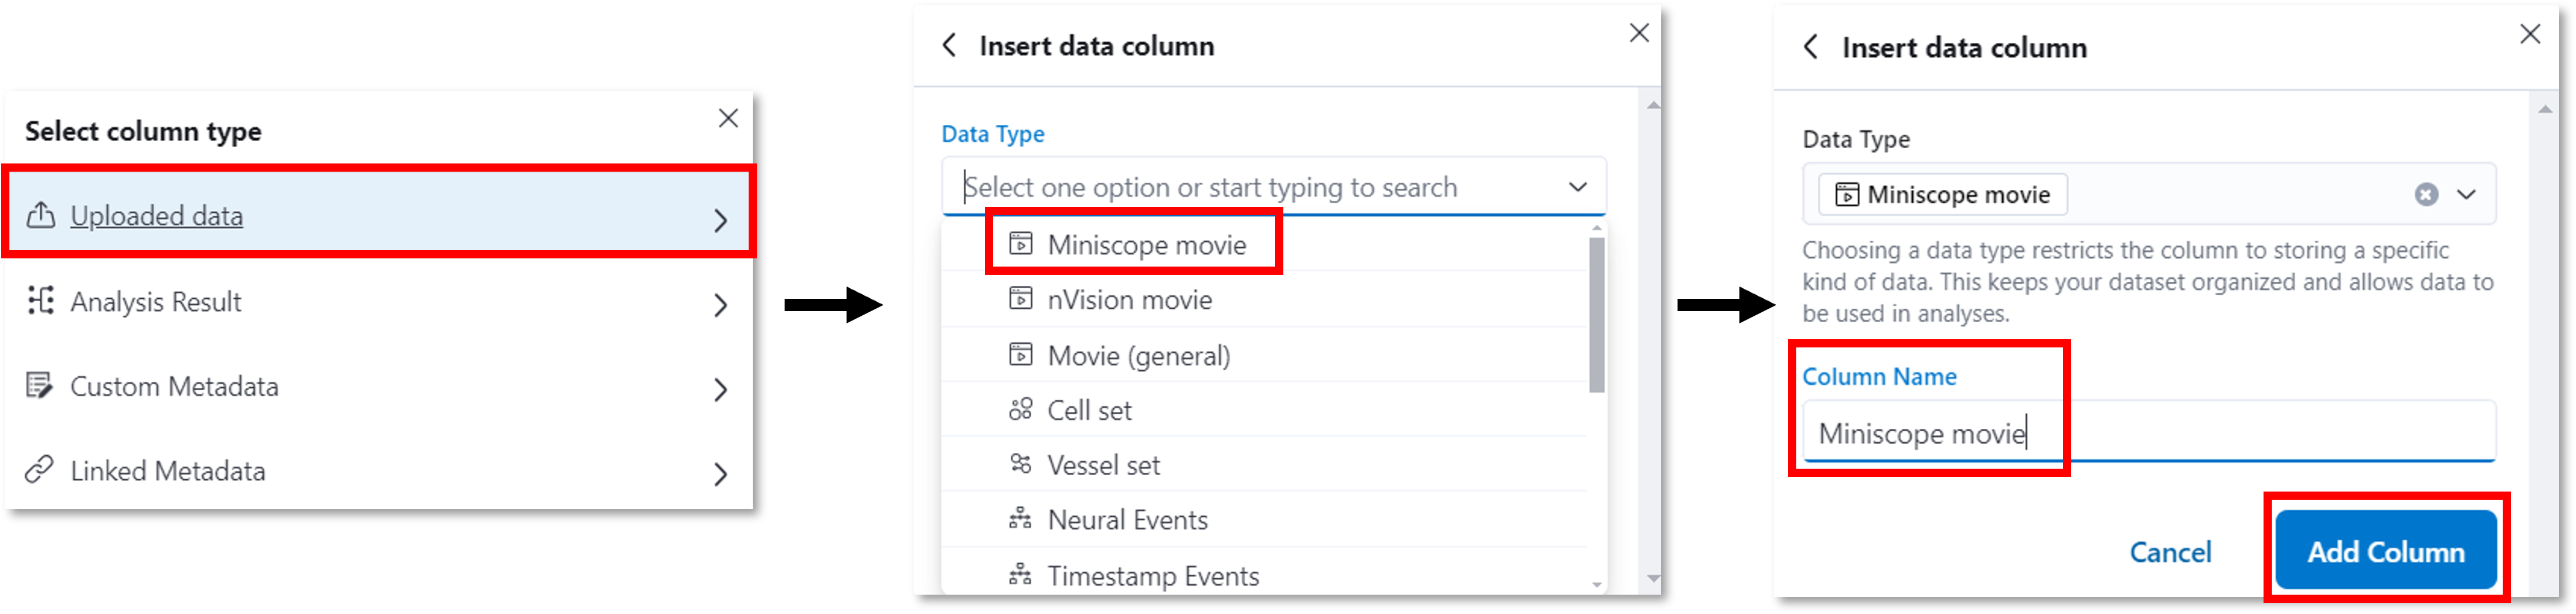
Use the  icon or the Insert menu to insert data columns.
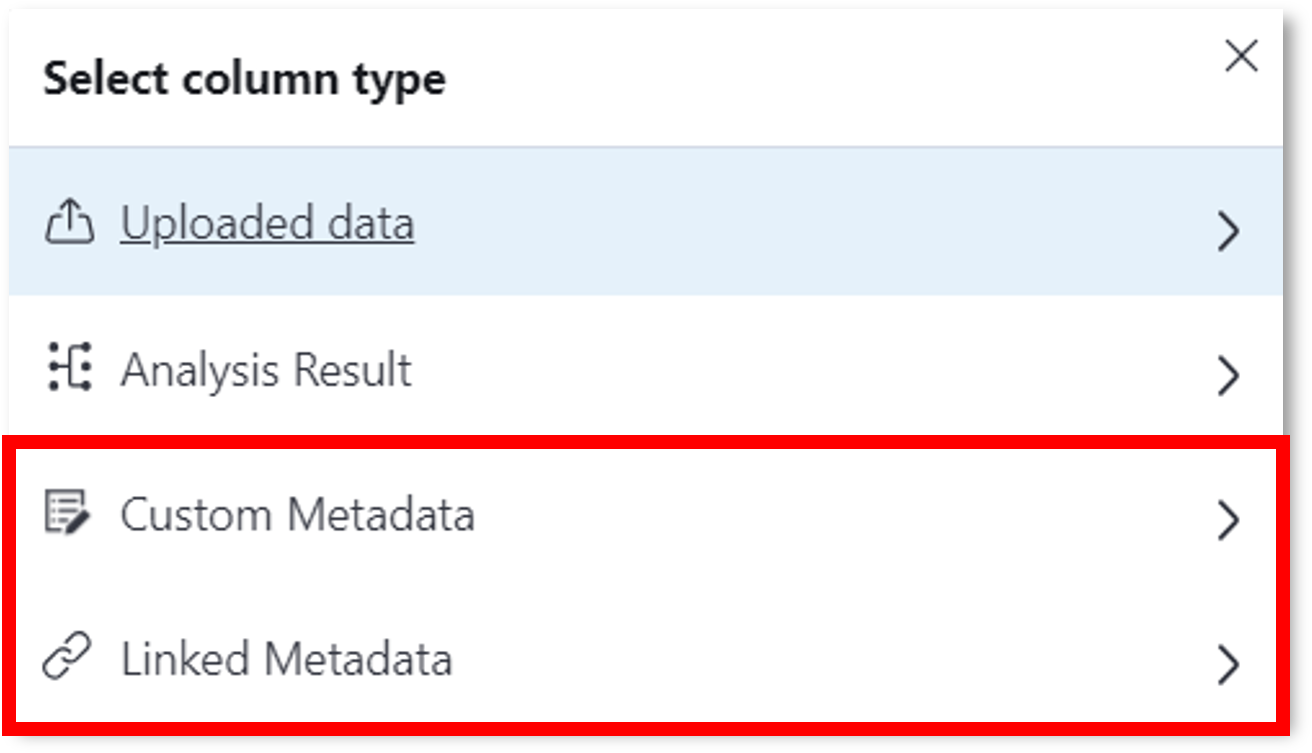
A pop-up window will provide a selection of column types from which to choose. Select your desired column type, follow the prompts to provide a name for
the column and then click Insert.
icon or the Insert menu to insert data columns.
A pop-up window will provide a selection of column types from which to choose. Select your desired column type, follow the prompts to provide a name for
the column and then click Insert.
Note
Refer to the Creating data tables for additional notes regarding selecting a column type.
Assign data
Now that you have rows and data columns, you can assign files to the data table by doing one of the following:
- Click an empty cell to upload data directly to the recording.

- Open the File Browser and drag and drop data into the data table.
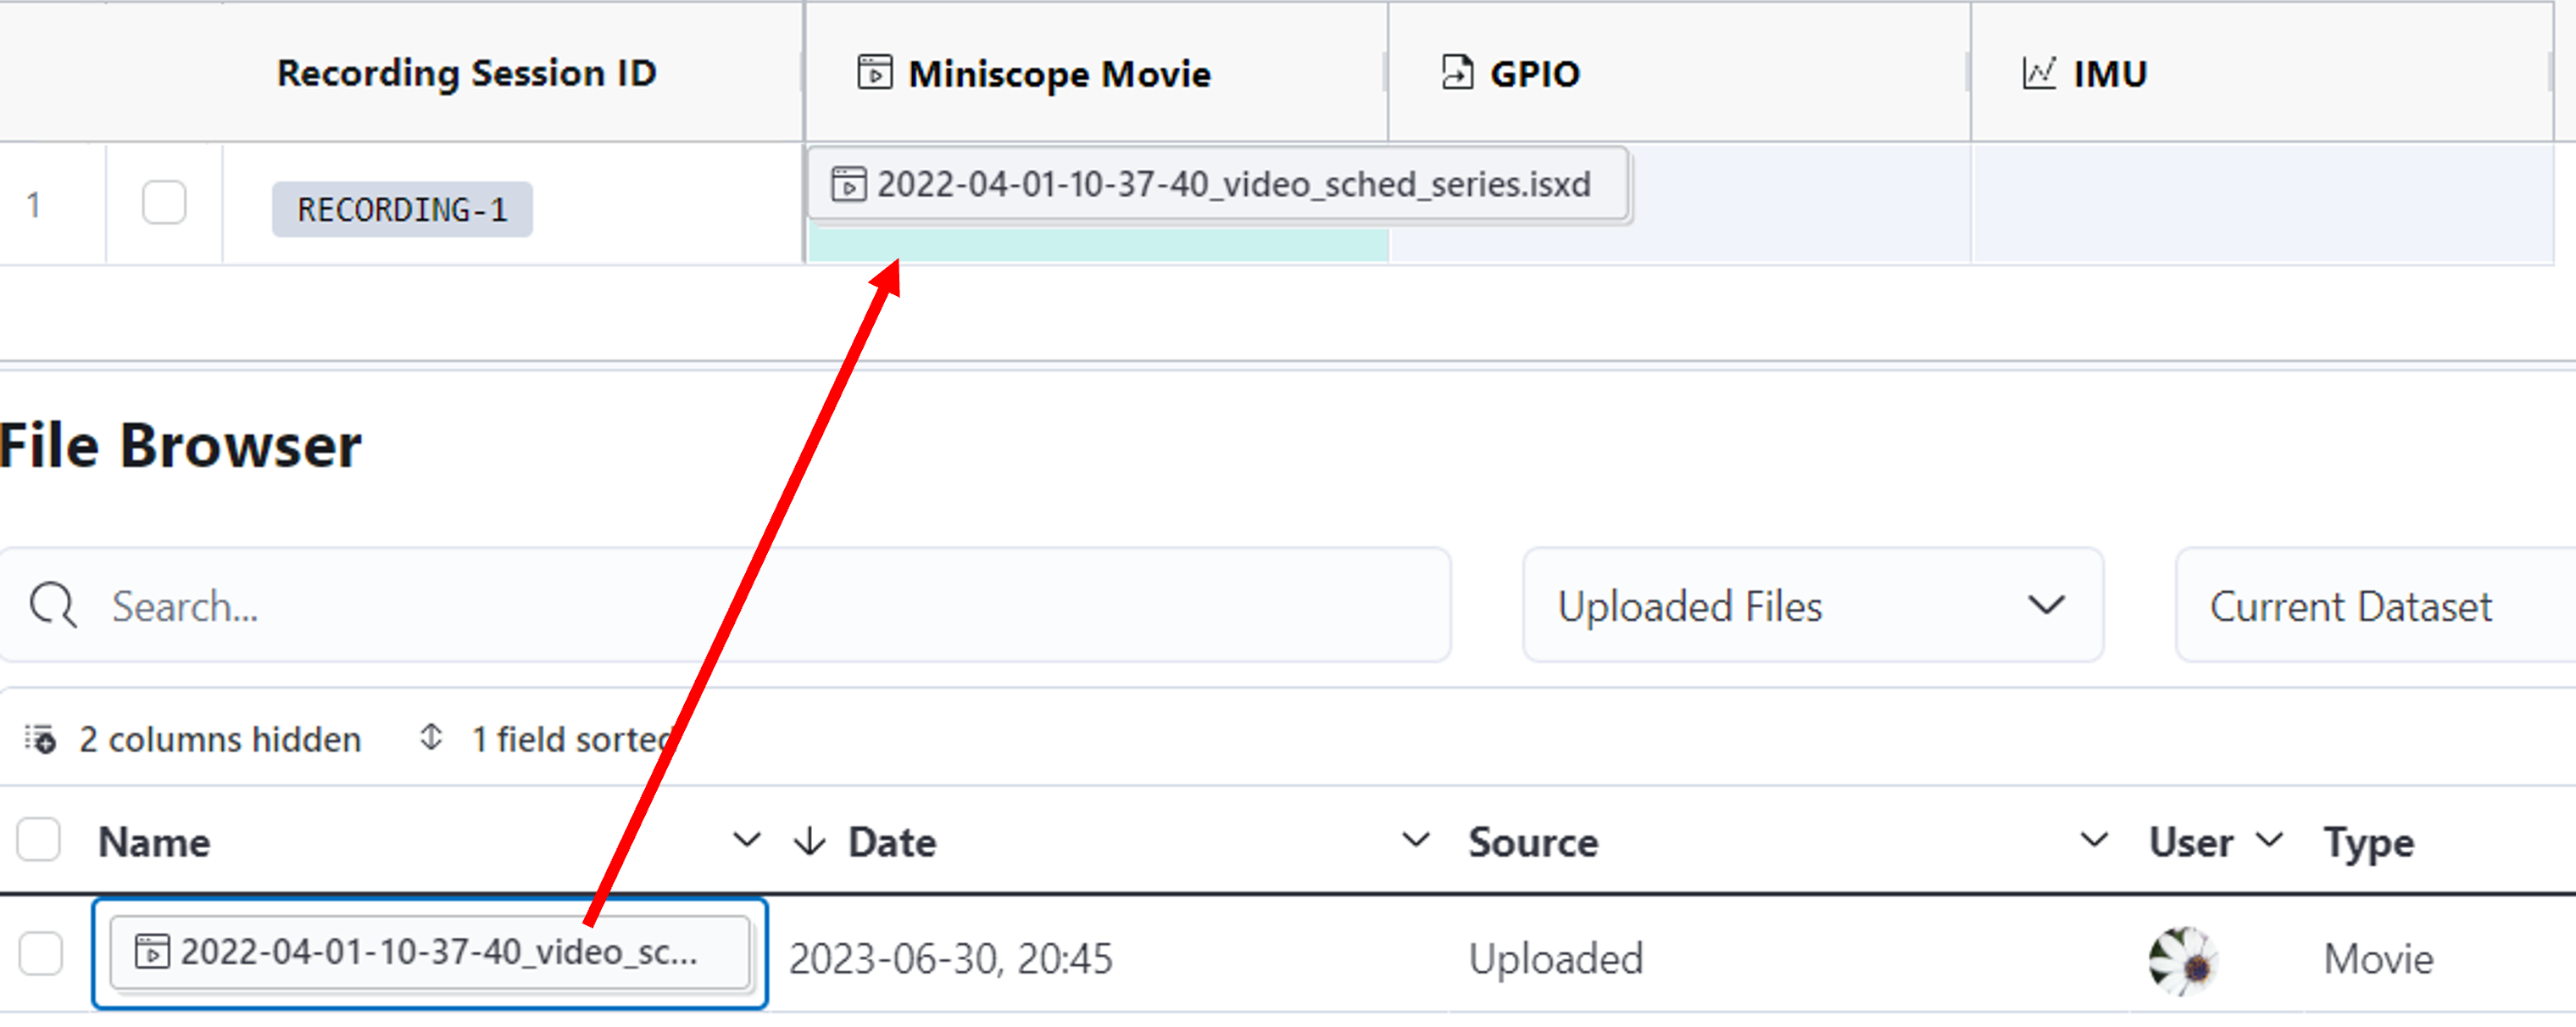
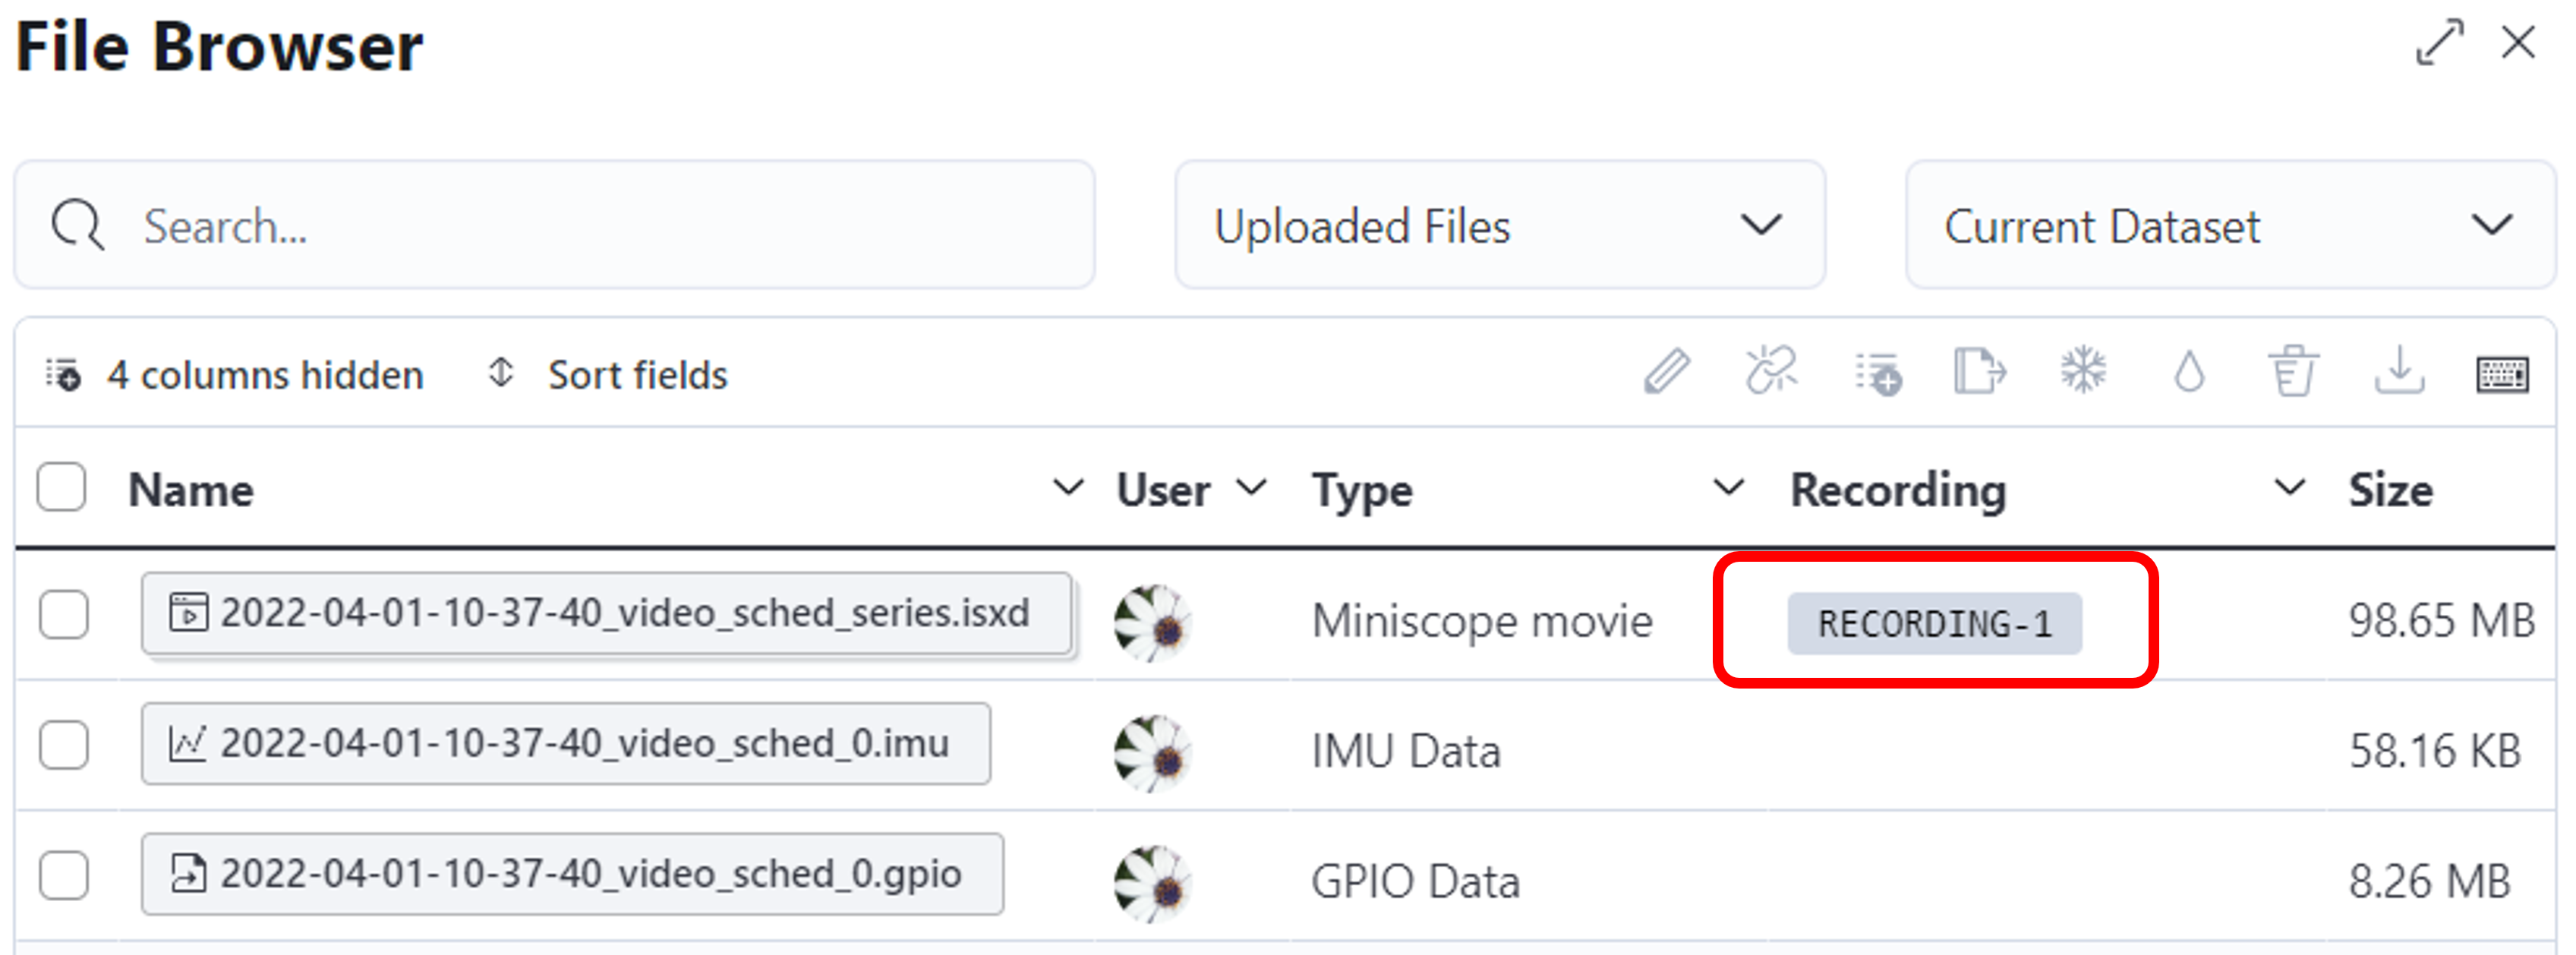
Note that the File Browser will show whether a file has been assigned to a row in a data table. The label listed in the Assignment column corresponds to the unique row identifier.
Preview data
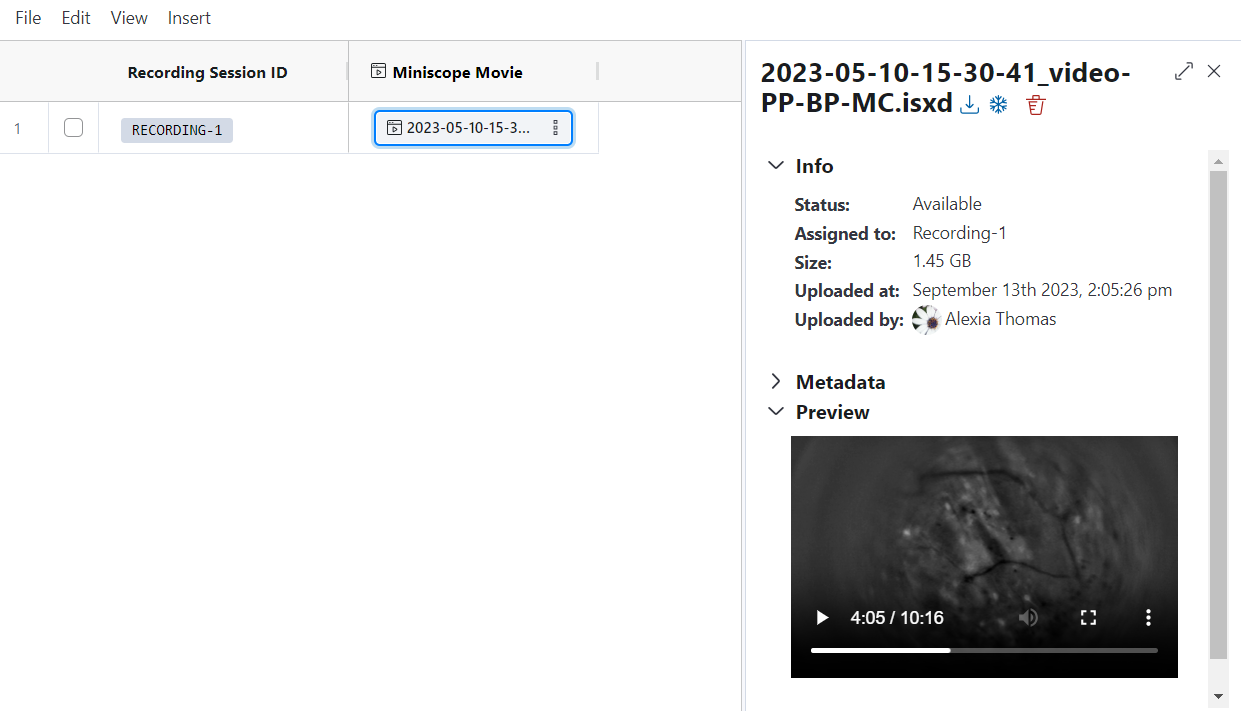
To preview data, simply click on the file of your choice (you can do this from either the dataset table or the File Browser window). This will open a panel on the right where you can preview the data and see metadata information. Shown below is an example for a miniscope movie.
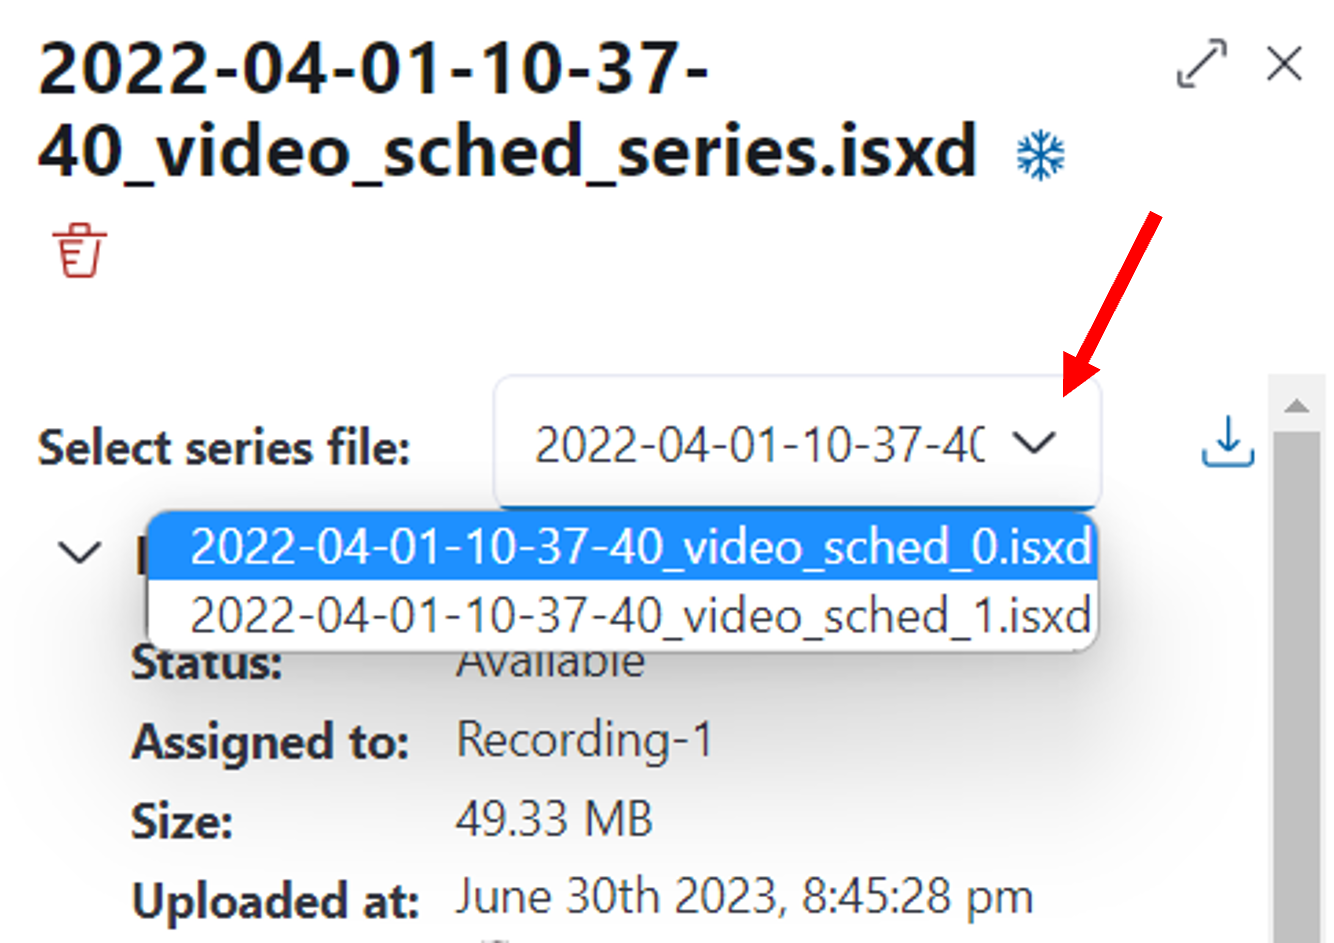
Note that if you have selected a time series, the preview will only show one movie at a time within the series. Use the drop down to select a different segment in the series to preview.
Adding metadata
To add metadata, follow the same instructions as for inserting a column and then select File Metadatum as the column type.
You will need to already have a column with a type containing metadata from which the File Metadatum will pull data. In the example below, the file column from where the metadata will come is a column containing nVision movies. Therefore, when selecting the nVision column, the metadata available corresponds to nVision movie data. After selecting your desired metadatum, click Insert to finish.