Upload data
How to upload files
Data can be uploaded to IDEAS using one of the following methods:
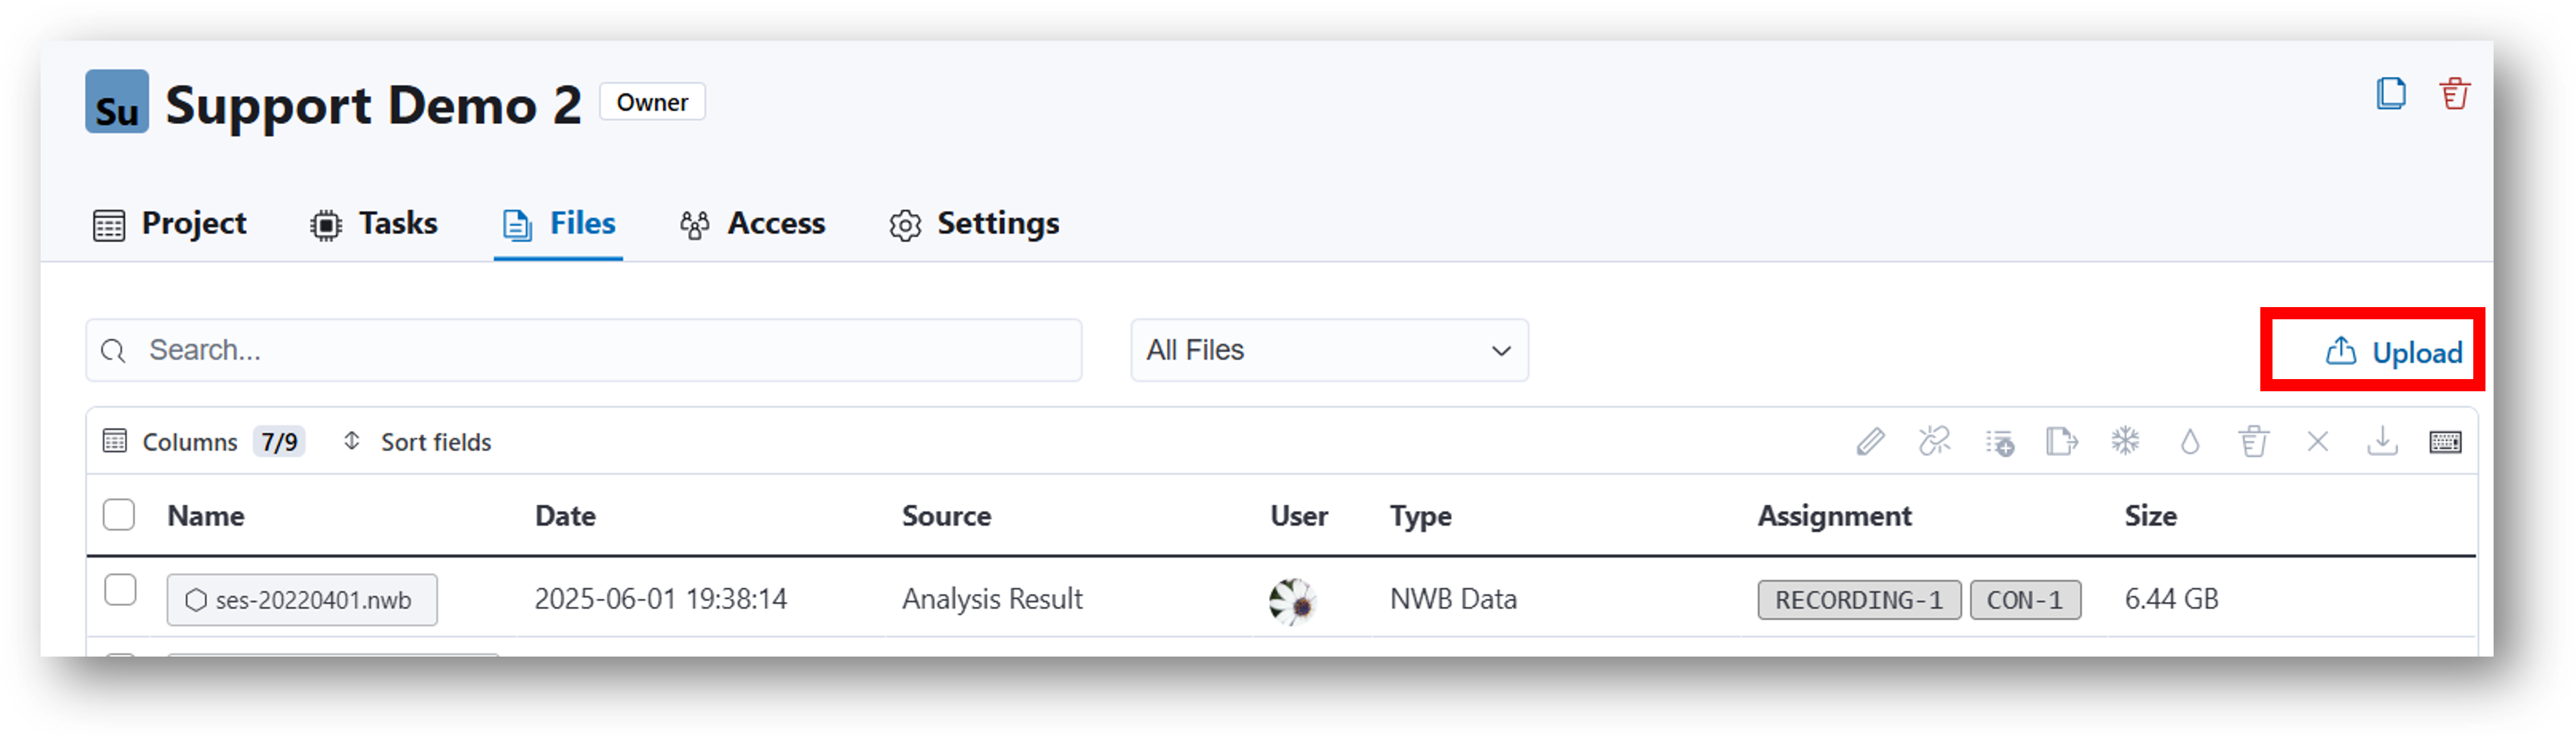
File browser
Click the Upload button in the top right of either the File Browser or the Files tab from the Project home page
(this will prompt you to select files from your device). Alternatively, you may drag and drop files from your computer into the file browser
or Files tab window. You may select multiple files at once.
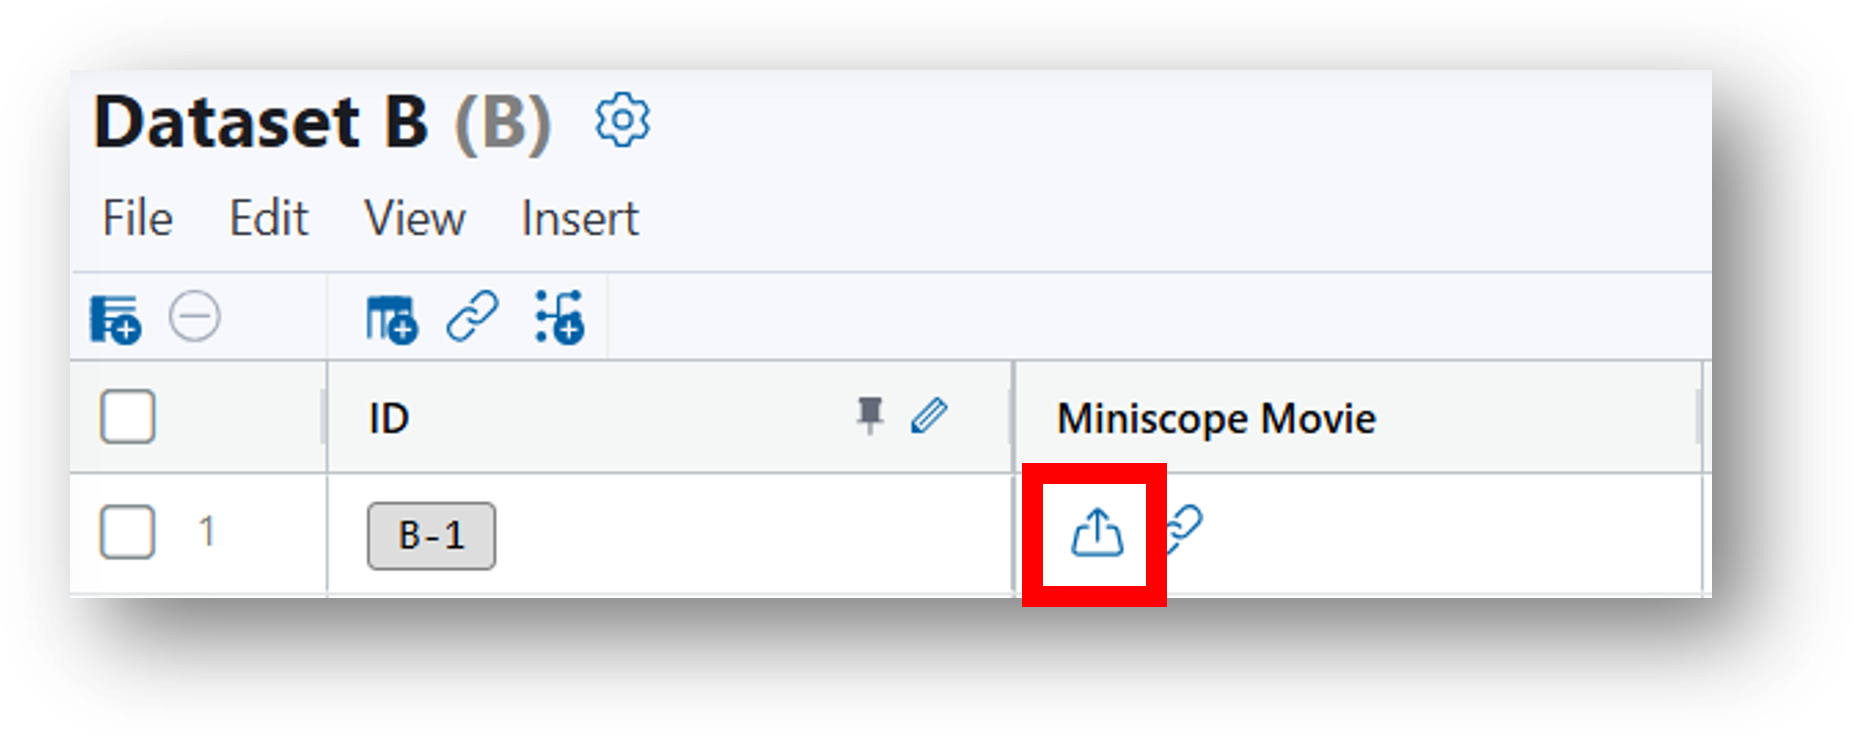
Data/analysis table
Provided you have at least one row and column, either click the upload icon in the table (see image below) or drag and drop the corresponding file directly into the cell.
IDAS to IDEAS
Files can be uploaded directly from the Inscopix system (e.g., DAQ box) using the Inscopix Data Acquisition Software (IDAS). Note that in order to use this method, you will need to ensure the following:
- You are running IDAS version 2.2 or later.
- Your miniscope system is connected to the internet.
- Multi-factor authentication (MFA) must be turned OFF from your user profile within IDEAS.
Upload process
Uploading files from IDAS to IDEAS involves two steps:
- Uploading the file(s) from the miniscope system (using IDAS) to the IDEAS platform.
- This requires a constant internet connection between your computer and IDEAS (i.e., you cannot close the IDAS interface) and will only be as fast as your internet speed.
- Identifying the file, extracting metadata, and generating previews.
- This step occurs on IDEAS and does NOT require any internet connection between your computer and IDEAS. You may close the IDAS interface on your computer and this step will continue to proceed in the background.
- When a file has uploaded and is being 'processed' in IDEAS, it will appear grey with dotted edges.
- Refer to the Supported Files section for the types of files recognized in IDEAS.
Instructions for Uploading Files from IDAS to IDEAS:
- Using IDAS, open the File Manager.
-
On the right panel, click the IDEAS button as highlighted below.
-
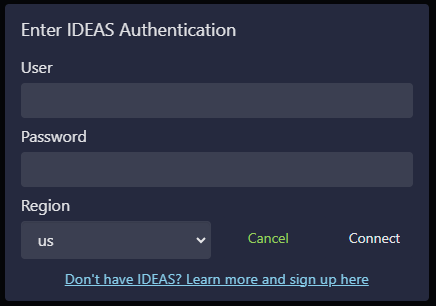
Log in using the authentication pop-up panel (shown below) and enter your username, password, and geographical region (us: United States, jp: Japan, eu: Europe). Click Connect to complete the login. After successfully logging in, you should see the IDEAS button turn green.
-
Use the drop-down menus to select an IDEAS account and a project from the selected account. Data will be uploaded to the project selected.

-
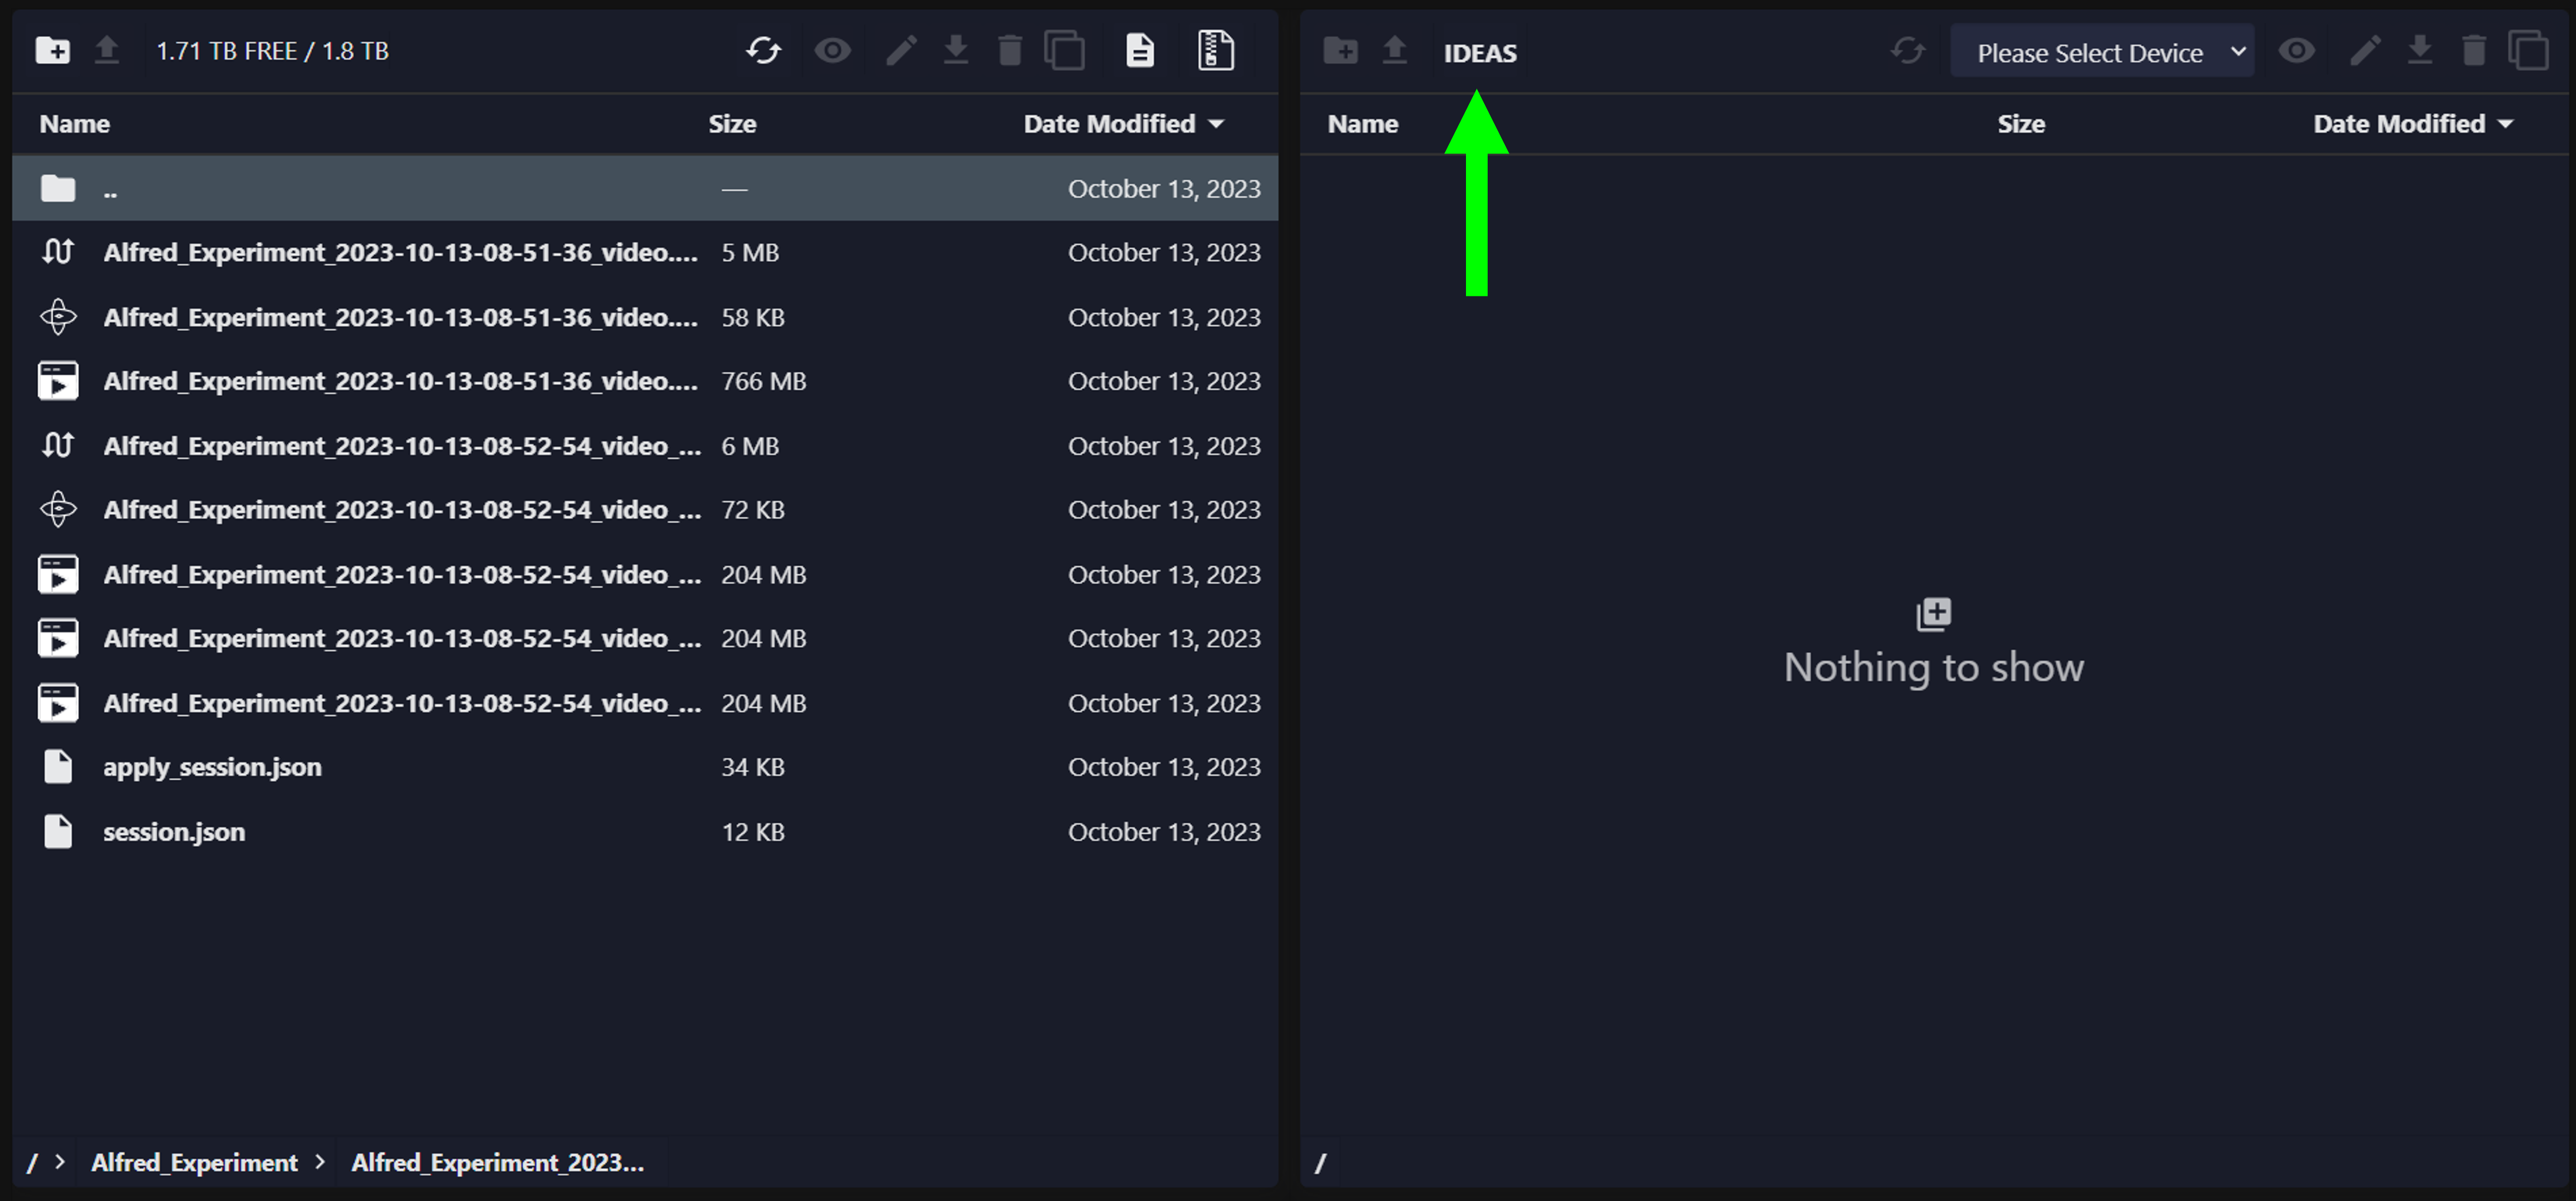
Use the File Manager left panel to navigate to the files on the miniscope system you want to upload to IDEAS.
-
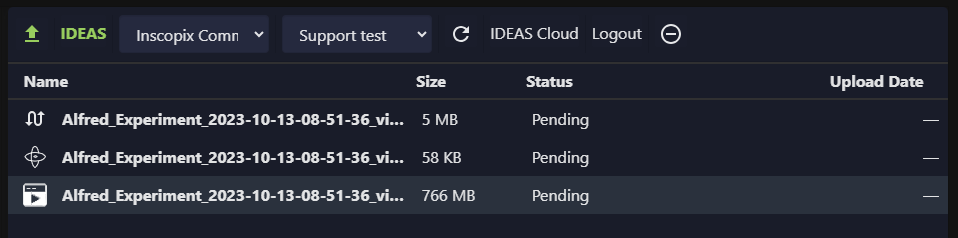
Add files to the IDEAS panel using one of the methods listed below. Files will appear in the right panel as they are added to the queue. Files not yet uploaded to IDEAS will show a status of Pending (as shown in image below).
- Drag and drop files one at a time from the left panel to the right panel.
- Select files from the left panel and click the
 Copy File(s) icon.
-
Click the
 Upload icon to initiate the upload to IDEAS.
All files with a status of Pending will be uploaded.
If there's a file you don't want to upload, select the file in the right panel and click the
Upload icon to initiate the upload to IDEAS.
All files with a status of Pending will be uploaded.
If there's a file you don't want to upload, select the file in the right panel and click the  Remove icon to remove it from the queue. A notification window will appear with the upload progress.
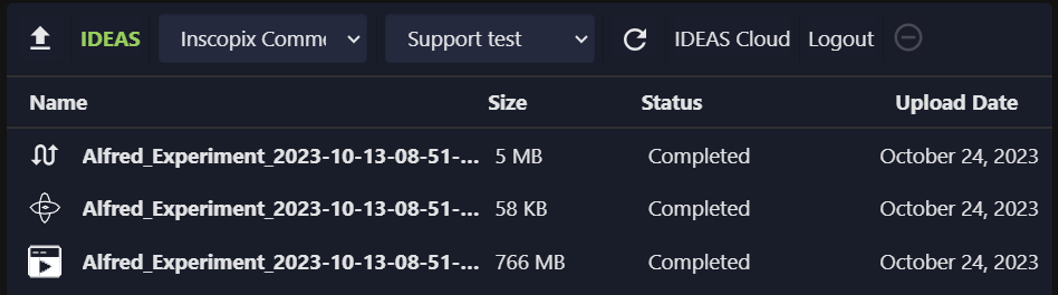
After files have successfully uploaded, the status will update to Completed and you should see your files in IDEAS.
Remove icon to remove it from the queue. A notification window will appear with the upload progress.
After files have successfully uploaded, the status will update to Completed and you should see your files in IDEAS.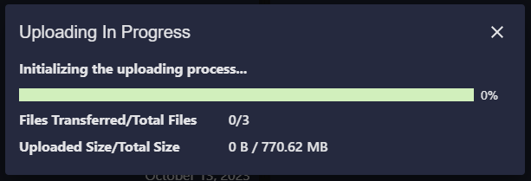
Notes
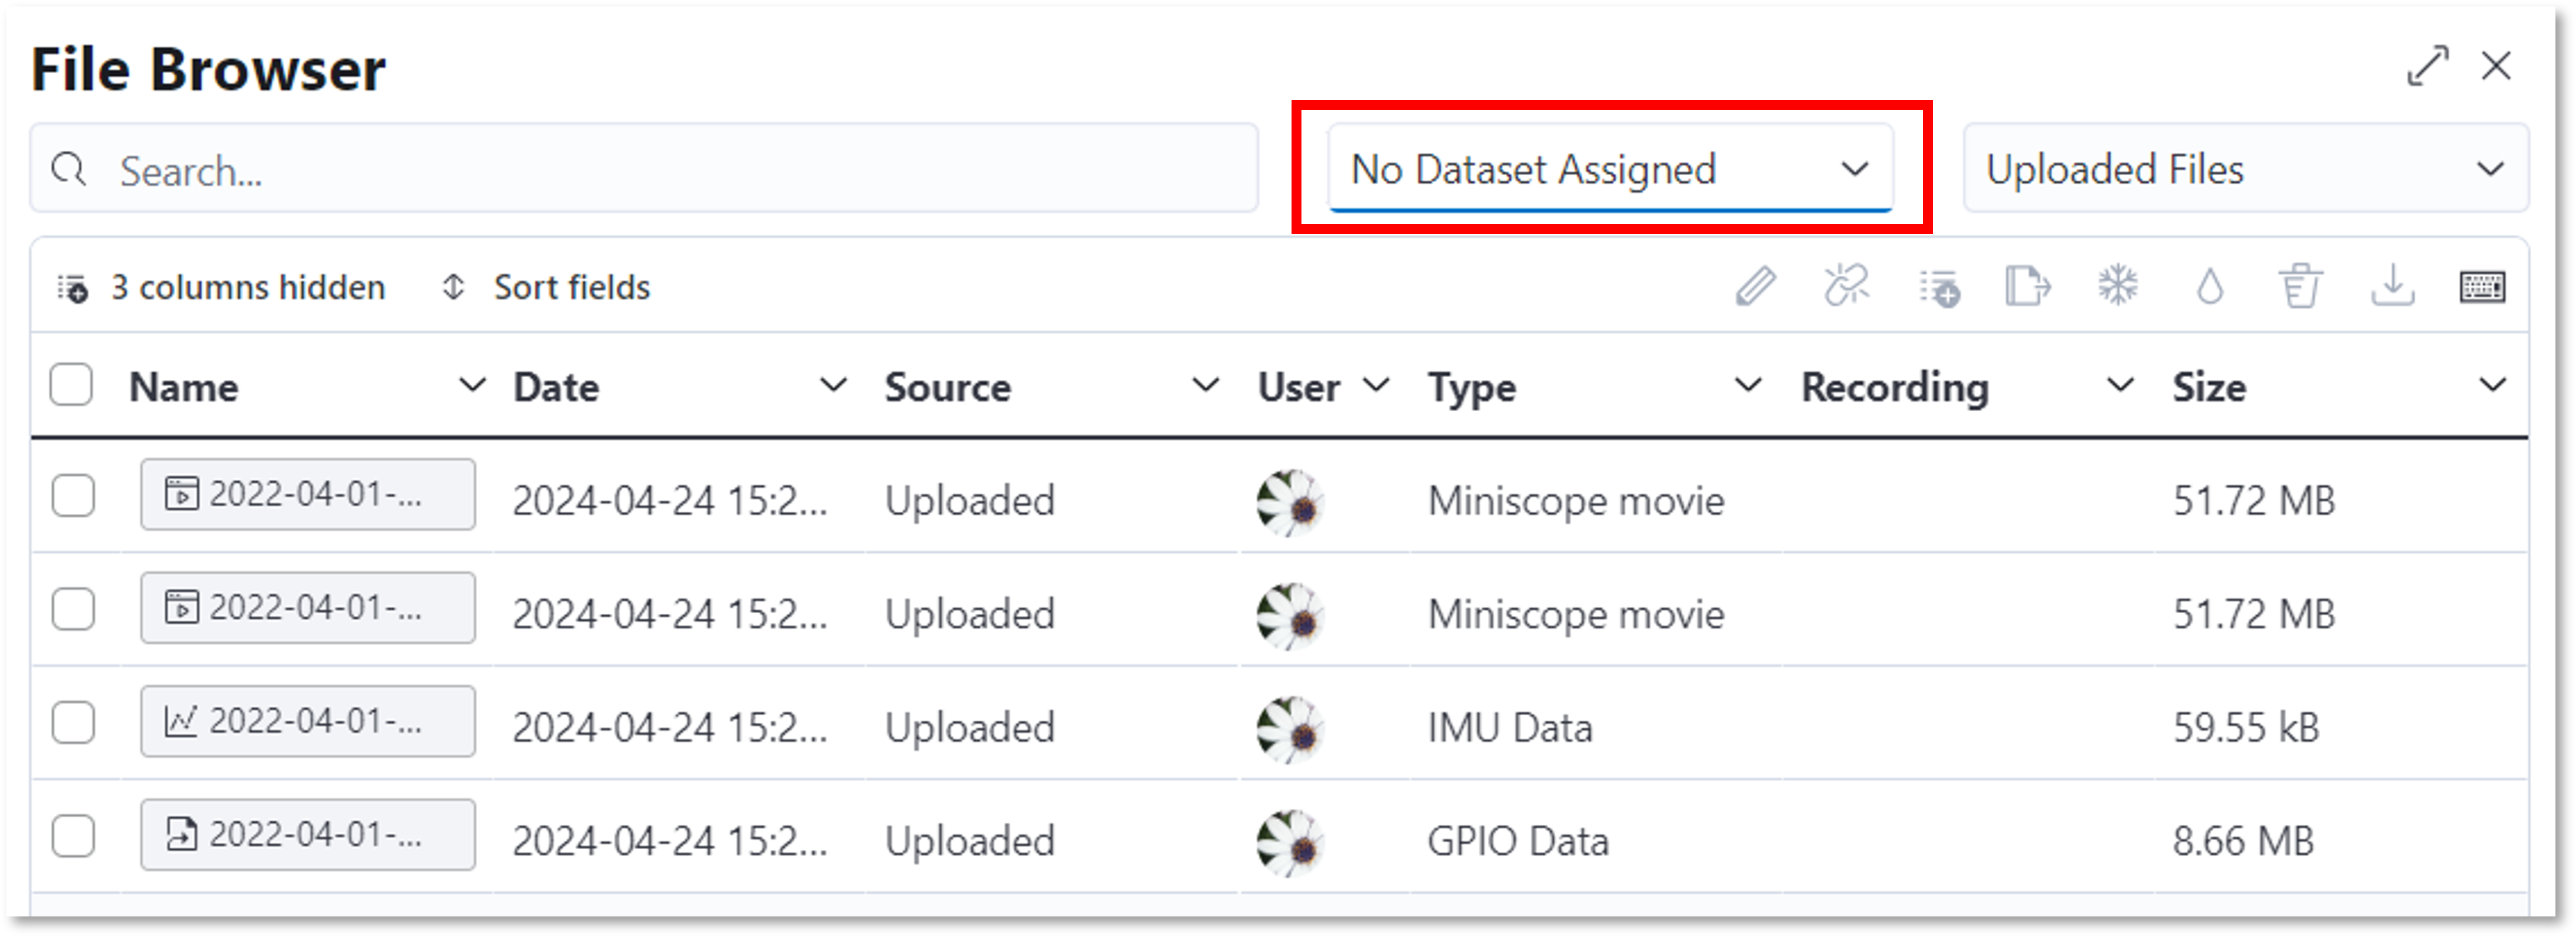
- Files uploaded to IDEAS via IDAS will NOT be assigned to a table. To see your files in IDEAS, open the Files tab on the Project home page or navigate to a table and open the File Browser. You may then proceed to organize your files.
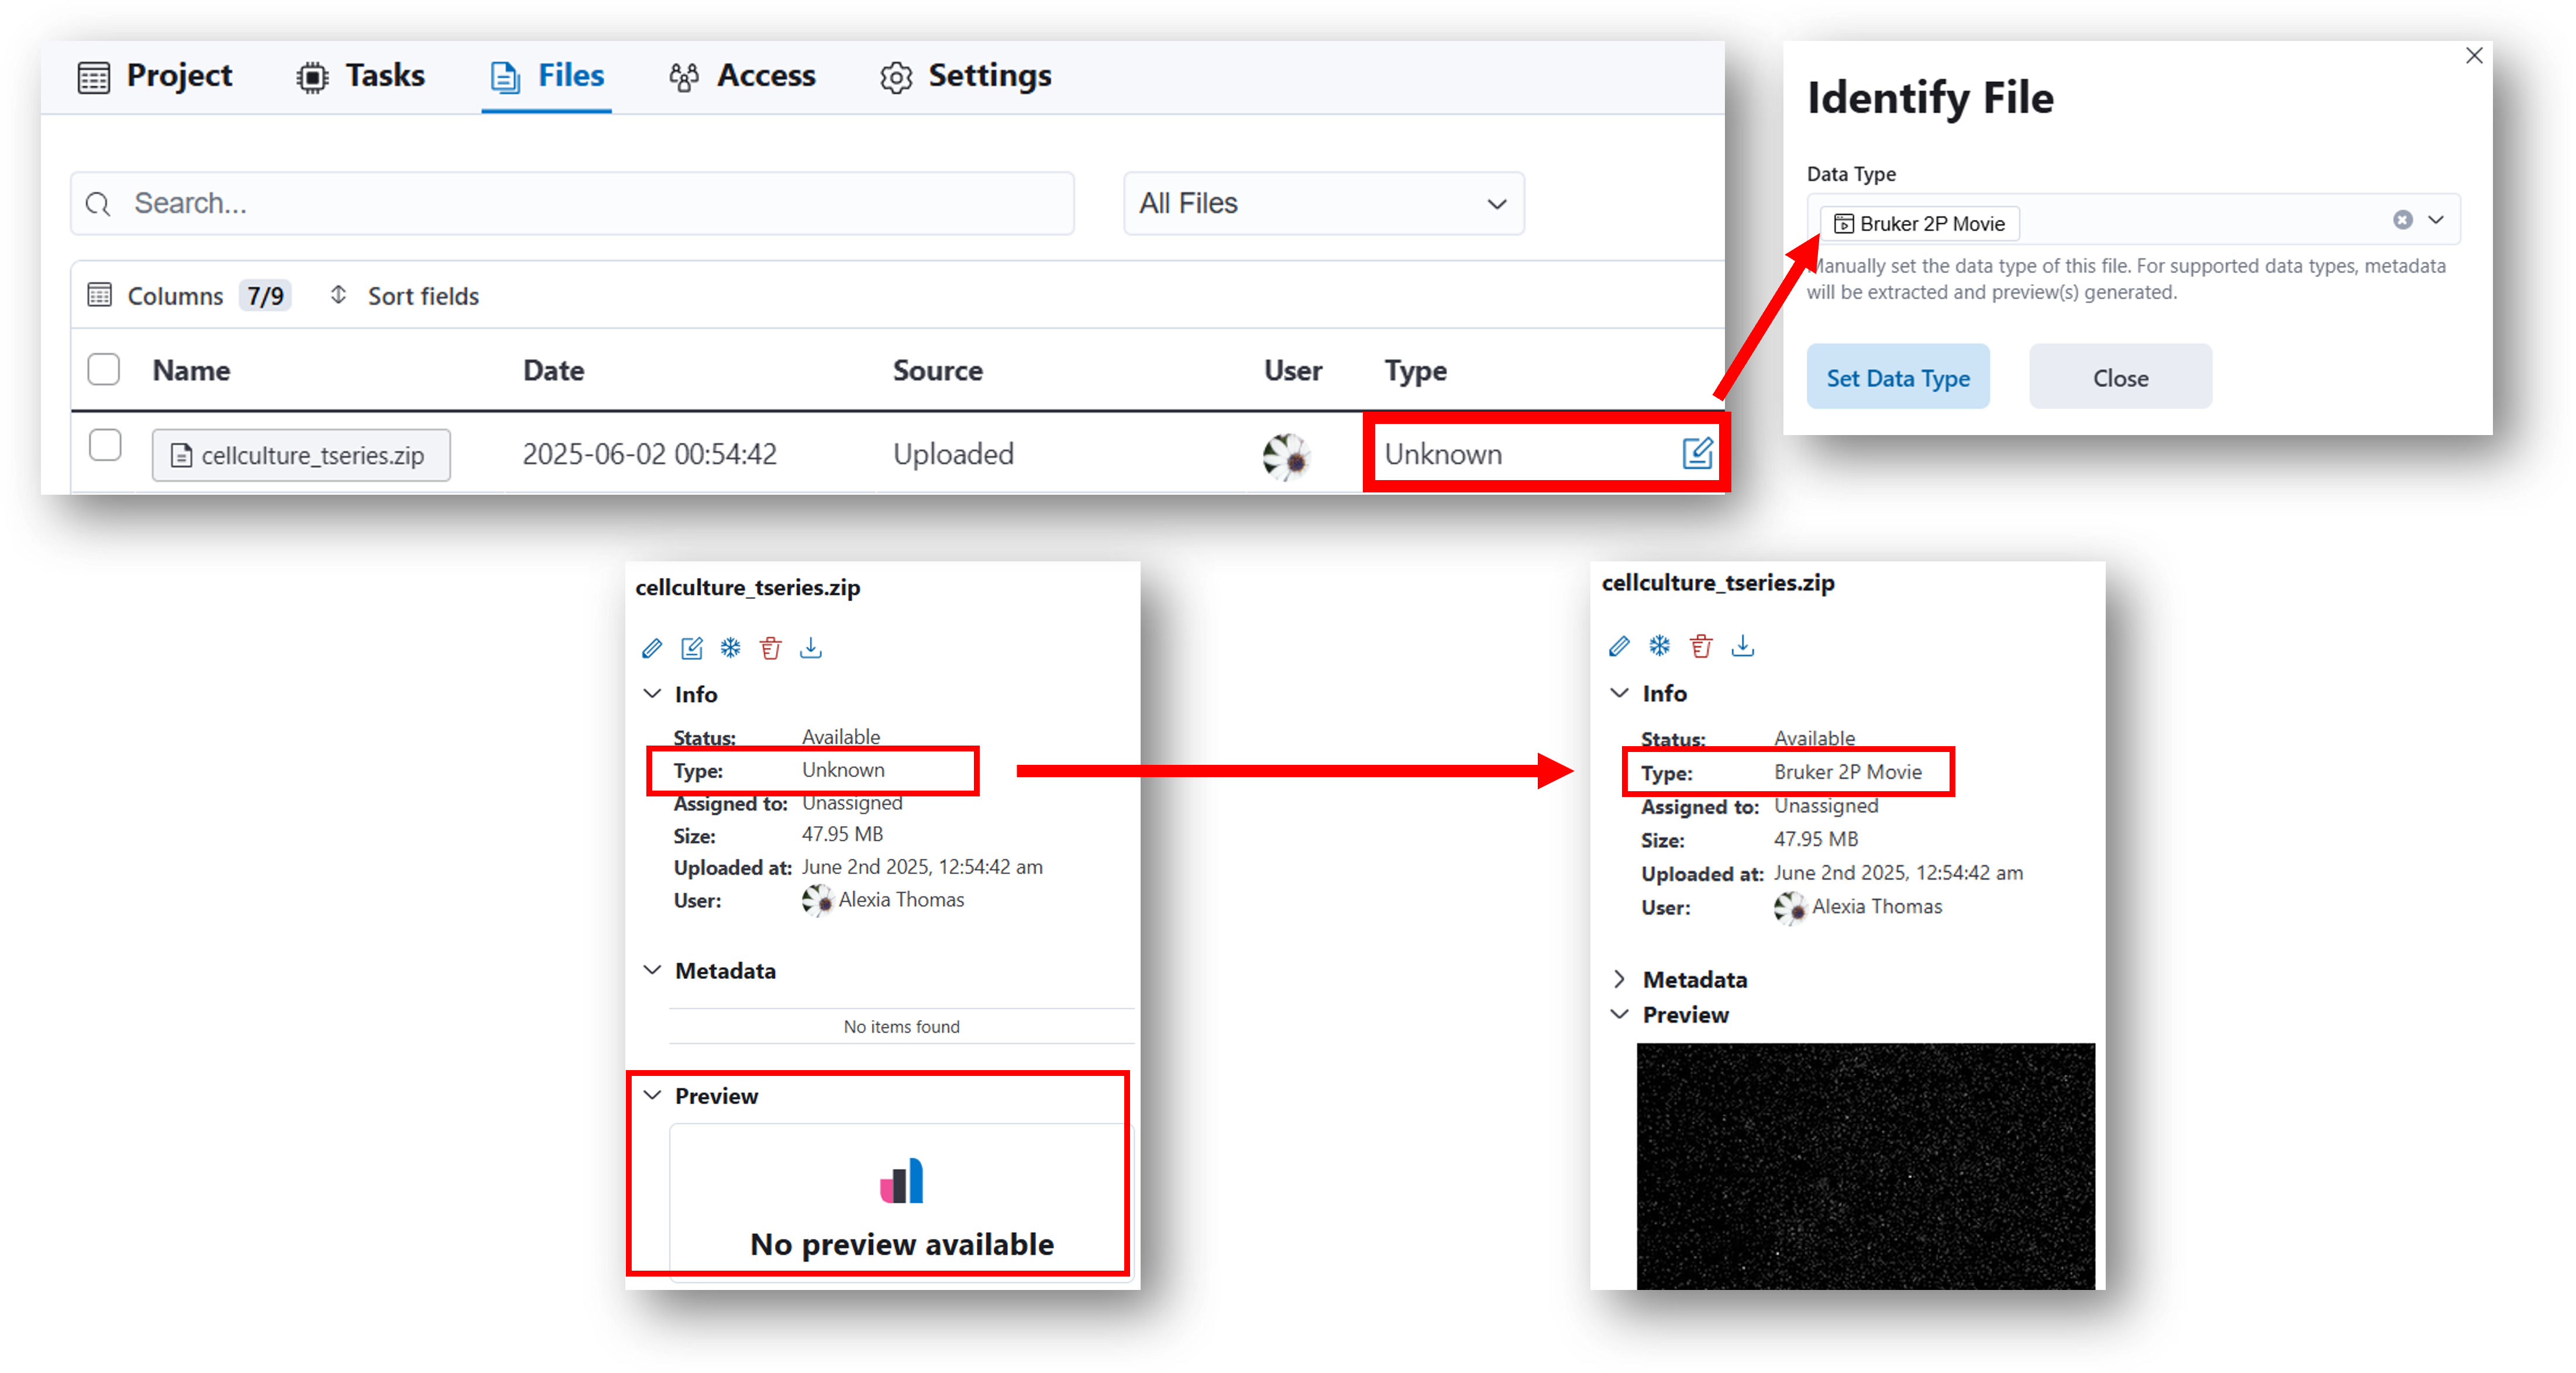
- IDEAS may not automatically identify the file type for an uploaded data. For example, files with the same extension (e.g., .zip or .csv) could be one of several file types.
You will need to manually specify the file type by clicking the
 Change file type icon in the File Browser and selecting a file type from the menu as illustrated below.
Selecting a supported file type will trigger preview generation and metadata extraction (the image below shows the same file before selecting a file type where no metadata
or preview are available, and after selecting a file type where metadata and a preview are available).
Change file type icon in the File Browser and selecting a file type from the menu as illustrated below.
Selecting a supported file type will trigger preview generation and metadata extraction (the image below shows the same file before selecting a file type where no metadata
or preview are available, and after selecting a file type where metadata and a preview are available).
Check upload progress
You can see the progress for files that are uploading in a few ways:
-
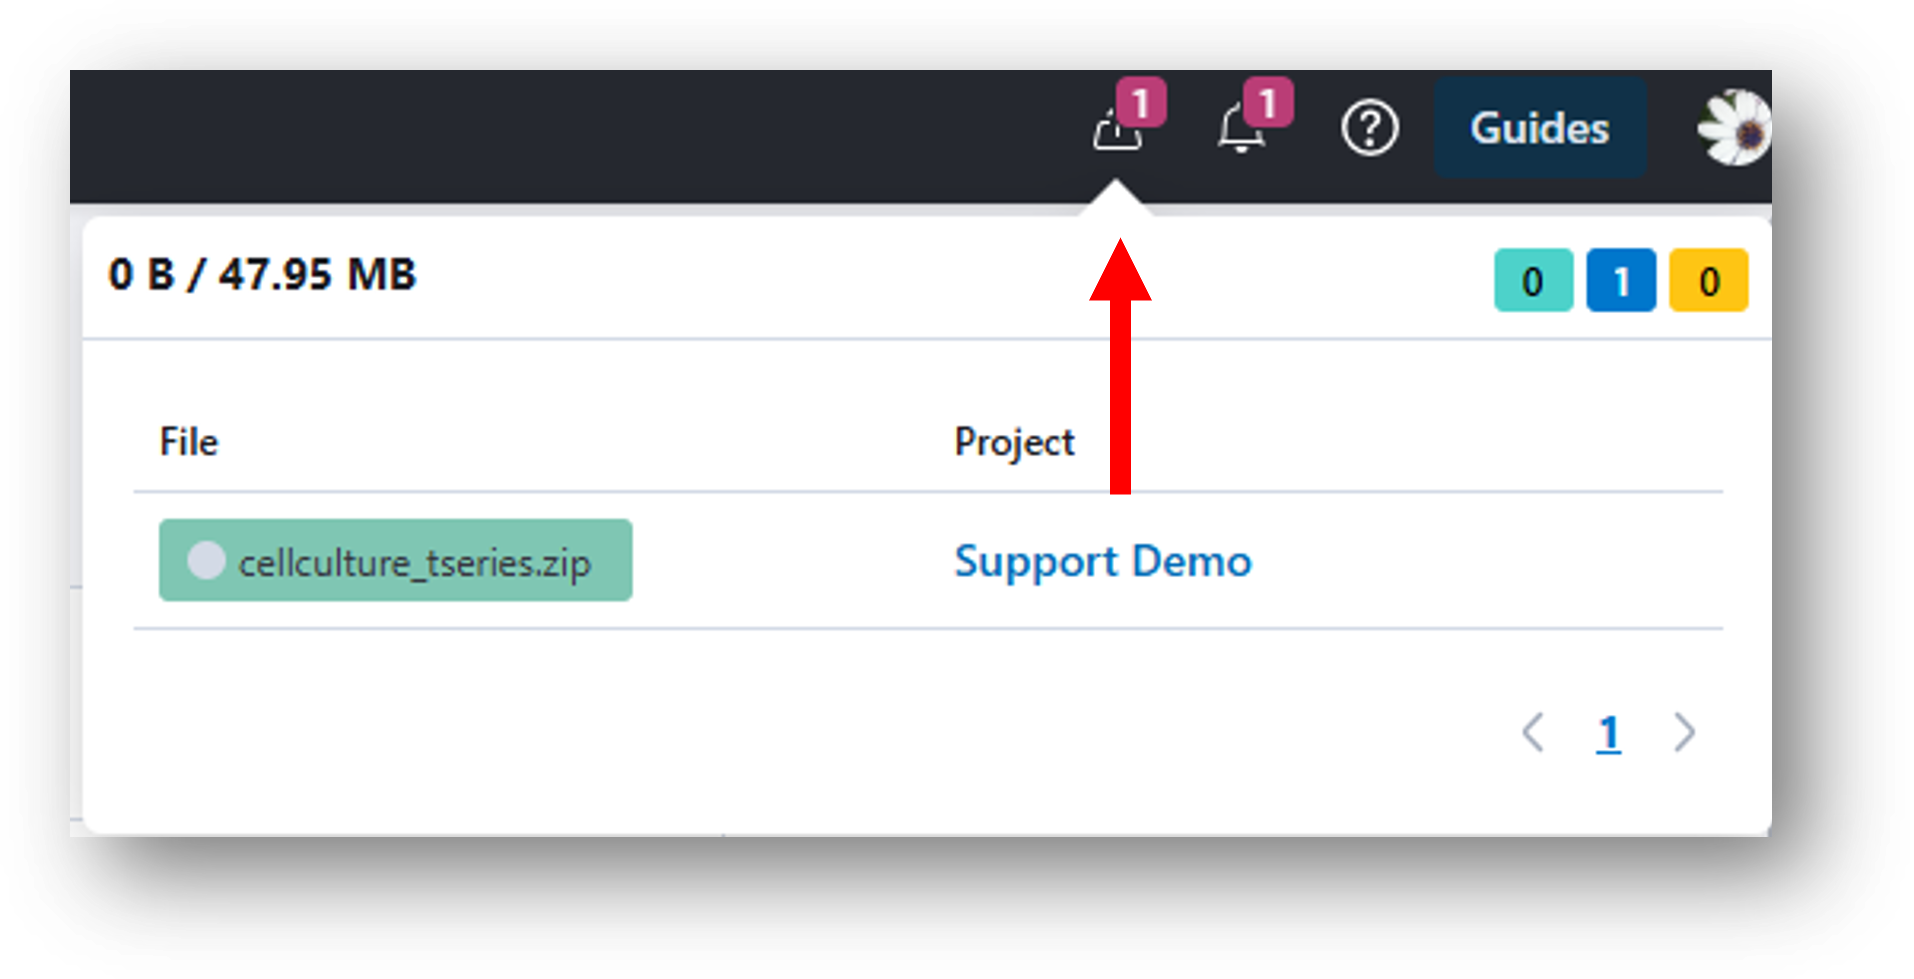
Click to open the upload notification window (top right corner). Here you will see one of three statuses for uploads: files uploaded, files uploading, and failed uploads. This is a global notification which you will be able to see even when navigating away from the current project.
-
All data uploaded to IDEAS will appear in the File Browser. Statuses for uploads will be similarly color coded as above.
- If you uploaded data directly to a recording within the data table, you will similarly see the status for the upload.
Notes
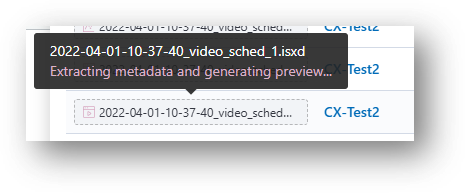
- After files are uploaded, it may take time for IDEAS to extract the metadata and generate a preview as noted in the following message that may appear when hovering over such files.
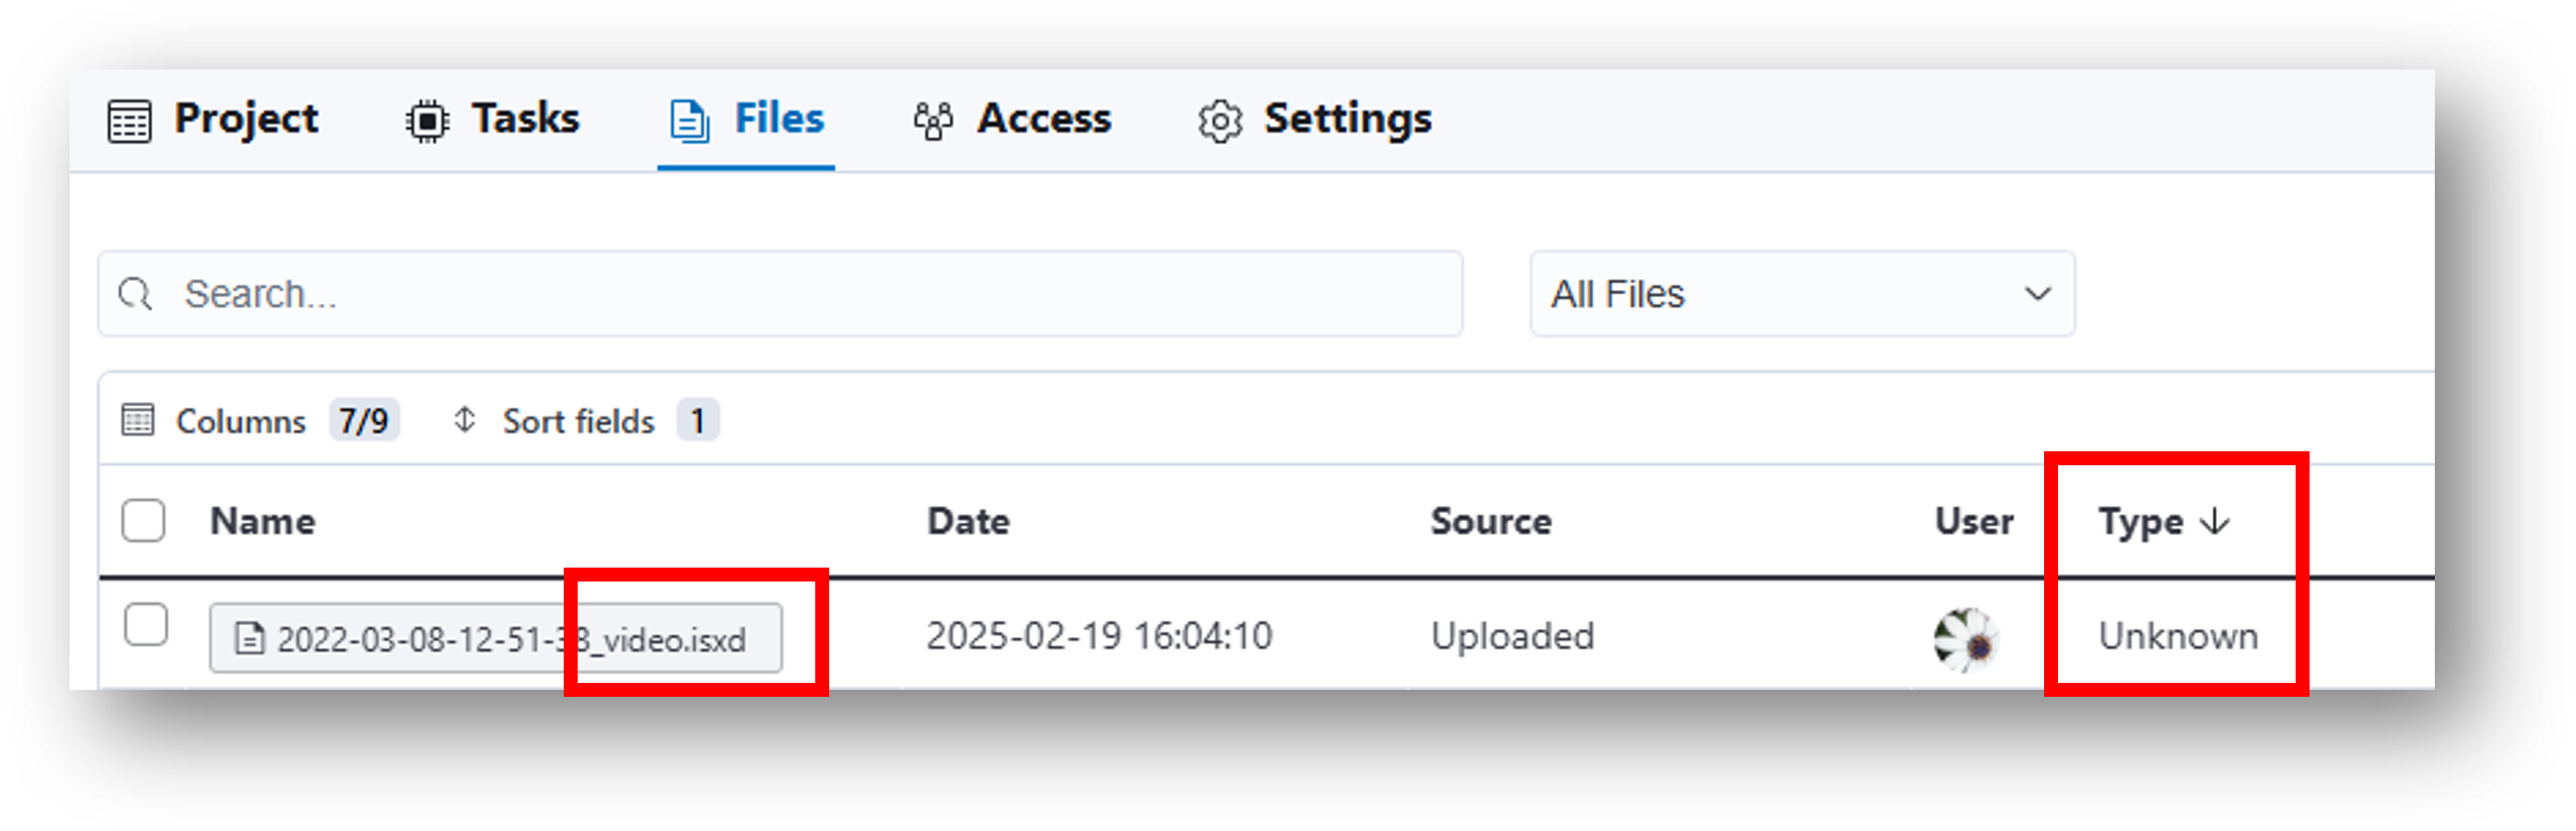
- If you upload an Inscopix movie (isxd) that IDEAS does not recognize (e.g., the Type is marked Unknown), one possibility is that the movie is corrupt. You may consider checking if the Recover Corrupt ISXD Movie analysis tool can recover your movie.
Supported files
Any file can be uploaded and stored on the platform. The following file extensions are supported for data processing.
| Type | File Extensions |
|---|---|
| Inscopix | .isxd*, .isxc, .isxb, .gpio, .imu |
| Movie | .mp4, .avi |
| Image | .png, .tiff |
| Tabular data | .csv, .tsv |
| Experiment annotations | .parquet |
| Timestamp events | .h5 |
| Neurodata Without Borders (NWB) | .nwb |
| Any | .zip |
*Supported .isxd files include: movies, cell sets, neural events, and vessel diameters.
Other file types
Other file types can be uploaded for storage and organization purposes, but IDEAS will not support previewing of these files.