Data tables
After generating a project, create a data table to get started. A data table is like a spreadsheet where each row contains a
collection of related data. The table columns can be customized as you desire to hold information such as:
- test subject info (e.g., subject ID, genotype, DOB, sex)
- experimental conditions (e.g., drug dose, behavioral paradigm)
- data collected (e.g., miniscope movie (.isxd), behavioral movie, experiment metadata)
- test results (e.g., processed movies, cell sets, QC report, experimental annotations)
The flexibility of storing various types of data within a table enables the consolidation of data for easy reference.
Refer to the following topics for more information about data tables:
Create a data table
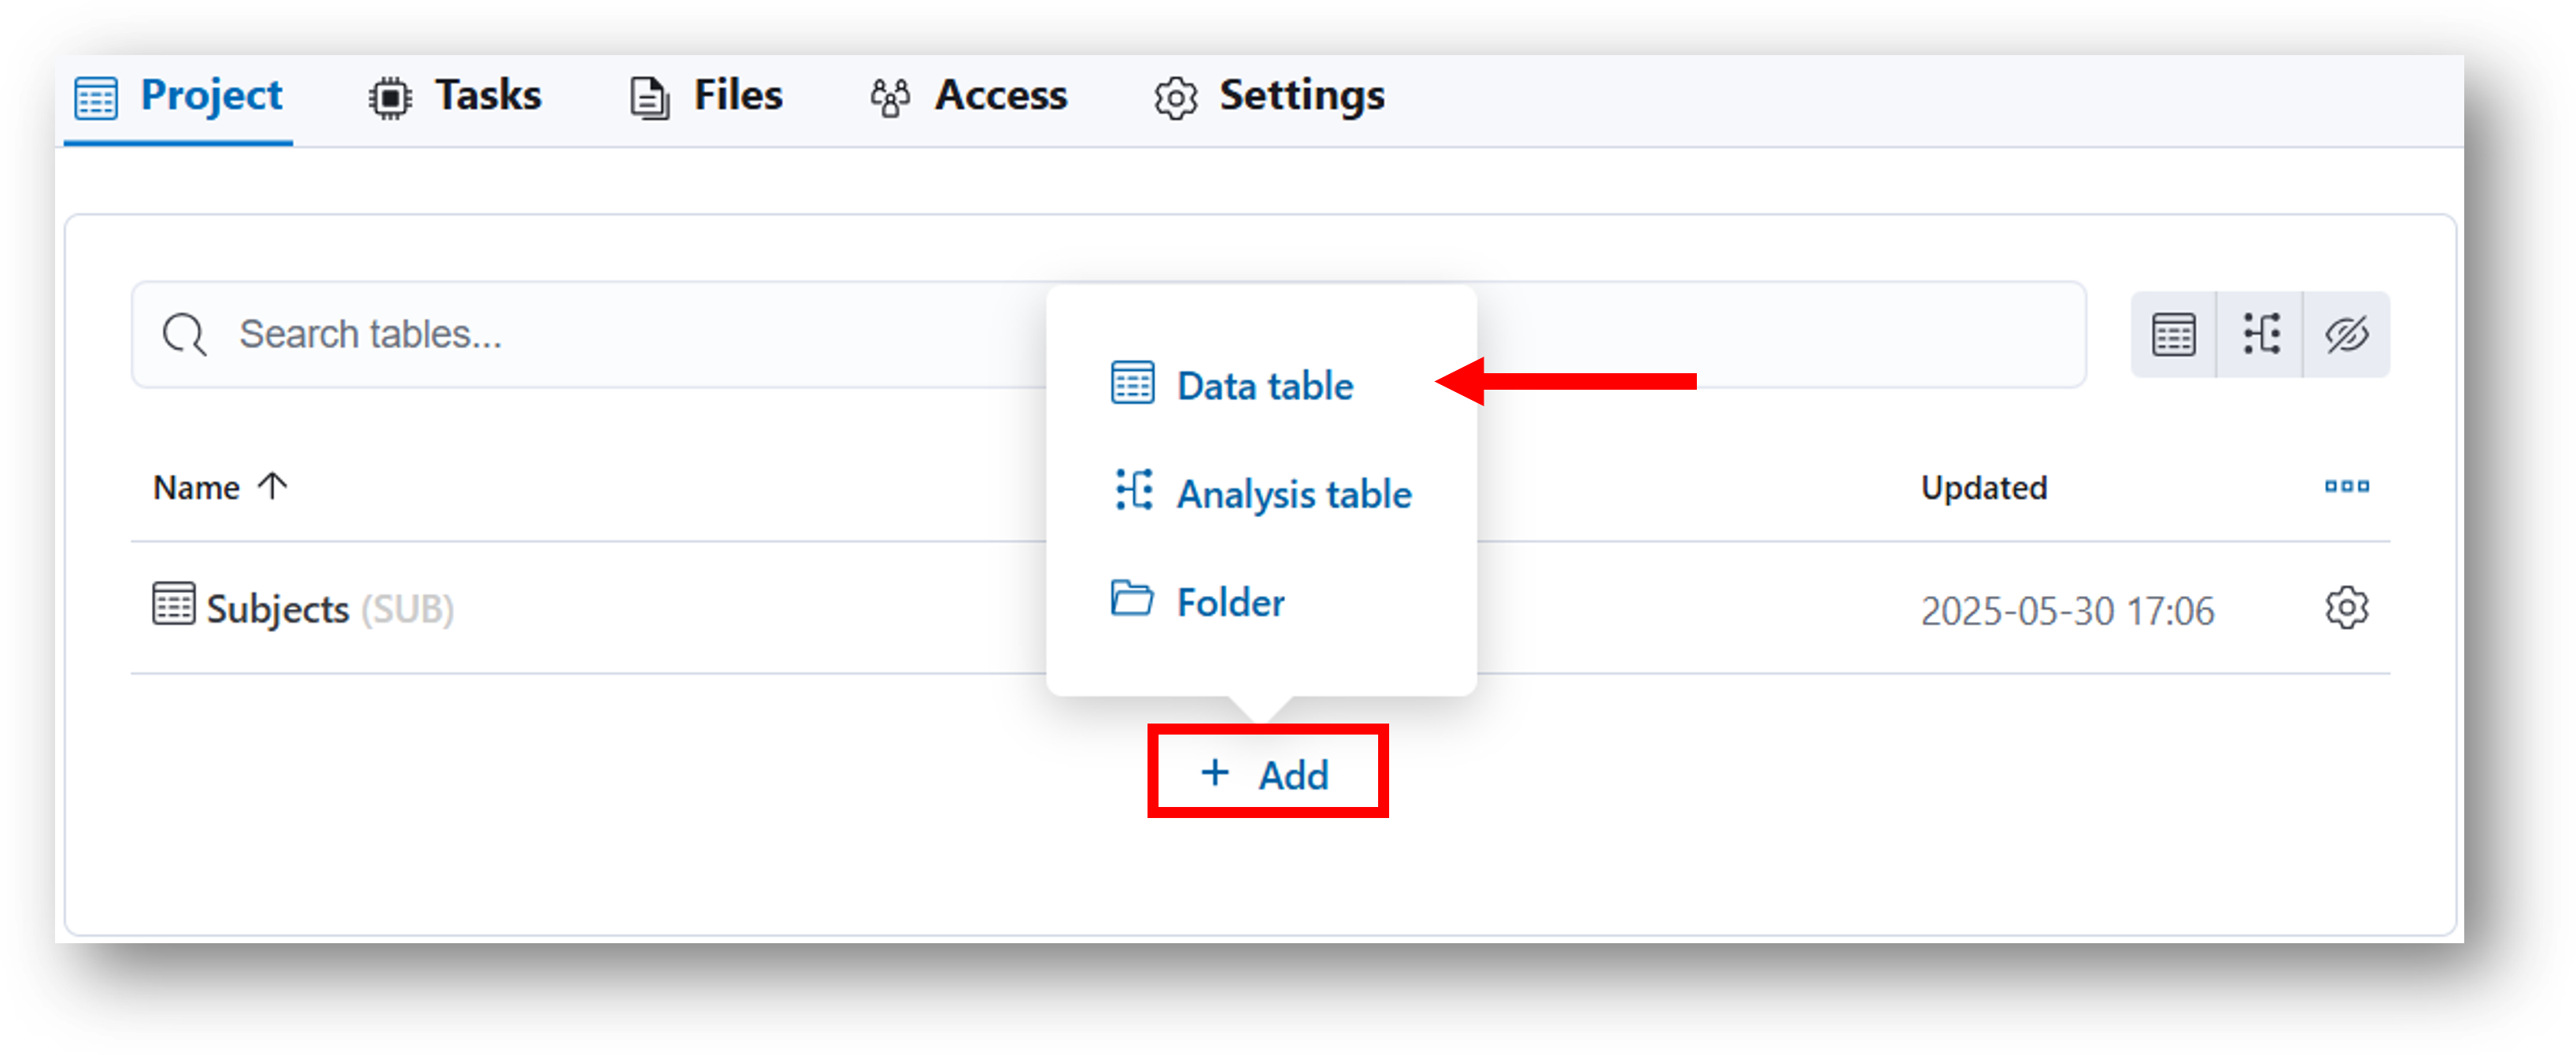
From the Project tab for a project, click the + Add button and then select Data table.
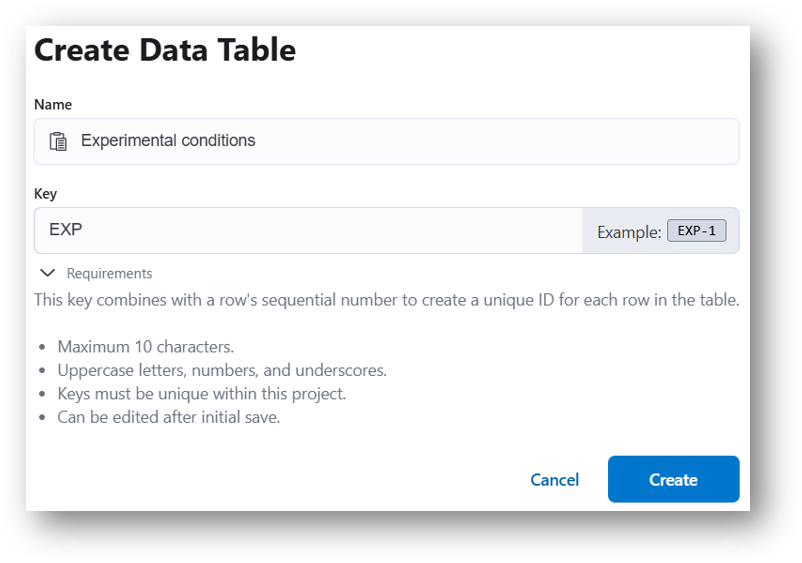
You will be prompted to enter a name and key that will be used to create a unique identifier for each row of the table.
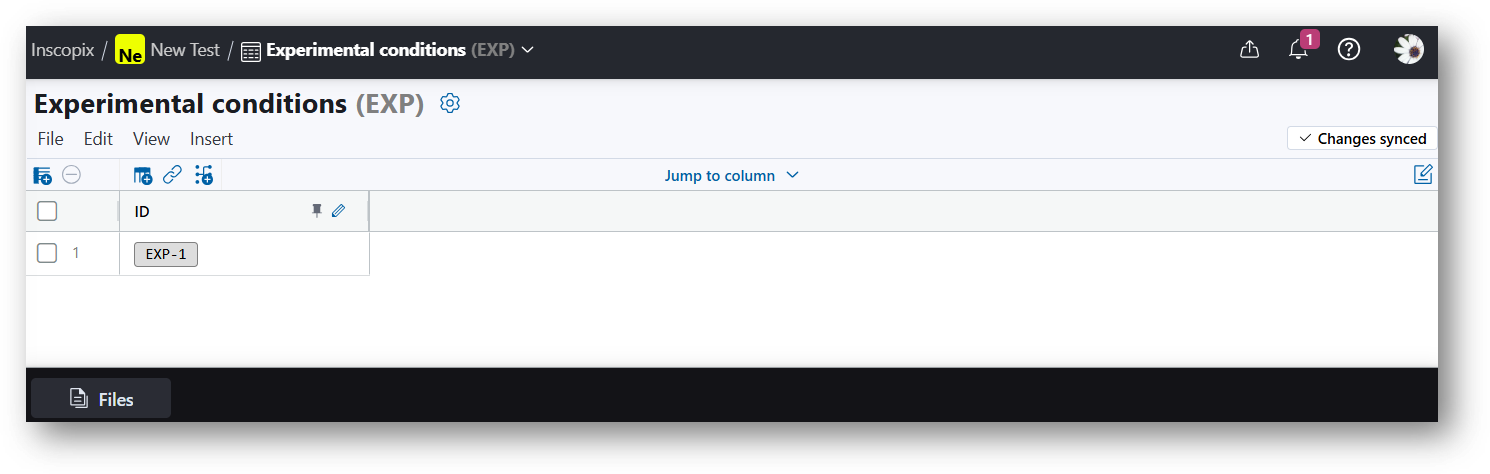
After clicking Create, you will automatically navigate to the data table. Initially the table will have one row populated with the row ID.
Navigating a data table
Navigation bars
Use the navigation bar at the top to return to the project home page or the organization home page.

The navigation bar at the bottom provides a quick access button to open the file browser.

Menu bar
-
File
Edit the table name or key, delete the table, download the table as a CSV file (only names of data will be exported), or export data to DANDI
-
Edit
Delete selected rows and edit row identifiers.
-
View
Quick links to the file browser and notes for the data table
-
Insert
Insert data table rows, columns, new analysis or link or join columns from another table.
Action bar

 Insert row
 Delete selected row
 Insert column (see below for additional details)
 Insert columns from another table (see
Linking and Joining Tables)
Insert columns from another table (see
Linking and Joining Tables)

![]() Open panel to add markdown notes specific to the table.
Open panel to add markdown notes specific to the table.
Insert column
Select from a variety of column types including:
- File
Select from a list of data types including miniscope movie, cell set, GPIO data and more - File metadatum
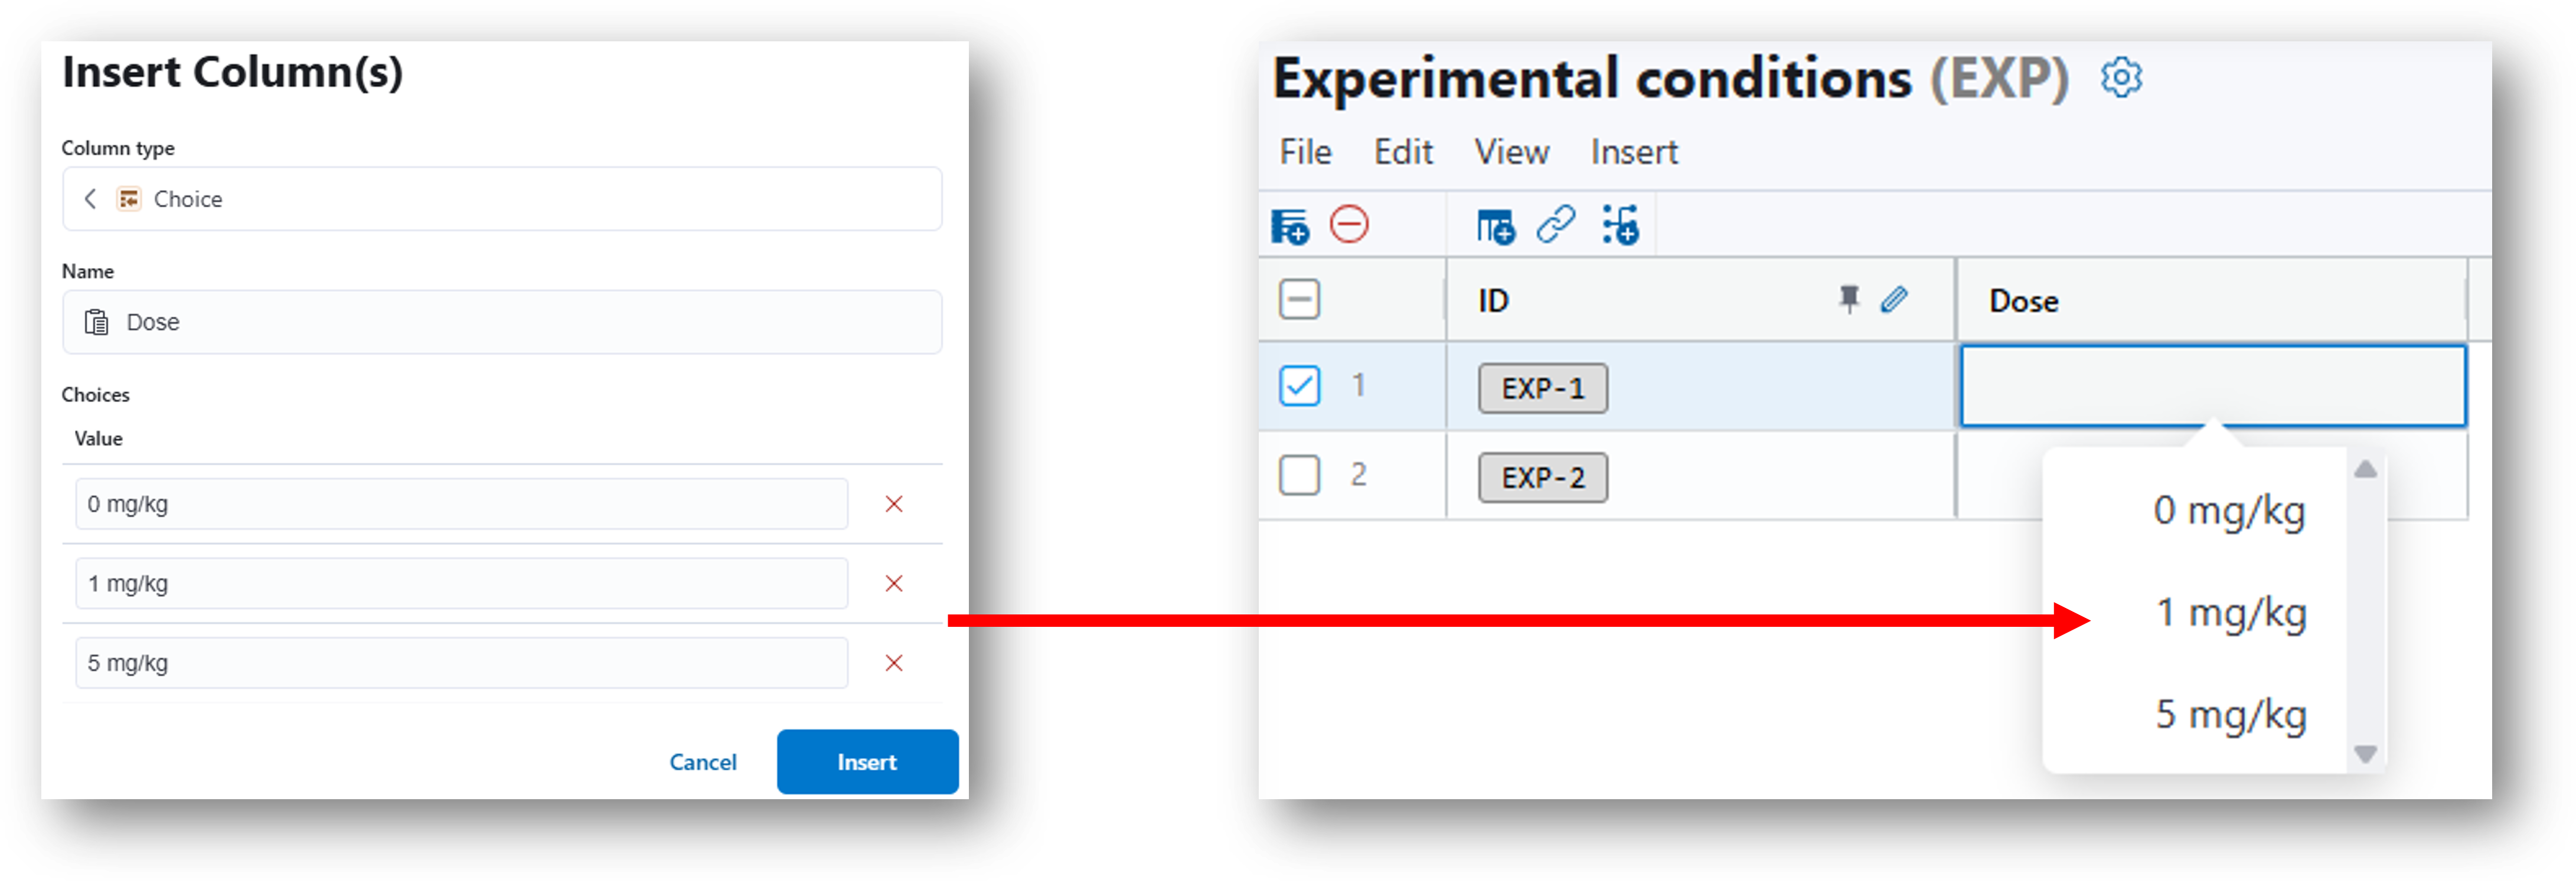
- Choice
Create a pre-defined list of choices to select from. In the example below, the variable is the dose for a drug administered. Three doses have been defined as choices (0, 1, 5 mg/kg). You may optionally select one dose to serve as the default. When filling out the data for this column, simply select from the choices defined. This column option helps prevent user-error when manually entering data.
- Text
- Boolean
- Float
- Integer
- From table
link or join data between tables - From new analysis table
Start creating a new analysis table
Customize your data table
There is a lot of flexibility in how you may customize your data table. Let’s use an example to explore a few ways to configure data tables to organize your data. Say you have an experiment evaluating a disease model with 12 mice and 5 imaging sessions (pre-disease state, post-disease state, 3 drug dose tests). You will have a collection of data to associate with each imaging session (miniscope raw movie, and results following analysis: cell sets and event sets). There are a few different ways this data could be organized into data tables:
-
Create one table with 12 rows (one for each mouse) and 5 columns for each imaging session. Note that the columns would be replicated for each data type added to the table (5 columns for miniscope movies, 5 columns for cell sets, etc.).
-
Create one table with 60 rows (one for each mouse + imaging session permutation). In this table, the number of columns is simplified (no longer have separate columns for each imaging session), but you have more rows. Note that this may get challenging to organize.
-
Create multiple tables - one for each imaging session. Each table would have 12 rows (one for each mouse)
-
Create multiple tables - one for the experimental condition, one for the subject ID/info, and one with the imaging sessions. You may then use the link/join table feature to relate information between tables.
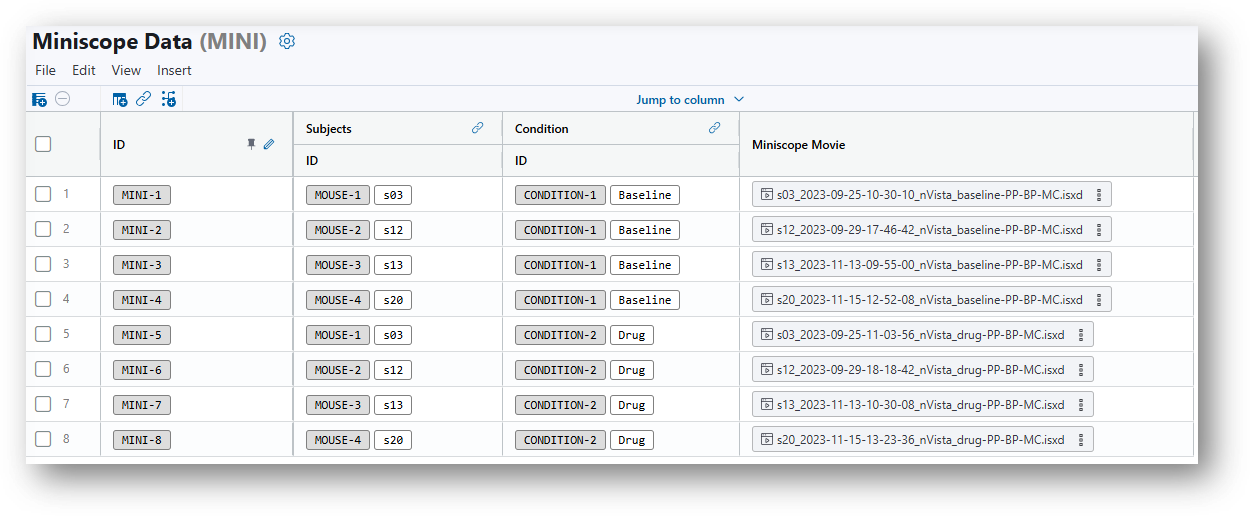
An example data table is shown below. In this example, you'll notice that the Subjects and Condition columns are linked from another table. See Linking and Joining Tables for more details on how to link/join data.